H25 waterline stripe poll

Jun 5, 2010
1,107
Hunter 25 Burlington NJ
Hello, all. Before I jump off the dock and commit to painting this boat's waterline stripe, I wonder if anyone with a first- or second-generation (1974-1979) H25 would care to share some dimensions on the waterline stripe.

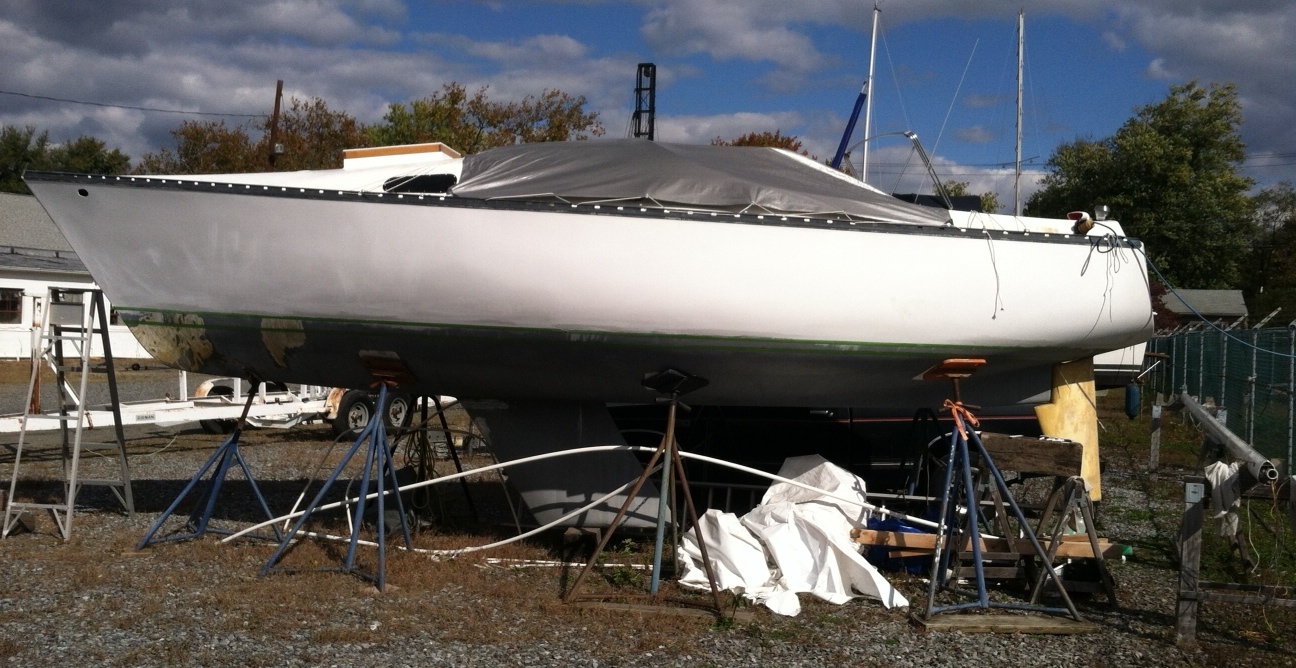
The accompanying pic shows my current tape markings. These came from measurements taken from a sistership parked next to Diana. The sistership was totally stock with little gear aboard and had a near-perfect slime line (actual float line as defined by water marks). I have already cheated this stripe up about 3/4" but dislike how low it appears at the turn of the bilge amidships.

Would anyone like to contribute actual measurements of other boats?

The best data would be as follows:
  • Bow: hook tape over edge of deck, next to stem plate, keep in contact down the stem and report the reading at the forward end of the actual float line.
  • Stern: hook tape over corner of the bottom of the transom and report the reading at the aft end of the float line.
  • Midships: any reading taken from any measurable place (such as at the after chainplate/shroud pin); hook tape over TOP of aluminum toerail, keep vertical and report reading at top of actual float line.
This is just to check my marks. I admit I'm probably being just OCD and over-worried. When I sanded and faired this hull I lost the molded-in line, which was fading anyway. I took the measurements from the sistership beforehand and recorded them in a chart, which I will make available to anyone who asks so long as I can 'prove' the data I have. My very worst fear is to paint a line and find the boat floating ON it-- the boat always looks more buoyant to reveal a bit of bottom paint. I have not modified this boat very much in terms of adding weight; but you never know.

The astute will recall the story I told of my dad's betting on the waterline marks of these boats each time hull #1 of each model was first launched. He never lost.

The more boats reporting in, the more likely I can rely on the marks. Besides, it's a fun way to 'call roll' and see who's out there.

Sorry to be asking this during bottom-painting season and not during haul-out season; but I really did not think of it till recently. Thanks for all the encouragement & help.
2016.1024a waterline stripes.JPG
 
May 25, 2015
176
Macgregor, Hunter Venture 21, H25 Candlewood
Here is what I got:
At the stern, tape hooked on the toe rail as back as possible, tape following the hull curve, to the bottom of the stripe 37" at the bow, tape hooked on the bow cap, following the angle of the bow 48" at the mid ship lifeline stanchion mount, tape hooked on the toe rail, following the curve of the hull 32.5"
Looks close to yours
 
Jun 2, 2004
5,802
Hunter 37-cutter, '79 41 23' 30"N 82 33' 20"W--------Huron, OH
John, I think I can see the line well enough in your picture to lay the tape down. It looks like the right shear and the correct width. I like the looks of a waterline stripe but I have to eliminate mine. With my new motor being so light I am now bow heavy. I think I am going to take the bottom paint to the top of the stripe. I get a lot of slime high on the waterline. Hard to see how that will change this picture.
Ladylove.jpg
 
Jun 5, 2010
1,107
Hunter 25 Burlington NJ
Ed, how high does your boat float at the stern? That stripe looks pretty level at the middle suggesting the stripe is angling down towards the front. I've seen it before.

As for mine, I don't like how high the boat seems to want to float in the middle. There's too much turn to the bilges above the stripe. I already expect this boat to lean to starboard owing to weight placed there-- one reason why I'm putting a smaller water tank that side (and emptying it first!). The tape stripes in the photo are already 'cheated' up about 3/4". I might cheat another 1/2" or so-- exclusive of built-in sheer of course.
 
Jun 5, 2010
1,107
Hunter 25 Burlington NJ
JohnCTV, thanks for the measurements. I moved my stanchion bases to have more, closer together, so I'm afraid I can't take the middle marking you give. No trace of the old bases remains on the deck. I hesitate to use cleats and stanchion bases as reliable markers since, even at the factory, production builders often place them differently. Even the holes on the toerail are not reliable-- for example my port & starboard toerails do not finish up at the same places at the stern and probably have different numbers of holes (which would indicate an asymmetrical hull mold). The chainplates, however, had better be right!

That said, I altered my chainplate positions when I got rid of the bent-sheetmetal thing and replaced it with U-bolts. The sheetmetal plate's end mounting holes (coinciding with mounting holes in the toerail) are now the inside holes for the U-bolts, meaning that each lower-shroud attachment point is now half the U-bolt's width farther away. It's not enough for the stock shroud lengths to run out of threads so I'm not concerned; and the reverse (making the shrouds closer together) is a less-desirable option.

Also, I seem to have placed a stanchion base between the shrouds. In all my experience this is a no-no, mainly because of the weird loads it places on that section of deck (and also for aesthetics); but it's where the 62" base-to-base dimension landed them and the worst case is that the upper shrouds will rub on the lifelines. Since both are bare 1x19 rigging wire, at worst there will be a little contact which can be set off with chafe-guard material.