So I have been planning (and replanning, and replanning and asking advice of others) an upgrade to the electrical system. The upgrade was sparked by Blue Sea discontinuing the fuse that was in line between my battery charger and my batteries. Since I was going to be messing around with this system, I decided to make upgrades to add capacity to my system and monitoring to allow me to manage the electrical system better. In regards to increasing the capacity, it had been bothering me that I had these two giant 4D batteries but was actually limited to the power of one, while the other would be just sitting there in reserve. This seemed to be a bit of a waste to me.
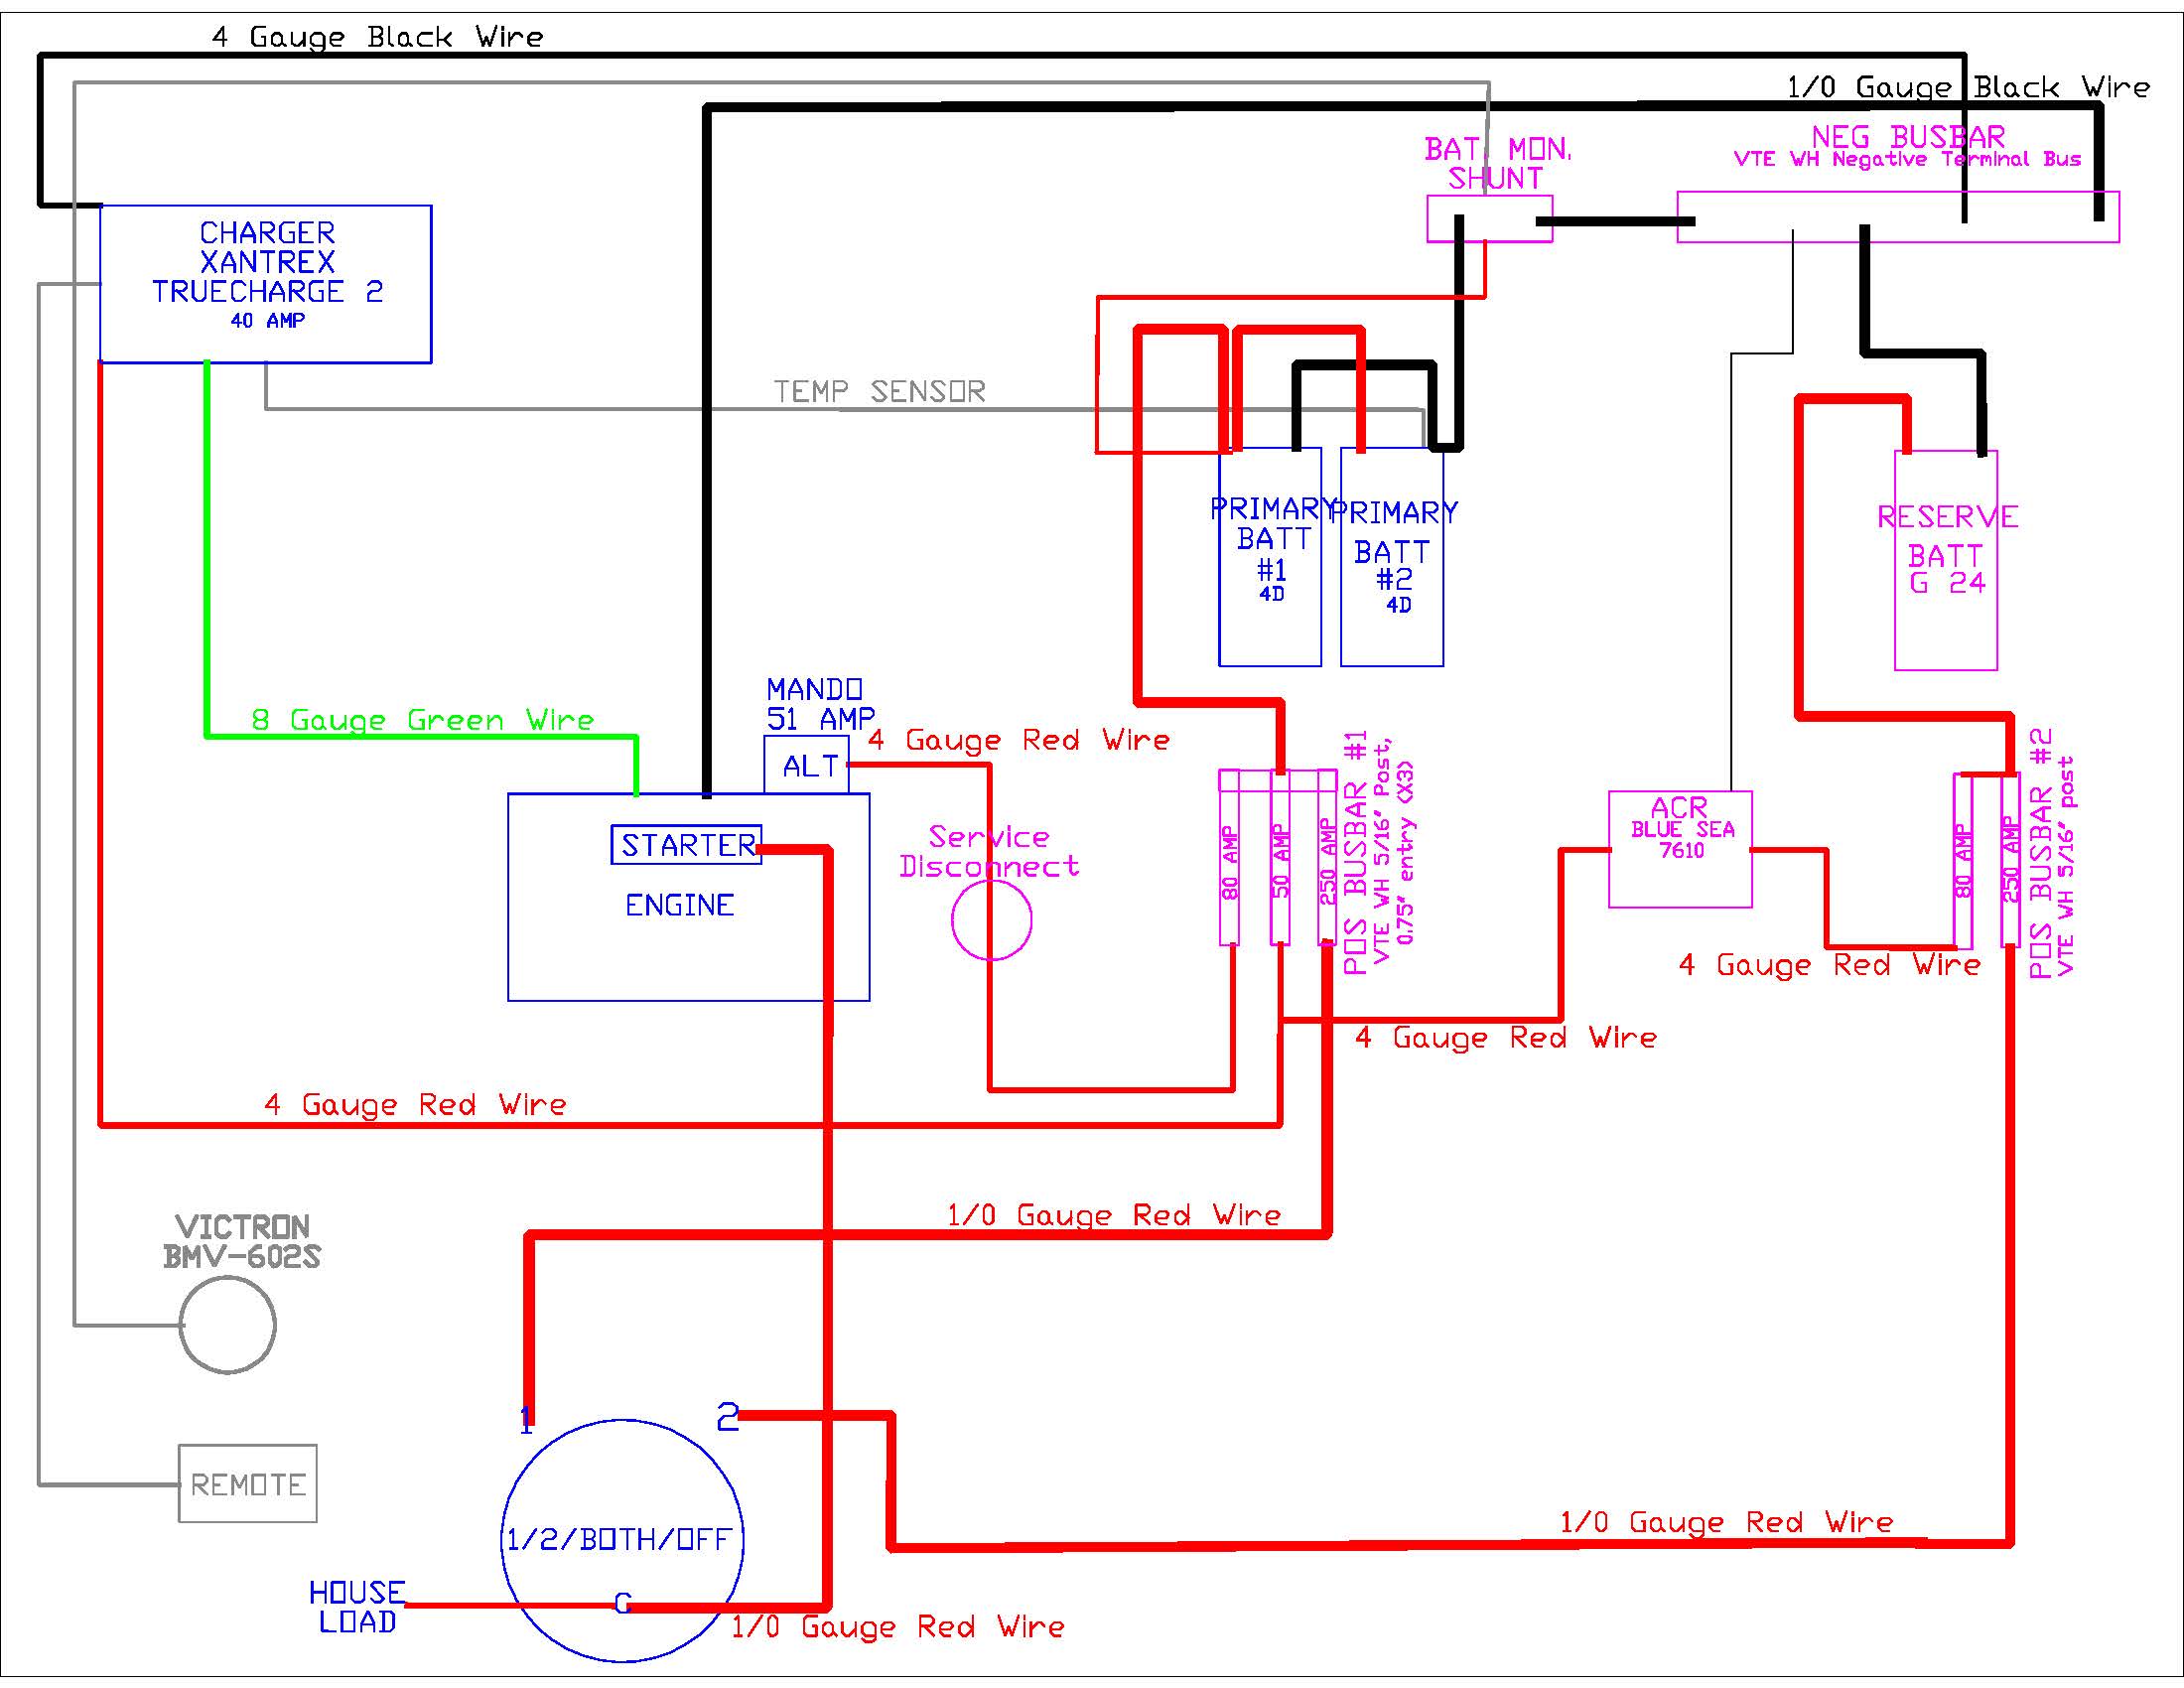
So, with a huge amount of help from MaineSail (aka Compass Marine) I finally settled on the wiring diagram below.

This weekend my brother-in-law, Jason, and my friend, Tom from Sunshine, spent the weekend with me running wires, designing the law out of the new system, fixing the install of the battery charger I did in 2011 and cutting and replacing more zipties than one could imagine.
Jason is the smallest of the group. So he got the unpleasant job of being the troll int he back cave, between the water heater and the holding tank. After a couple of hours of work, he had remounted the charger, disconnected and removed for reuse the 4 gauge red wire that had been for battery #2, added a case ground I had neglected to install in 2011, ran the cable for the remote panel and the batter temperature sensor into the main cabin and reconnected the whole area with zip ties. Here is final look of the charger (forgot to take a before picture).

While Jason was stuck in the cave, Tom was installing the charger remove, battery monitor control unit and a 12 volt double USB charger at the navigation station. Here is what he started with at the nav. station.

Tom is a phenomenal craftsman and laid out the area perfectly. Here is what the area looked like after the installation.

Meanwhile, I was working with the batteries. I disconnected the batteries, remove the existing fuse blocks and lifted the heavy ass 4Ds out of the battery box. Here is what the battery box looked like when we started.

After remove the batteries, I figured out that someone, either the previous owner or the deal who commissioned the boat, had added a battery box. However, when they did this, they put several holes in the box in an attempted to screw it down. Here is a shot of the empty battery box.

So I patch the wholes and rescrewed down the box, bedding the screws to keep the box water tight.
Next, the three of us pondered how to set up a sheet of starboard to serve as the mounting surface for the components of the new system. Did I mention Tom is really good a building things? Well he was able to convert a piece of 3/16-inch by one-inch aluminum bar into a professional looking bracket to hold the starboard at a perfect angle between the battery box and settee. Here are a couple of photos.


That was a great place to end Saturday.
On Sunday, the three of us spent most of the day just trying to figure out how to layout the board to optimize the space on the starboard. In the end, I was happy with the layout, it took up a little more space than I had initially thought it would and there is no space for a solar controller that I plan to add later. Here are a couple of shots.


Obviously I still have to do all of the terminals. I am borrowing a professional grade crimper for that project but I forgot to get it from my friend John before he left for the Bahamas. He runs the parts and service department at a local boat dealer and I will be getting the group 24 reserve battery from him as well. The group 24 reserve battery will be installed in the adjacent settee storage, as suggested by Tom J a fellow C310 owner.
I also will be putting a bus bar near the engine for the grounds instead of stacking up too many connections right to the block. I started to look at that but no real progress yet to show.
I will post an update with the final photos once complete.
Cross posted on my blog.