The Many Stages of Keel (a photo retrospective) Parts 1-3

Jul 13, 2015
900
Catalina 22 #2552 2252 Kennewick, WA
Was dragging through the photos looking for goodness knows what and decided there's no value in having all that data floating around -- share it: In the hope that it's useful, interesting or just a insight into my own version of C22 madness, I leave you the many stages of Keel

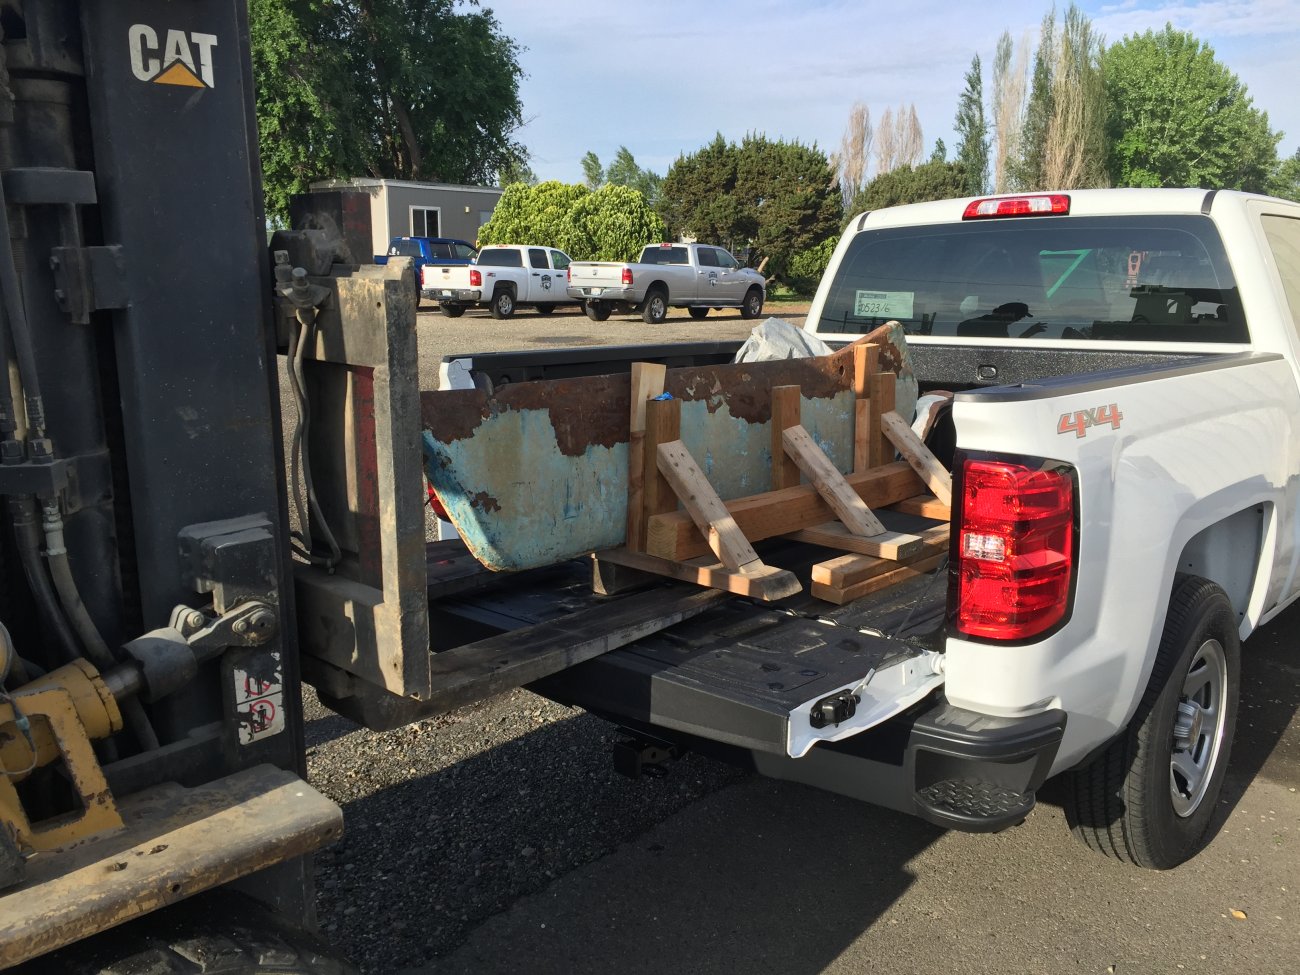
1) Pull it (and then promptly spend countless hours figuring out how to get it in the truck for sandblasting
20160505_145301258_iOS.jpg


2) Sandblast -- expose that wonderfully flawed chunk o' Iron and get her clean

20160505_221243409_iOS.jpg

20160505_221313554_iOS.jpg


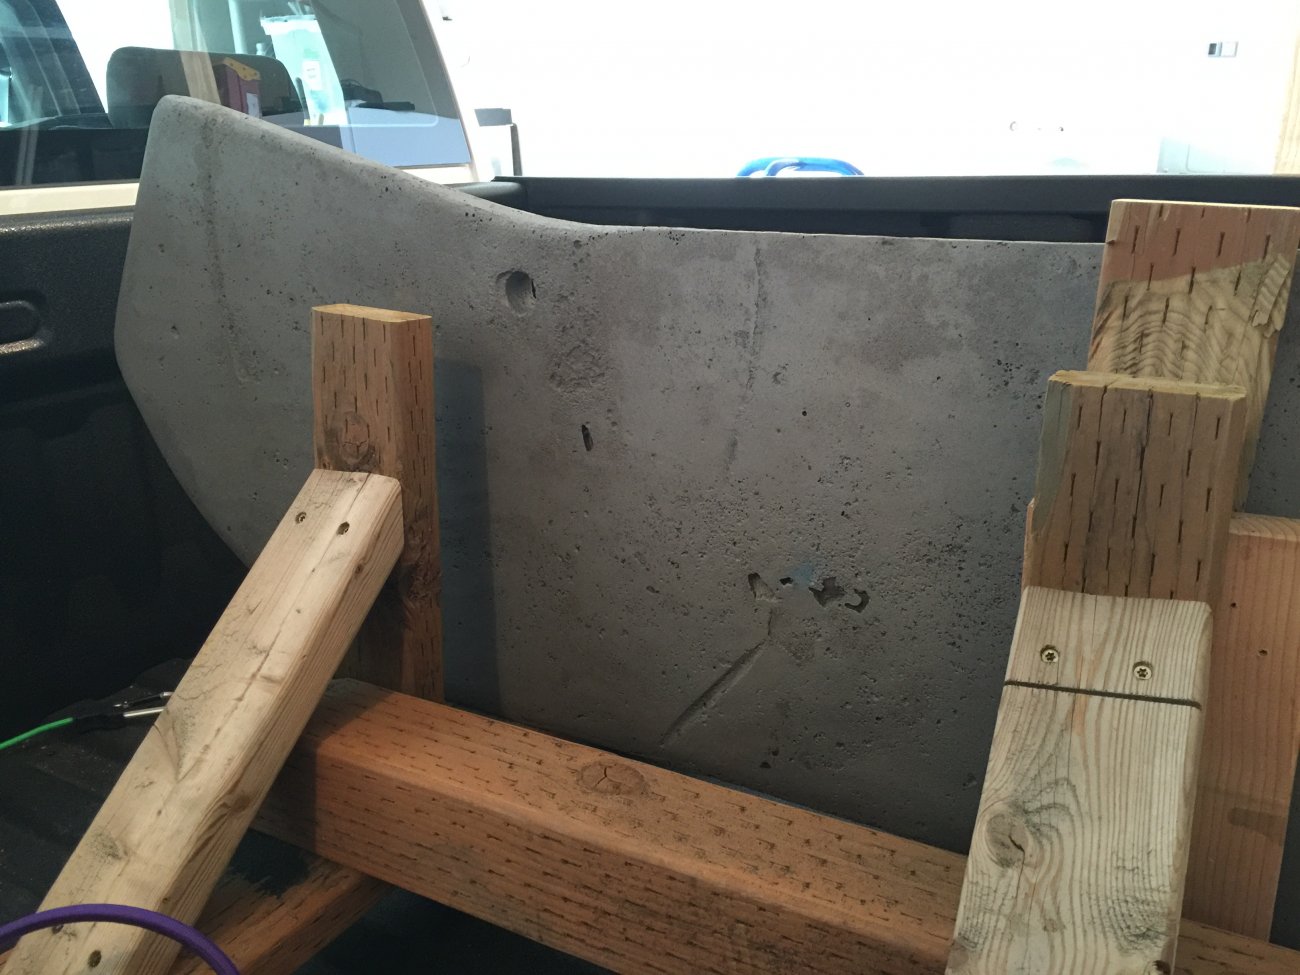
3) Slather with unthickened West Systems Epoxy (two coats) Finally its free from rusting in the open atmosphere, but far from bulletproof.


20160505_232215403_iOS (1).jpg


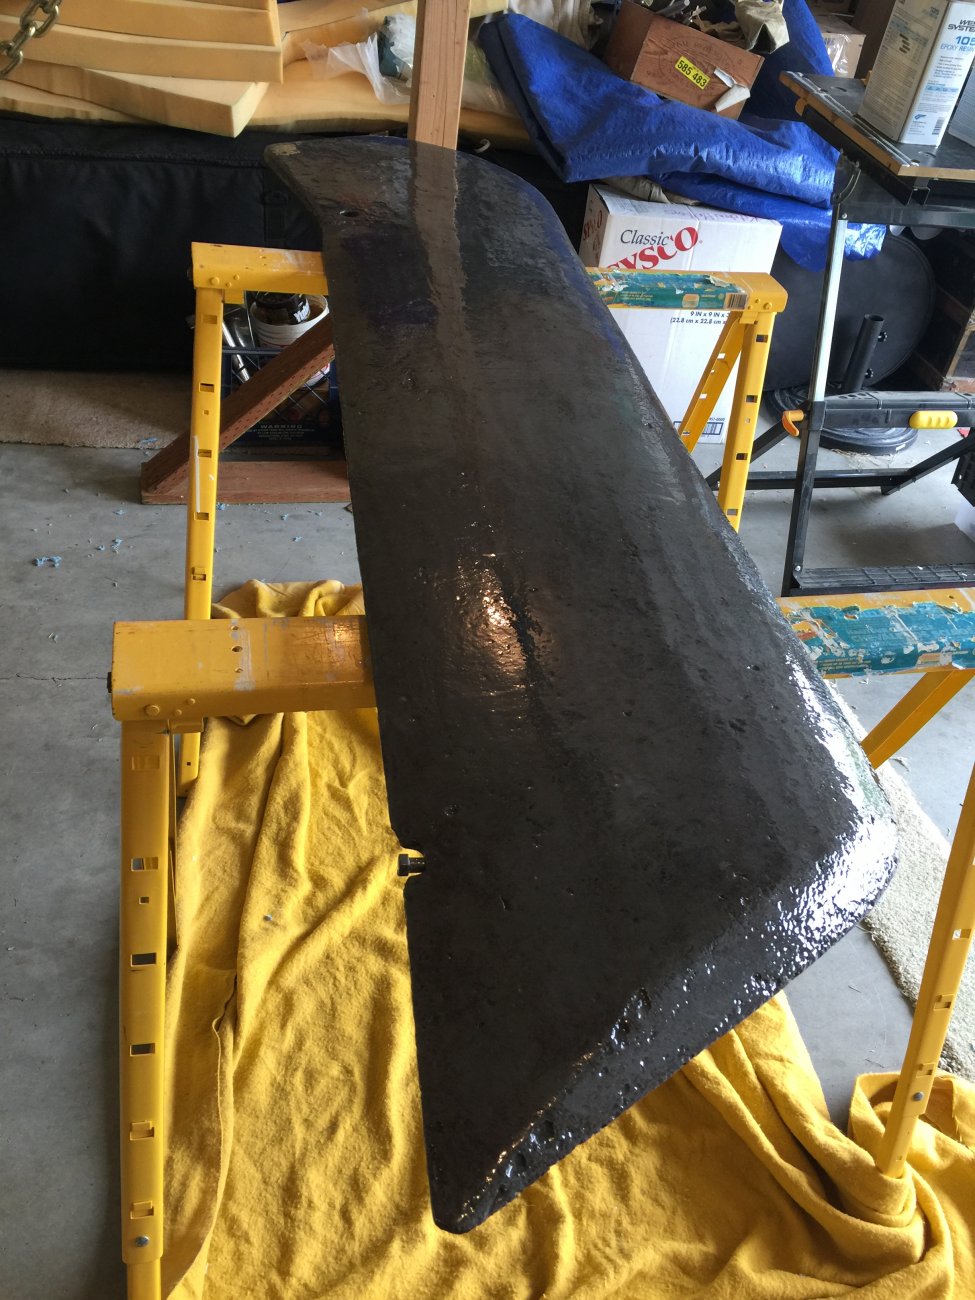
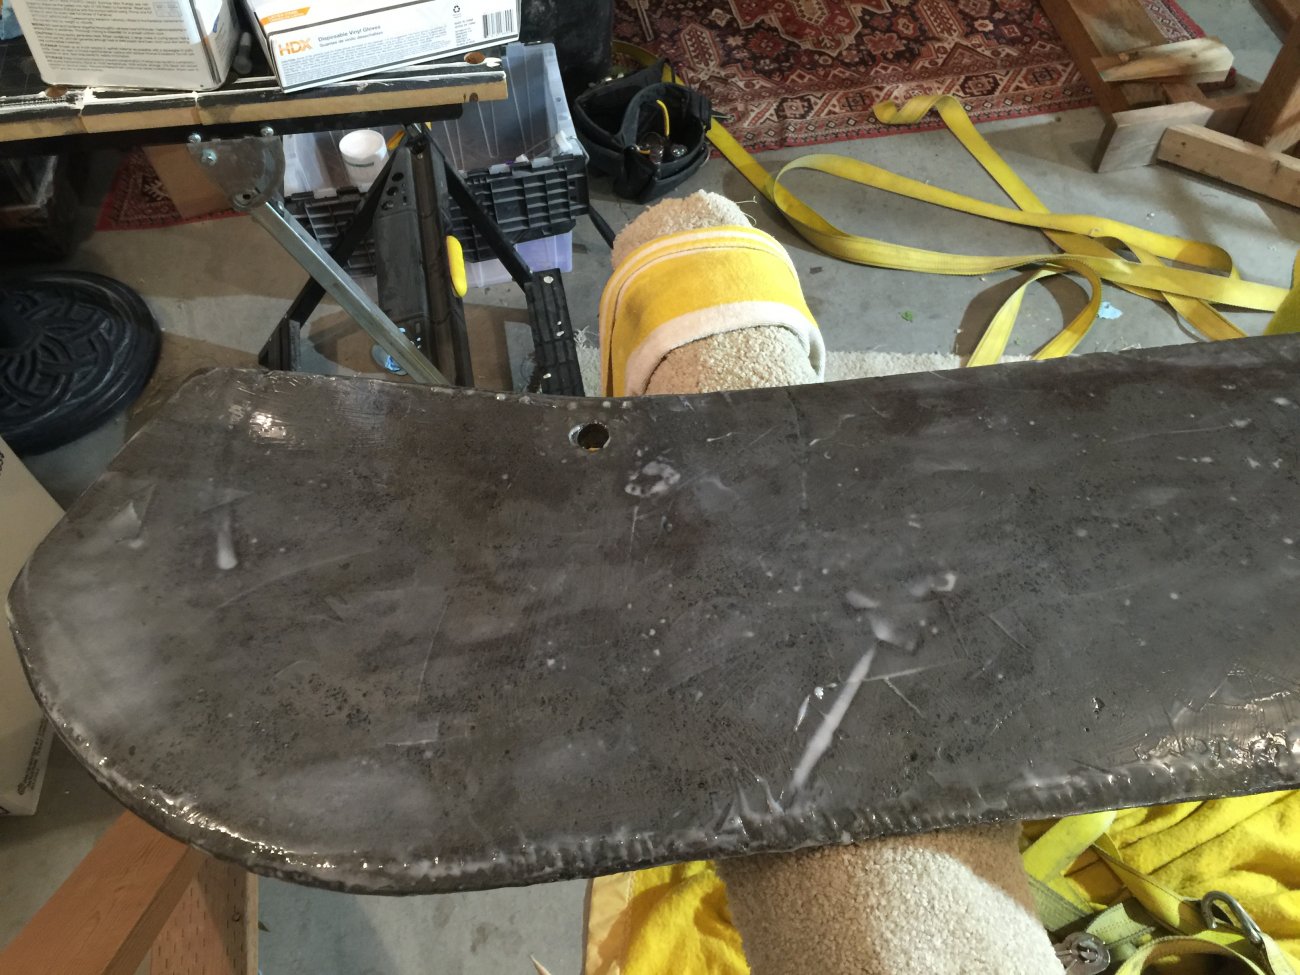
4) Waterproof but still lumpy as all get out-- now it's smeared with West Epoxy thickened with Colloidal Silica (strong like bull)-- not fair, but starting to find a shape.
20160506_074517412_iOS.jpg


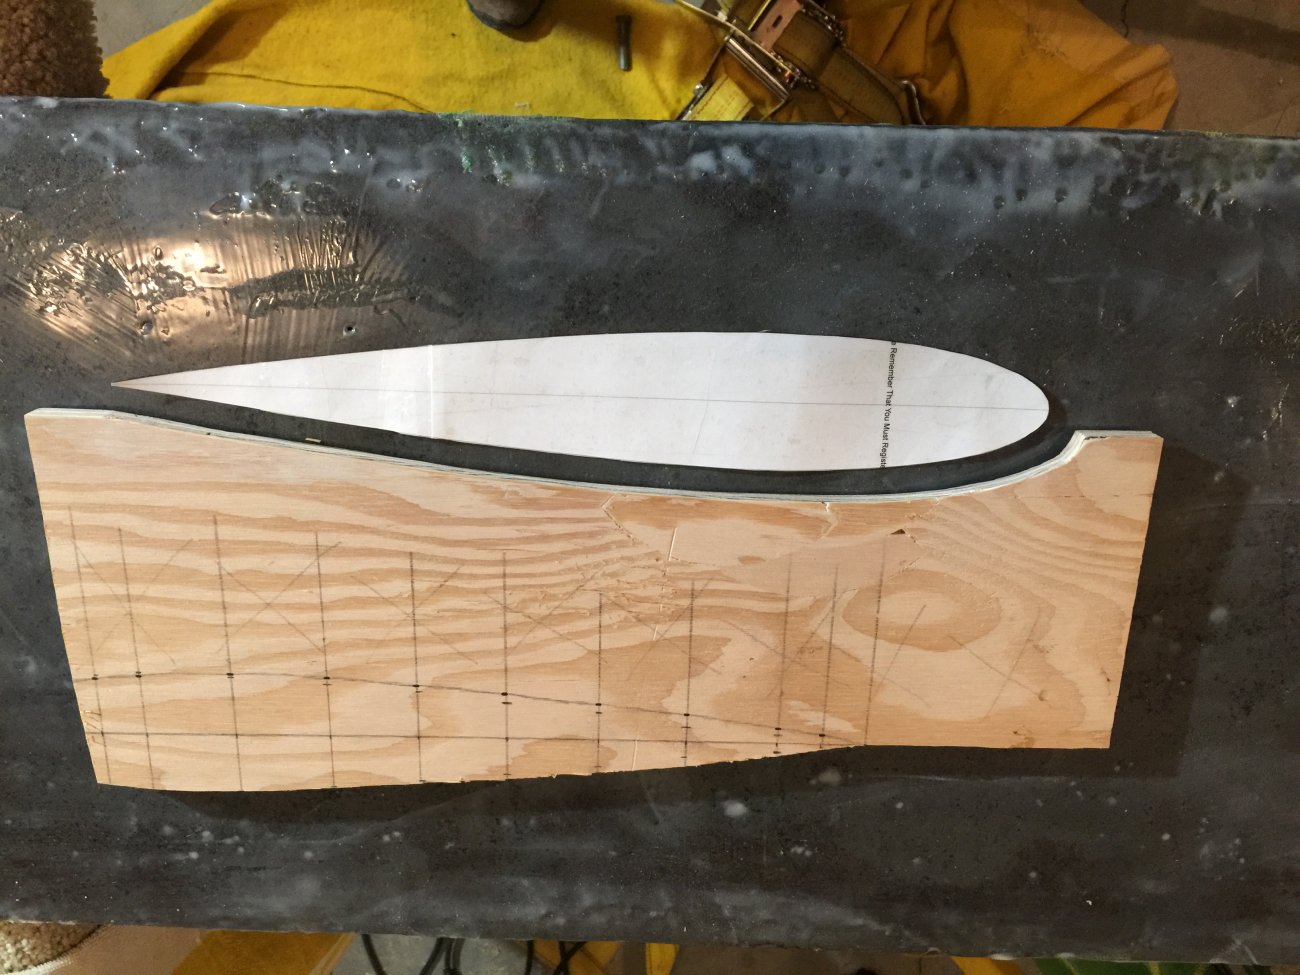
5) Wings need a shape-- found a foil template, build the jig
20160513_041403347_iOS.jpg


20160513_041303118_iOS.jpg


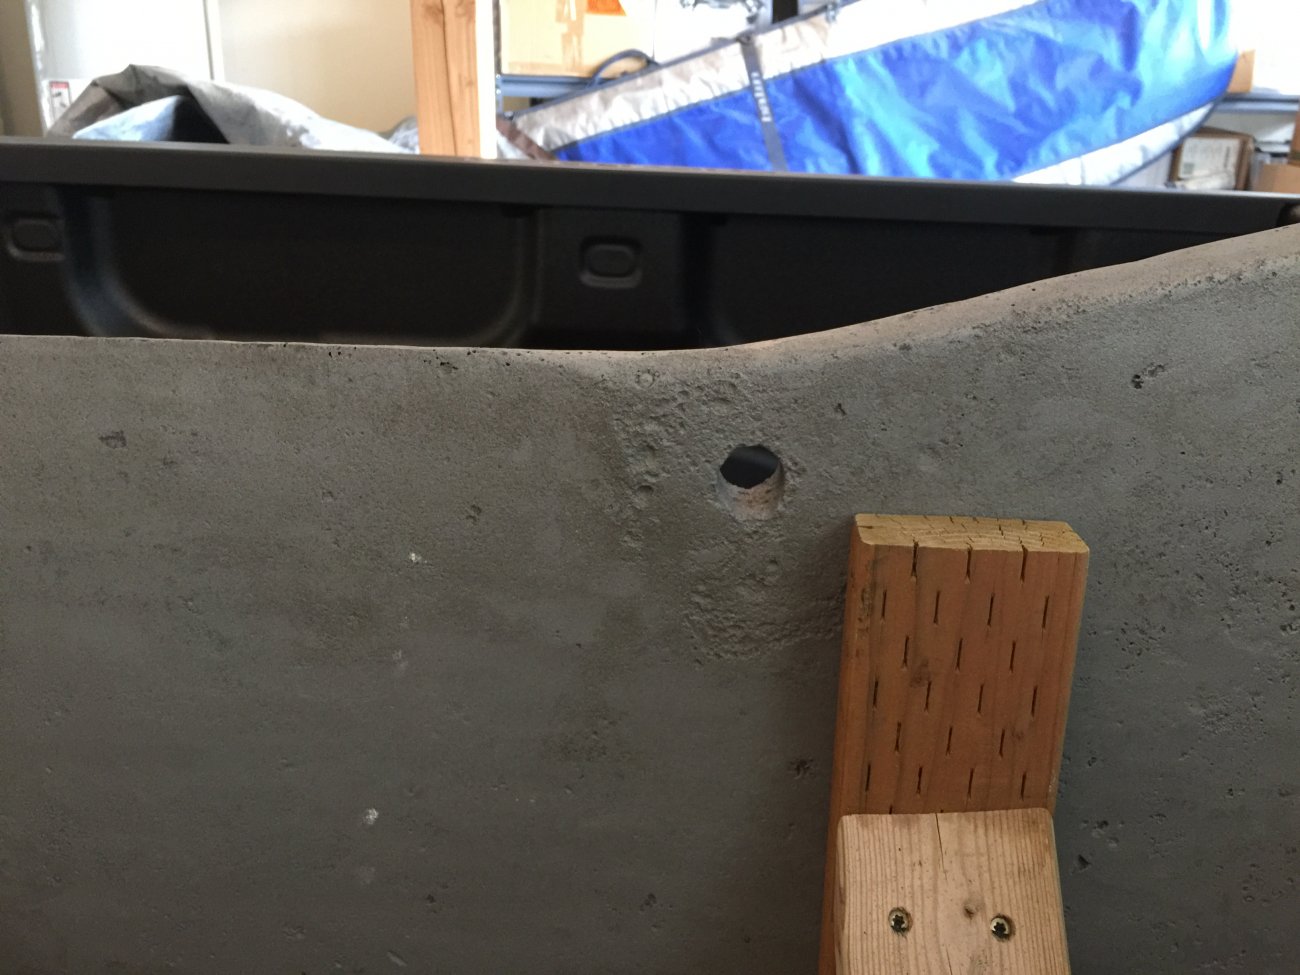
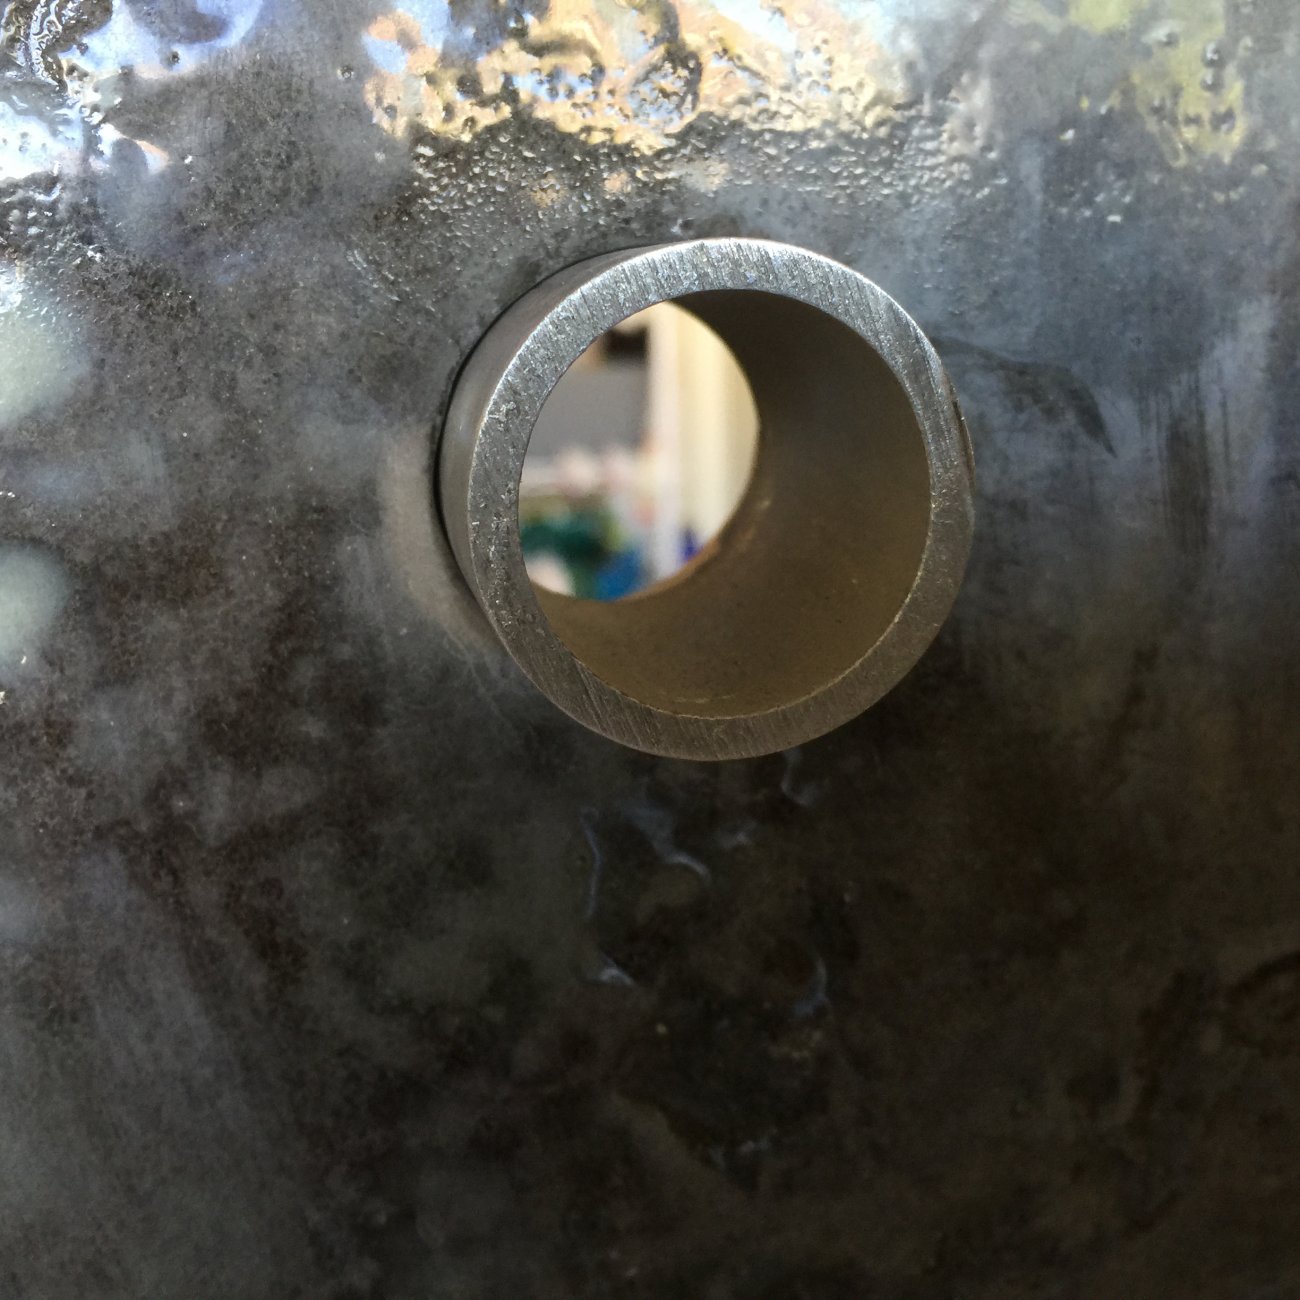
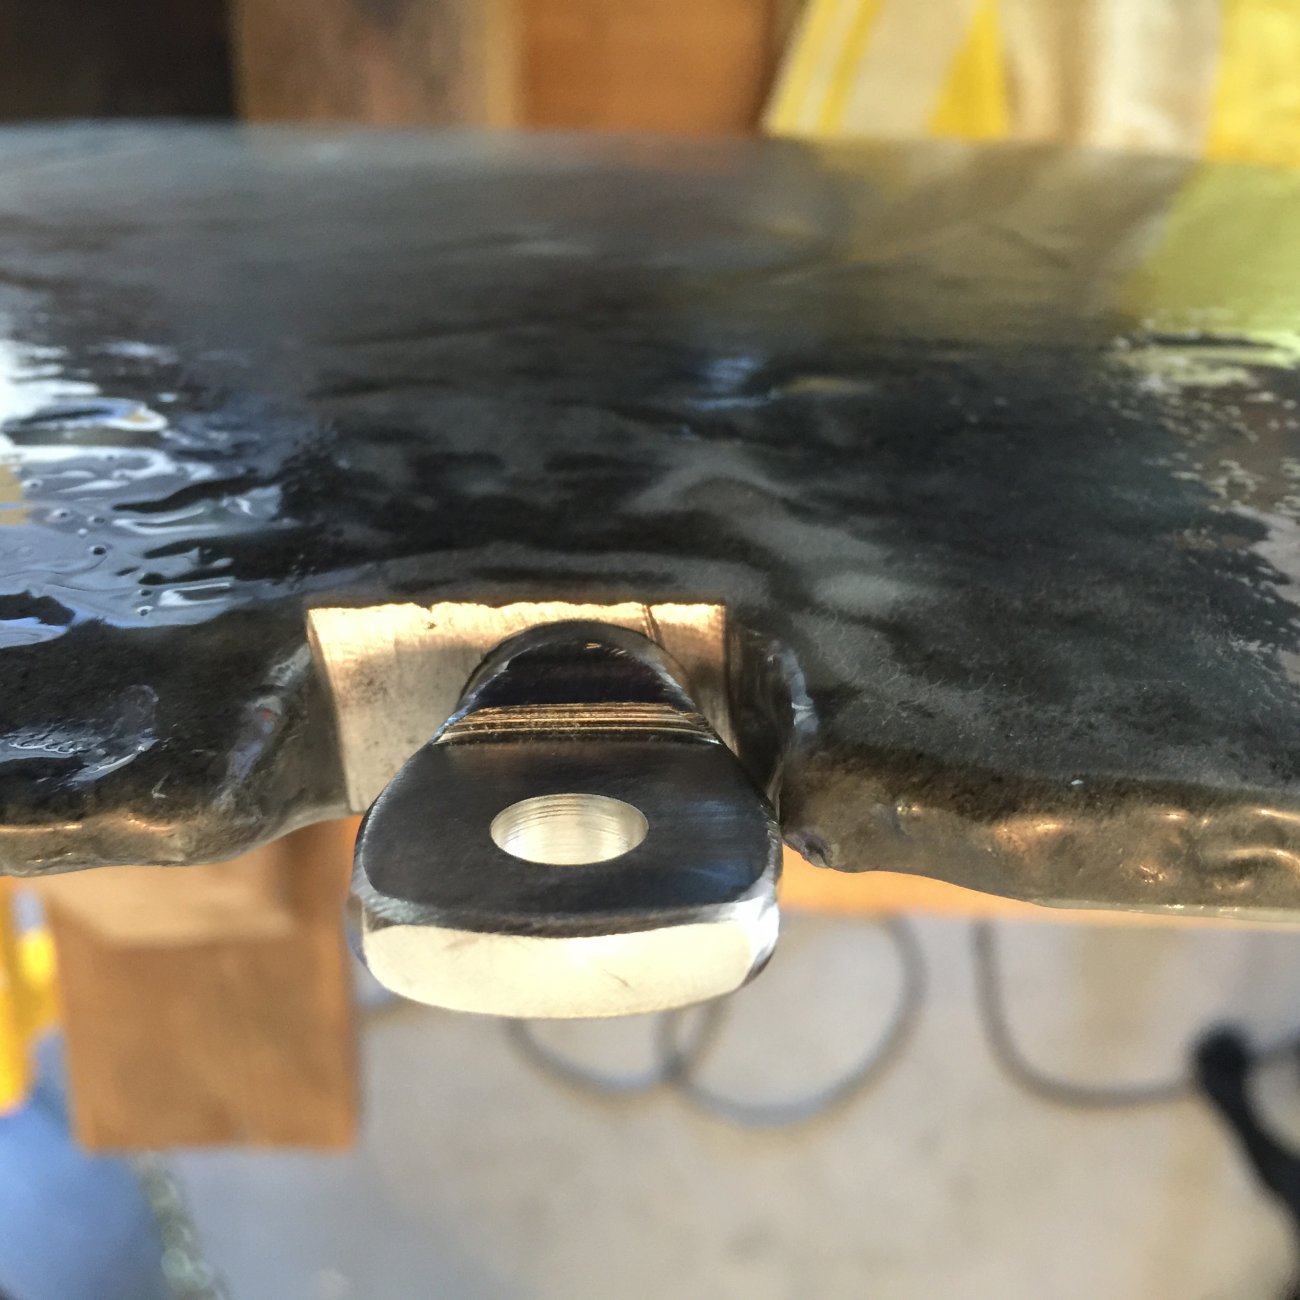
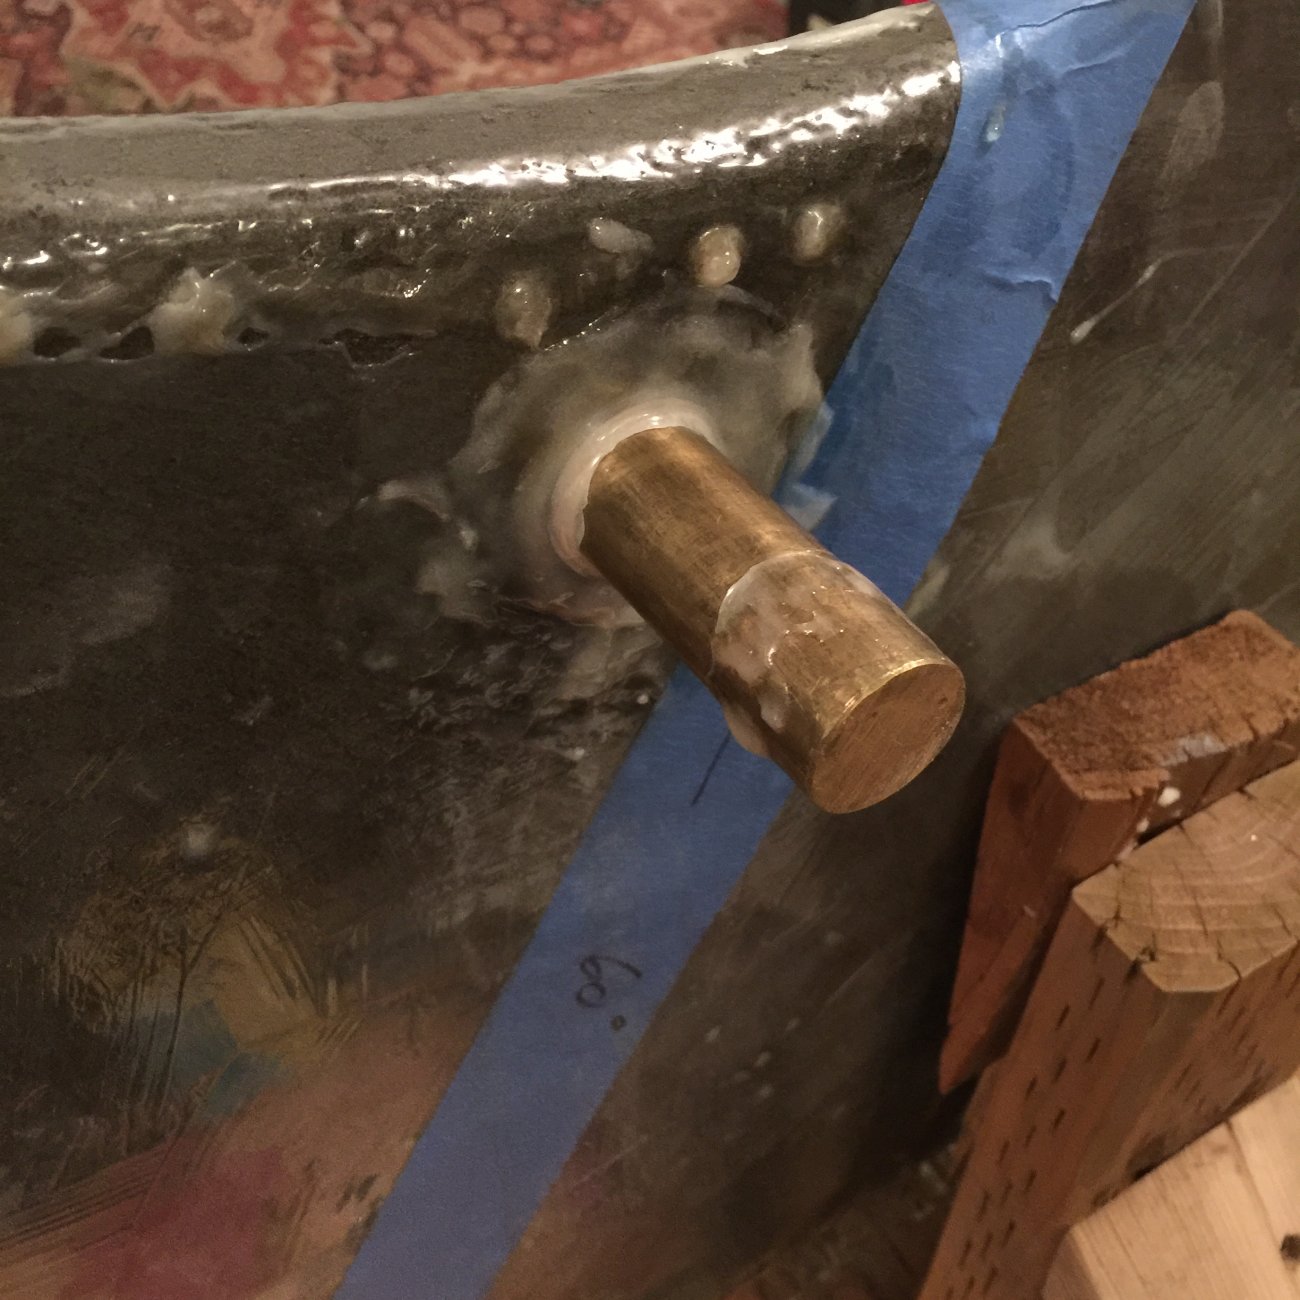
6) Clean up the important holes-- off to the machine shop to drill for the bushing, clean up the keel eye bolt
20160603_213504055_iOS.jpg

20160603_213646393_iOS.jpg

20160604_034701952_iOS.jpg


The stage is set, mechanical addressed and ready to start what I thought would be the easy part. Standby for part 2 (you can only load so many photos at a shot :) ).
 
Jul 13, 2015
900
Catalina 22 #2552 2252 Kennewick, WA
Part 2 of the epic saga: now that the keel is clean and structurally sound it's time to make the wing fly and mow through my Epoxy supply. Just for quick reference I only used three additives to my West Epoxy throughout the process:

A) 404 High Density Filler for strength gap filling and bonding (hard as nails to sand)
B) 407 Low Density Filler -- the red colored filler for buildup and shaping/gap filling (less hard but still cranky to sand)
C) 410 Microlight Fibers-- the tan colored filler for fairing (easy to sand and will feather out seamlessly)


Step 7) Put armor on the battle ship! best thing I decided to do -- completely en-roved the leading edge with a wide strip of light cloth and then gave the top a big slab of biaxial

20160610_055620318_iOS.jpg


8) Start blending that fiberglass leading edge into a continuous shape-- bring on the 407

IMG_1537.JPG


9) Burn 407 like there's no tomorrow-- finally a surface that we can apply the jig and foil template to-- we build up from here
IMG_1544.JPG


10) We've added some depth -- but a long way to go before we have a semblance of the foil outline-- note the heavy spots as the layers are building vertical depth

IMG_1744.JPG


11) Did I mention 407 is pretty hard to sand ? as we get closer to shape that can be molded I switch to the more pliable and sand-able 410
Copy of File_000.jpeg


12) Countless hours and layers later we almost have the foil, but note there's a long way yet to go to a "fair" surface. Still lumpy as all get out but now we have the rough outline and starting to resemble an airplane wing
File_000.jpeg

13) Fairing begins in earnest-- High spots, low spots and lots of pencil marks to guide the next layer of 410. clearly visible here are the shiny spots the longboard sander isn't touching (low) and the buffed sanded 410 is starting to blend

File_000 (1).jpeg

14) The longboard is doing it's job-- we're almost to the land of OCD, how picky do we want to be?
File_004.jpeg

15) more longboard followed by spot hand sanding-- I'm ready to coat the entirety again in a layer of unthickened epoxy for the next stage , but here we take a modest break

File_000 (2).jpeg


16) Check for fit! I've added a ton of material and have been conscientious of keeping the trailing edge and head of the keel unencumbered so she'll still fit-- confirmed! and I'd rather wrestle her here than once I have everything pretty

File_000 (3).jpeg


Stay tuned for the finish line-- part 3 brings it all home.
 
Jul 13, 2015
900
Catalina 22 #2552 2252 Kennewick, WA
To the victor go the spoils (or at least you don't have a rusty @$$ keel)

16A) Neglected somewhere around step 12 or 13 to show the transferred foil template to an old scraper to work the leading edge into something closer to useful:

File_008.jpeg


17) Primer Coat #1 -- used Interlux interprotect 2000E , expensive but designed for purpose.

File_003 (1).jpeg


18) Some spot filling / fairing now that the primer shows all the hidden flaws, good time to touch up anything you're not happy with-- note the work around the keel eybolt

File_002.jpeg


19) Last chance at filling / fairing and another coat of unthickened epoxy to smooth it all out for last primer coat. I Enjoy this photo as it actually looks like a wing finally.
File_008 (1).jpeg

20) Last primer before finish:
File_004 (1).jpeg


21) Finish coat of VC-17 as she's only a fresh water dunk and dash (doesn't stay wet more than a weekend at a time). PS. It's never going to turn blue-- 2 seasons and not enough exposure to lose the crimson. I should sail more often?

File_003 (2).jpeg


22) Made up some fiberglass spacers with all the scrap and applied accordingly-- 1/8 Delrin spacers courtesy of @CloudDiver 's leftover bin shimming each side of the keel pin

File_001.jpeg


Success as measured by a good day on the water: and an anecdote in season 2, I had to park the boat keel up on a relatively rough shallow shoreline for several hours while we prepared a proper anchorage (long story...) -- when the weekend was over and I pulled the boat and was concerned about how durable that leading edge really was. Nothing more than the VC17 scrubbed to primer coat 1, and the worst spot was barely showing through primer coat 2 to the fairing epoxy-- no where near the Iron, and fixable with a spatula in my free time.

Definitely cheaper than a new keel, and as we all know don't buy a used boat if you want to save money. Enjoy the fruits of your labor.

File_007 (1).jpeg
 
Last edited:
Aug 22, 2017
1,609
Hunter 26.5 West Palm Beach
Wow, you've certainly been busy. Congrats on the product of your labor.

The reshaping that you did leaves me with a question. Now that you have a better foil shape on your keel, do you notice that the boat is able to point higher than it did before?
 
Jul 13, 2015
900
Catalina 22 #2552 2252 Kennewick, WA
I didn't have a reference point with this particular hull before I did all the work-- so sadly no control set to measure from. I must admit I think she points pretty darn well all things considered, and that could improve dramatically with a new vang, backstay adjuster, sails, and rudder... I'll give it a definitive yes, but can't put a percentage improvement on it unfortunately.
 
Oct 10, 2011
619
Tartan 34C Toms River, New Jersey
This is the best keel restoration thread I have seen in a long time, maybe ever. Superb photos and clear, concise wording. I have never rated a thread before, but I gave this one five stars.

Can you make a guess at the dollars and hours you invested in the job?
What Gene said :plus:
 
  • Like
Likes: pclarksurf
Jul 13, 2015
900
Catalina 22 #2552 2252 Kennewick, WA
I'll just start with wow-- that Mr Neill, (@Gene Neill) is indeed high praise. I'll briefly comment with the fact that it was not because of my mad skills ( I indeed am mad, and have average skills) that I undertook the effort- but in fact it was exactly this forum and the many many contributors that made my particular project possible-- I think we all know who they are, so I will very humbly and simply say thank you all.

To the actual question of time and dollars-- I did not intend on keeping meticulous track of expenses as the intent was more function driven than budget, but with that said I have a pretty good swag at about 1500.00 in actual spend that was specific to Keel. That may be a bit higher than necessary as I did everything Keel including new everything that touches it, so my totals might be a little elevated relative to just making the blade rust free and functionally foil shaped.

Hours is a bit tougher to quantify as I had the keel off for two full seasons while I did a slew of other work specific to the boat and put everything back together for first splash day late in season two (one full season was spent on the hard working on everything). @CloudDiver and Stingy were wickedly more efficient and focused than I and timing is certainly relative to energy expended. With all that said I probably had 100 hours into the effort-- and those were not grueling all day events with rare exception.

I did look back at my "list" and attached it here for fun-- when I brought SV Mary Ann home I put this list together as must do's prior to splash and off I went-- pretty much followed it to the letter and looking back realize I crossed it all off.

If there's any interest in additional threads-- I have enough photos to cover a few more topics including trailer, bright-work in general, keel hanger and assembly, and cockpit floor/winch bed replacement.
 

Attachments

Aug 3, 2012
2,542
Performance Cruising Telstar 28 302 Watkins Glen
Wow! You do gooood work! That is the best I have ever seen, and it is better than new. Congratulations!
 

AaronD

.
Aug 10, 2014
723
Catalina 22 9874 Newberg, OR / Olympia, WA
If there's any interest in additional threads-- I have enough photos to cover a few more topics including trailer, bright-work in general, keel hanger and assembly, and cockpit floor/winch bed replacement.
More work of this caliber to look at? Bring it on!

Thanks for your detailed account of a beautiful keel project. I'd been trying to scope my own for some upcoming winter, and this gives me a target to shoot for.
 

Grotto

.
Feb 18, 2018
273
Catalina 22 Wilmington
Beautiful work. I just finished my keel as well. ( not nearly as well done as yours). It is interesting to see how different the castings are. The bottom of my keel almost has a bulb. Much thicker than the NACA standard and tapers down to almost no camber in the middle / top. I used a gallon+ of fairing compound to build up the camber to something close to stingy’s template.
 

Attachments

Apr 11, 2017
571
Catalina C22 Solomon's Island, MD
You've done great work - really nice. If you did post any more project threads - it would be a great asset to the forum. A lot of us here have learned a good bit of what we know from selfless posts like these - and any new owner of a C22 who winds up here will benefit for years down the line. I've learned a lot from searching old posts for specific issue, and wind up reading threads from 15 years ago - still good. Thank again for taking the time to document, and post all that you have.
 
Apr 11, 2017
571
Catalina C22 Solomon's Island, MD
Beautiful work. I just finished my keel as well. ( not nearly as well done as yours). It is interesting to see how different the castings are. The bottom of my keel almost has a bulb. Much thicker than the NACA standard and tapers down to almost no camber in the middle / top. I used a gallon+ of fairing compound to build up the camber to something close to stingy’s template.
There does actually seem to be a lot of variability as to the keel profiles. My boat is an 87', and I was surprised that the keel profile is actually pretty decent. Not *nearly* as perfect as the projects shown here, but it basically carried a half-way decent foil shape for the bottom 3/4. Being easily satisfied - I was satisfied enough, just slapped some coal tar epoxy on it.
 
Jul 13, 2015
900
Catalina 22 #2552 2252 Kennewick, WA
@Grotto : outstanding point-- our keel molds are far from symmetrical. I broke it down into three slices-- the head of the keel needs to live in the trunk-- no value to extending the foil and you run the risk of crowding the trunk. Middle section is where the effort to find the foil will give you the biggest gains, and as you mentioned the bottom bulb is a pretty odd shape that expands well beyond the foil. I blended as best as possible and focused on smooth and fair without out adding any bulk.

foil.jpg


You can really see it from this angle-- almost nothing added to the bulb with the heavy concentration across the midsection:
foil2.jpg
 
Last edited:

Grotto

.
Feb 18, 2018
273
Catalina 22 Wilmington
Haha I actually scribed lines just like yours when building up my keels mid section