Repairing Hunter 40 damage from Hurricane Matthew
- Thread starter B757Captain
- Start date
Thank you!Mark, I have thoroughly enjoyed your progress. My highest compliments for your craftsmanship, logic, and persistence. I look forward to every one of your posts. Well done. Really, well done.
Cove stripe prep:
For reasons known only to Hunter, the original cove stripe was molded in gelcoat into the original layup. Not a problem until it comes time to refresh it. At some time the PO had that done. The boat yard guys (hereinafter to be known as the "gorillas") solution was to use vinyl tape. Ok, if done properly not a problem. Note I said "if done properly". There seems to be a theme developing here!
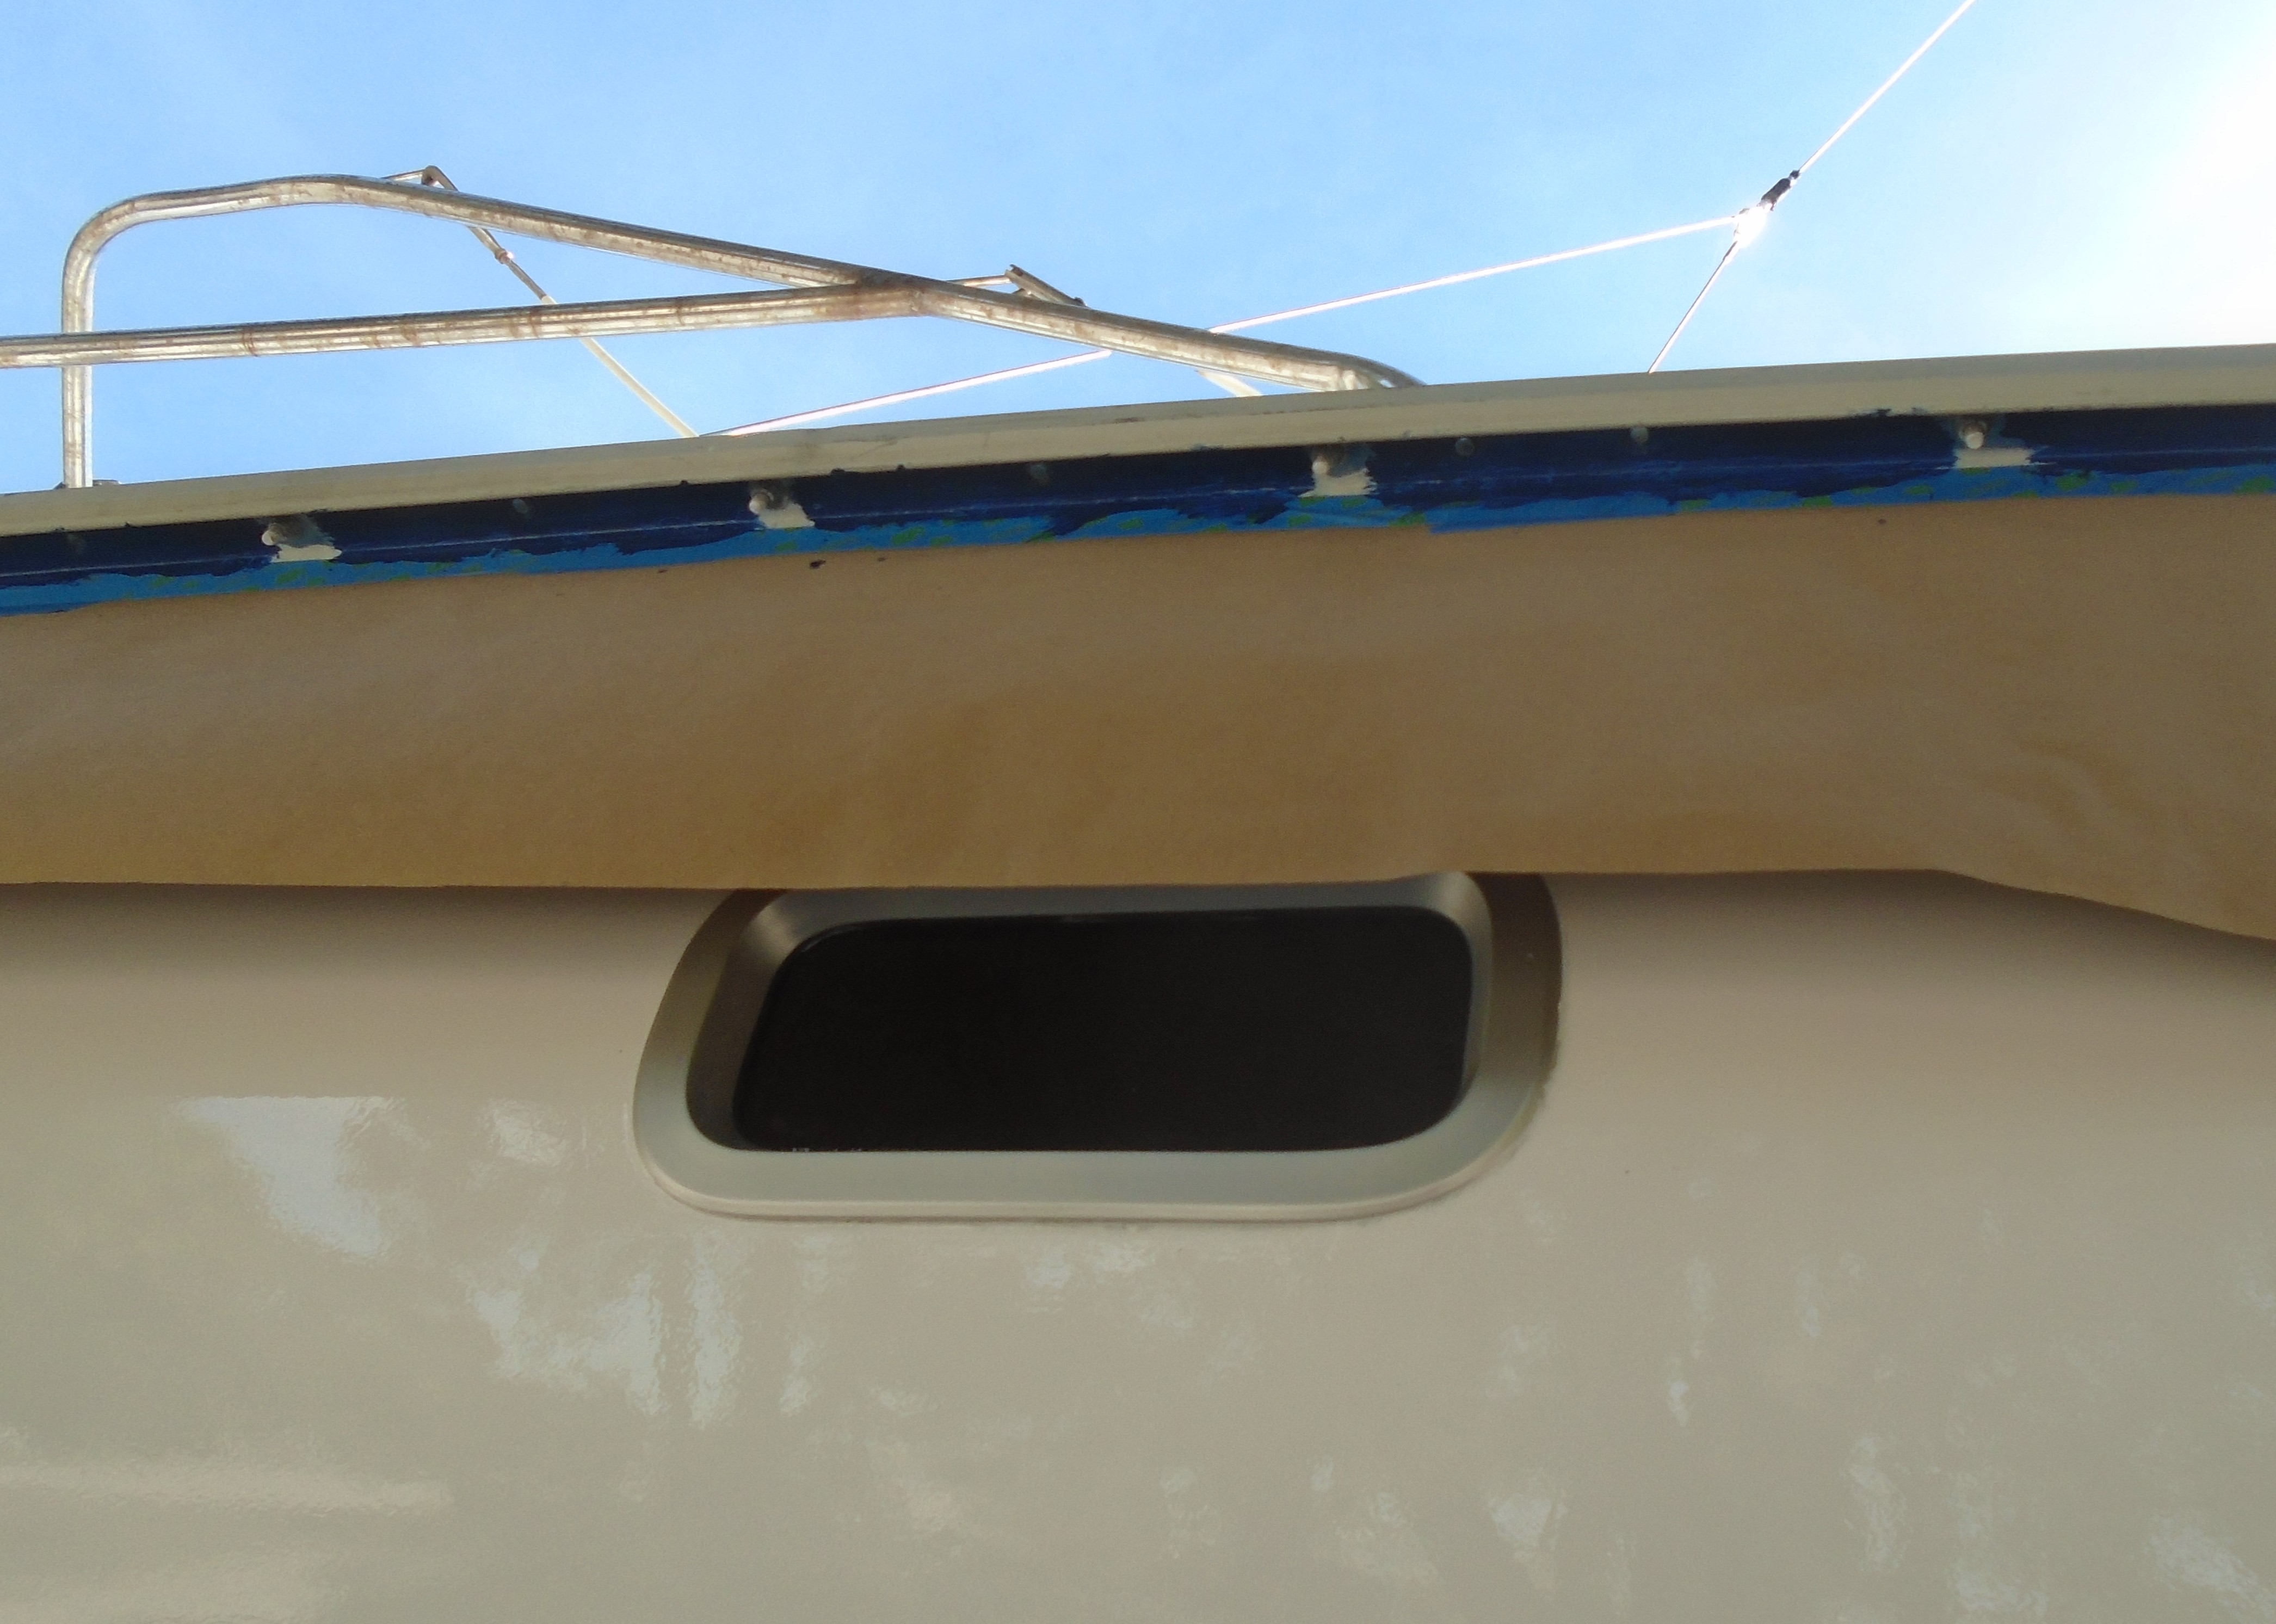
Two problems arose from the use of the vinyl tape. One, vinyl has a life-span when exposed to the elements. Removing the cove and accent stripes were right up there as some of the toughest jobs during the hull prep because the vinyl had deteriorated so badly. I'm guessing (hoping) that vinyl has undergone a chemical revolution in the last 20 years so as to last longer and fare better in outdoor applications because what I removed was absolute crap! Two, the design of the toe rail is not conducive to the use of tape in the first place. Since the toe rail lip extends below the hull/deck joint and turns under slightly, it forms a recess that is difficult to access. The vinyl tape in this area was poorly applied and did not adhere well on the upper edge, so as the years progressed all manner of dirt, debris, salt and such got under the tape. Just means more cleanup for me!
Added to that is the way Hunter clamped the toe rail, deck and hull together. The toe rail sits atop the deck edge which sits on top of the hull lip. All three are clamped together via 5/16th bolts spaced 6" apart. I personally like this setup - I think it's one of the strongest joints going. But . . .
What do you do if you need to refresh things underneath the lip?
Option 1: Do nothing. Nobody can see it anyway. Paint the cove stripe and be happy. Um, NO! I think you guys know me better than that by now!
Option 2: Paint the underside of the lip. Um, yeah. But there are 140 5/16ths bolts in the way (not kidding!) and I don't think it's a good idea to just paint over them. Not good for the stainless bolts, not good for the paint long-term.
I can't just remove all the bolts at once, and removing just a few at a time to paint underneath would be a monumental pain, so I settled on removing every other one. After cleaning and prepping, I taped and papered the hull to prevent paint splashes and drips and painted the recess:
Boy, was there paint splashes and drips! I will have blue spots on me for a few weeks until they wear off!
After this dried, I started replacing the bolts (properly torqued, which I bet has never been done!) and removed the other bolts. I was interrupted yesterday by the rain so I only got the starboard side done. After finishing the port side I'll paint the remainder of the lip, then tape off the cove stripe and finish up.
For reasons known only to Hunter, the original cove stripe was molded in gelcoat into the original layup. Not a problem until it comes time to refresh it. At some time the PO had that done. The boat yard guys (hereinafter to be known as the "gorillas") solution was to use vinyl tape. Ok, if done properly not a problem. Note I said "if done properly". There seems to be a theme developing here!
Two problems arose from the use of the vinyl tape. One, vinyl has a life-span when exposed to the elements. Removing the cove and accent stripes were right up there as some of the toughest jobs during the hull prep because the vinyl had deteriorated so badly. I'm guessing (hoping) that vinyl has undergone a chemical revolution in the last 20 years so as to last longer and fare better in outdoor applications because what I removed was absolute crap! Two, the design of the toe rail is not conducive to the use of tape in the first place. Since the toe rail lip extends below the hull/deck joint and turns under slightly, it forms a recess that is difficult to access. The vinyl tape in this area was poorly applied and did not adhere well on the upper edge, so as the years progressed all manner of dirt, debris, salt and such got under the tape. Just means more cleanup for me!
Added to that is the way Hunter clamped the toe rail, deck and hull together. The toe rail sits atop the deck edge which sits on top of the hull lip. All three are clamped together via 5/16th bolts spaced 6" apart. I personally like this setup - I think it's one of the strongest joints going. But . . .
What do you do if you need to refresh things underneath the lip?
Option 1: Do nothing. Nobody can see it anyway. Paint the cove stripe and be happy. Um, NO! I think you guys know me better than that by now!
Option 2: Paint the underside of the lip. Um, yeah. But there are 140 5/16ths bolts in the way (not kidding!) and I don't think it's a good idea to just paint over them. Not good for the stainless bolts, not good for the paint long-term.
I can't just remove all the bolts at once, and removing just a few at a time to paint underneath would be a monumental pain, so I settled on removing every other one. After cleaning and prepping, I taped and papered the hull to prevent paint splashes and drips and painted the recess:
Boy, was there paint splashes and drips! I will have blue spots on me for a few weeks until they wear off!
After this dried, I started replacing the bolts (properly torqued, which I bet has never been done!) and removed the other bolts. I was interrupted yesterday by the rain so I only got the starboard side done. After finishing the port side I'll paint the remainder of the lip, then tape off the cove stripe and finish up.

I retorked the 5/16" bolts on my Hunter 30 and found every third one bad or sheared ended up buying like 50 new bolts.
I got lucky, no broken bolts, but I did have a bunch of bent ones. I trash-canned about 25 or so either bent or galled and replaced the washers and nuts. I did spend a few hours with the wire wheel cleaning up the good bolts - if they cleaned up good I think the old bolts are better quality than I've been able to find (at least locally here). I've already had issues with cheap Chinese junk hardware. I ran into that years ago when a Chinese machine shop didn't know what T6-6061 aluminum was!I retorked the 5/16" bolts on my Hunter 30 and found every third one bad or sheared ended up buying like 50 new bolts.
All the bolts removed and every other one replaced and re-torqued. Ready to mask the cove stripe and paint as soon as another quart of blue shows up.
Bow pulpit repair:
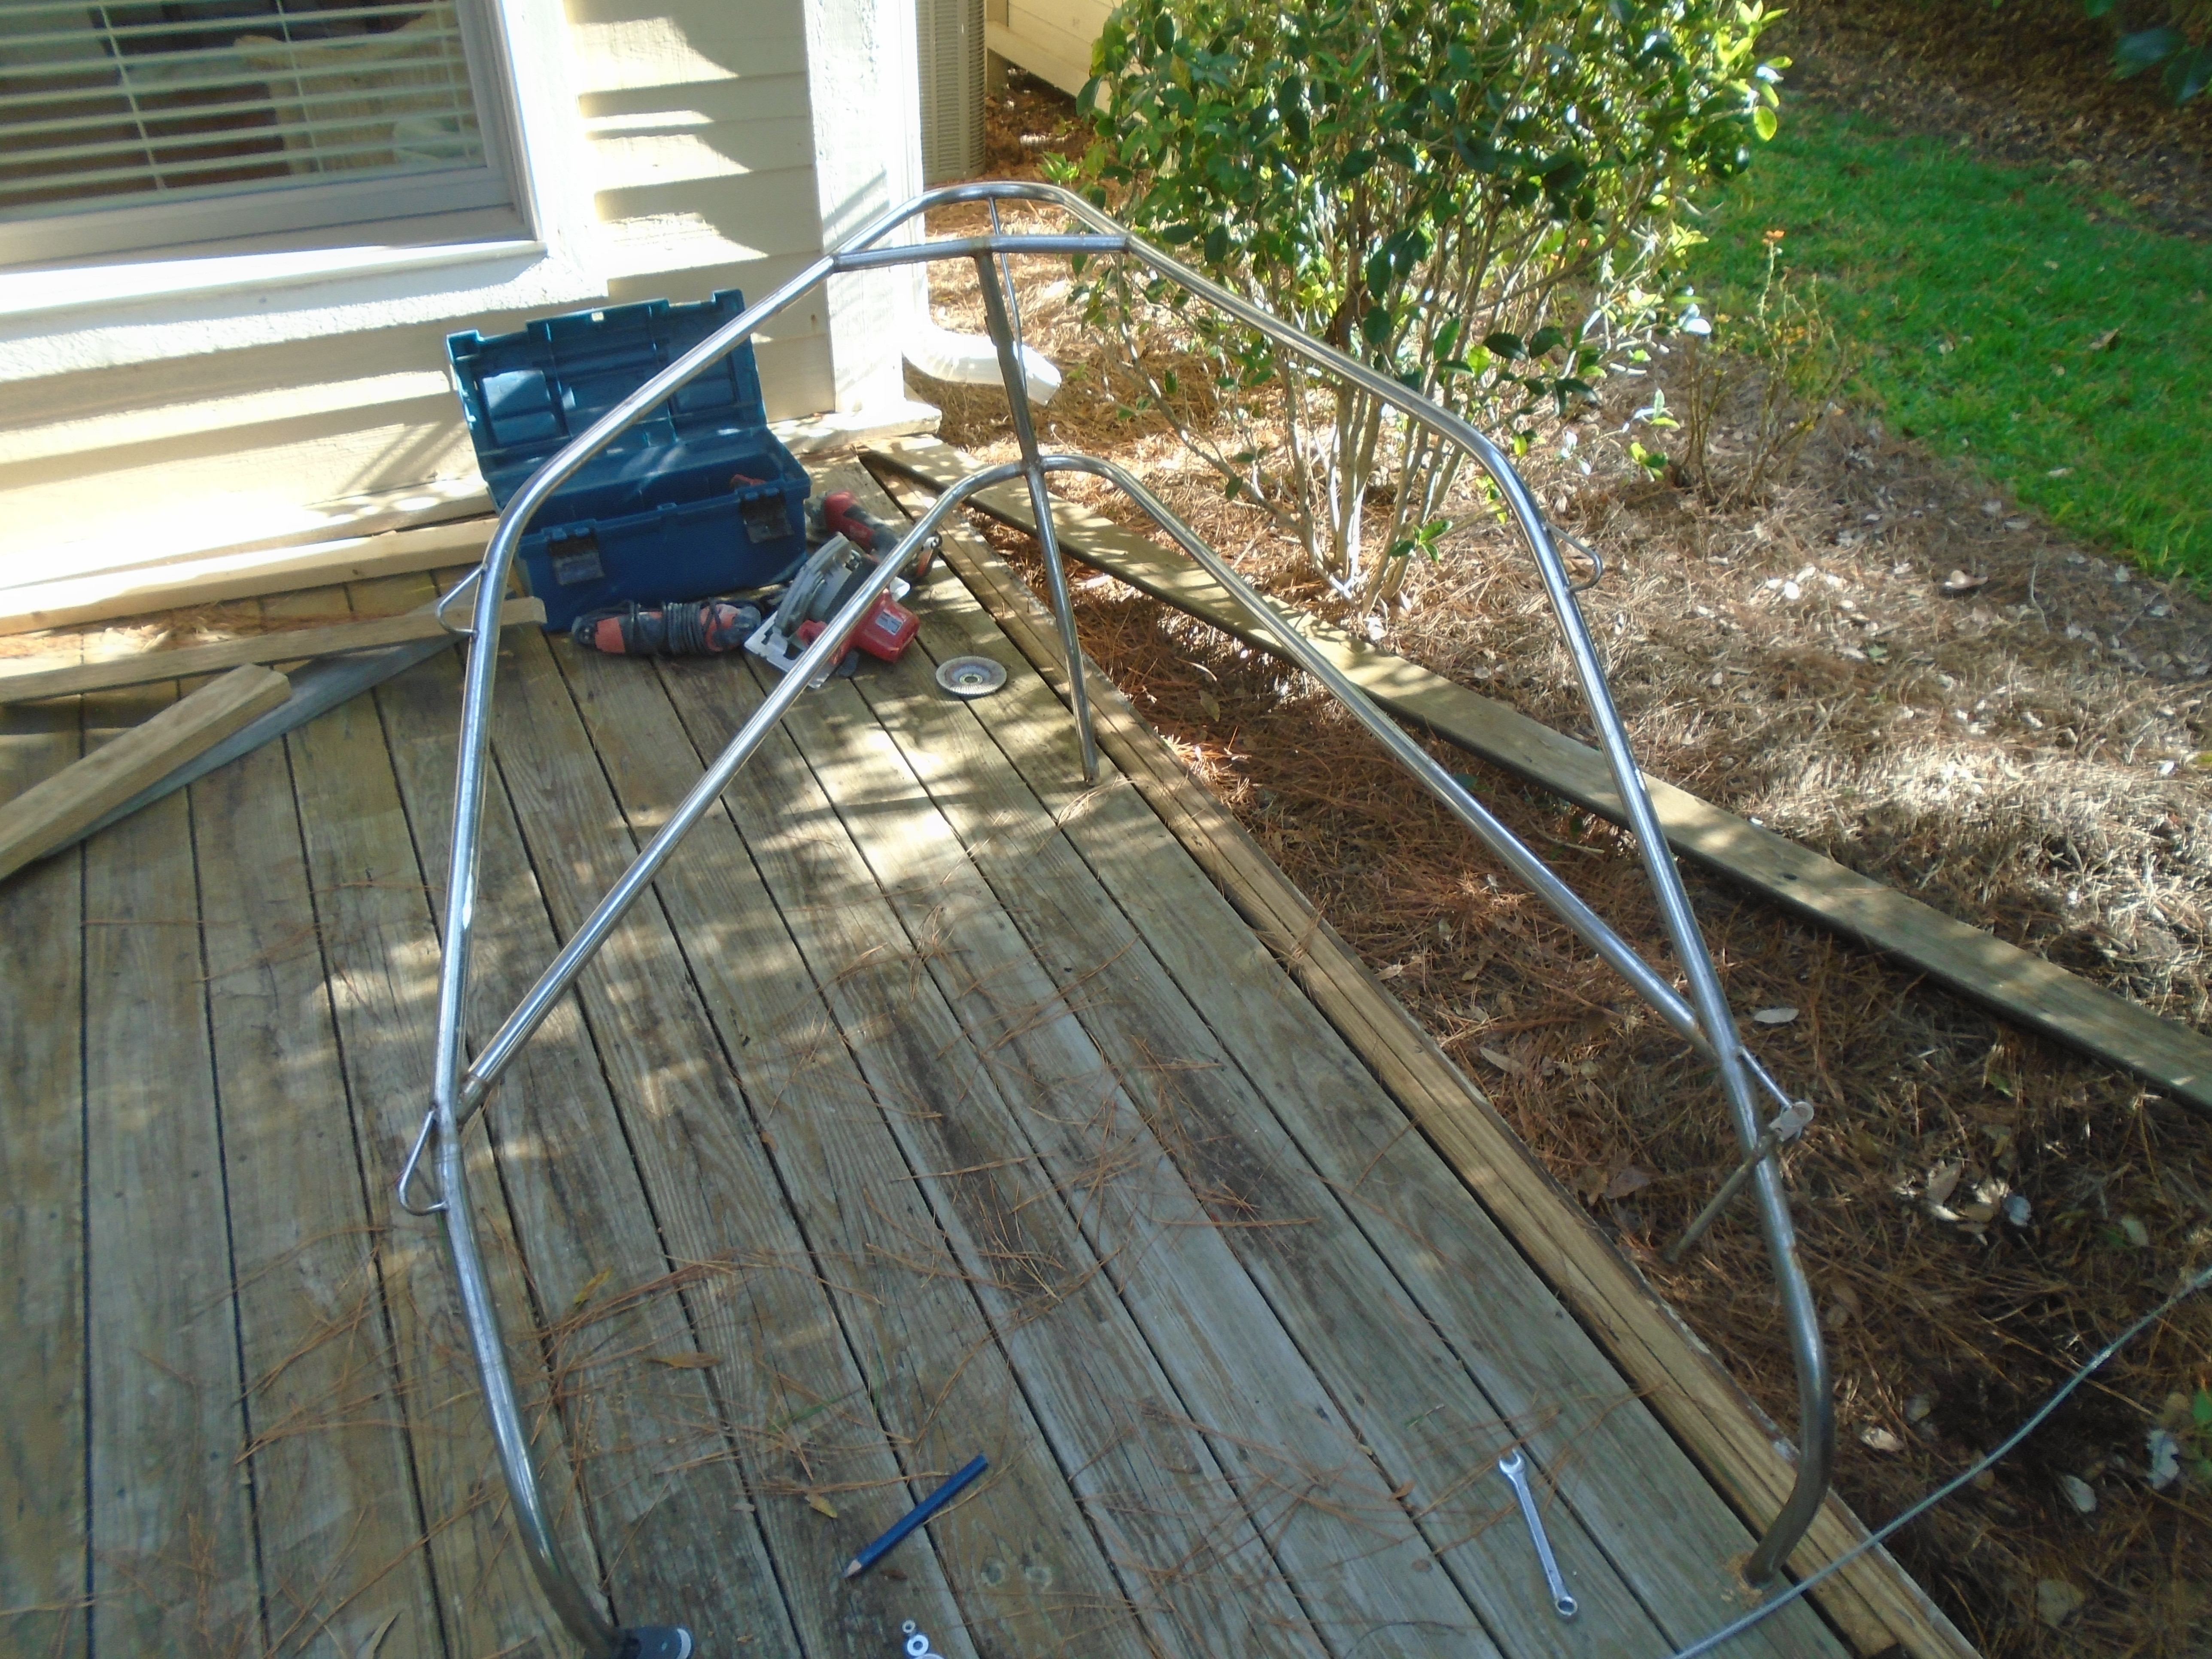
This has been sitting in my garage for a while, looking forlorn and imitating spaghetti. I would take a swipe at straightening it every now and then between other jobs but 1" stainless tubing is pretty strong! finding a good way to secure the pulpit while pulling on it has been a problem and the other day a friend of mine had what we thought would be a solution. He's about to replace a patio deck around the corner from us and his idea was to bolt the pulpit to the deck so we could apply some serious force to it. The old deck is being completely replaced so we could drill holes, etc., and generally tear things up if needed without harming anything.
I took some measurements from the bow for the locations of the feet, marked them on the deck and bolted the pulpit down:
Then attached the come-a-long to a convenient tree and started applying some real force:
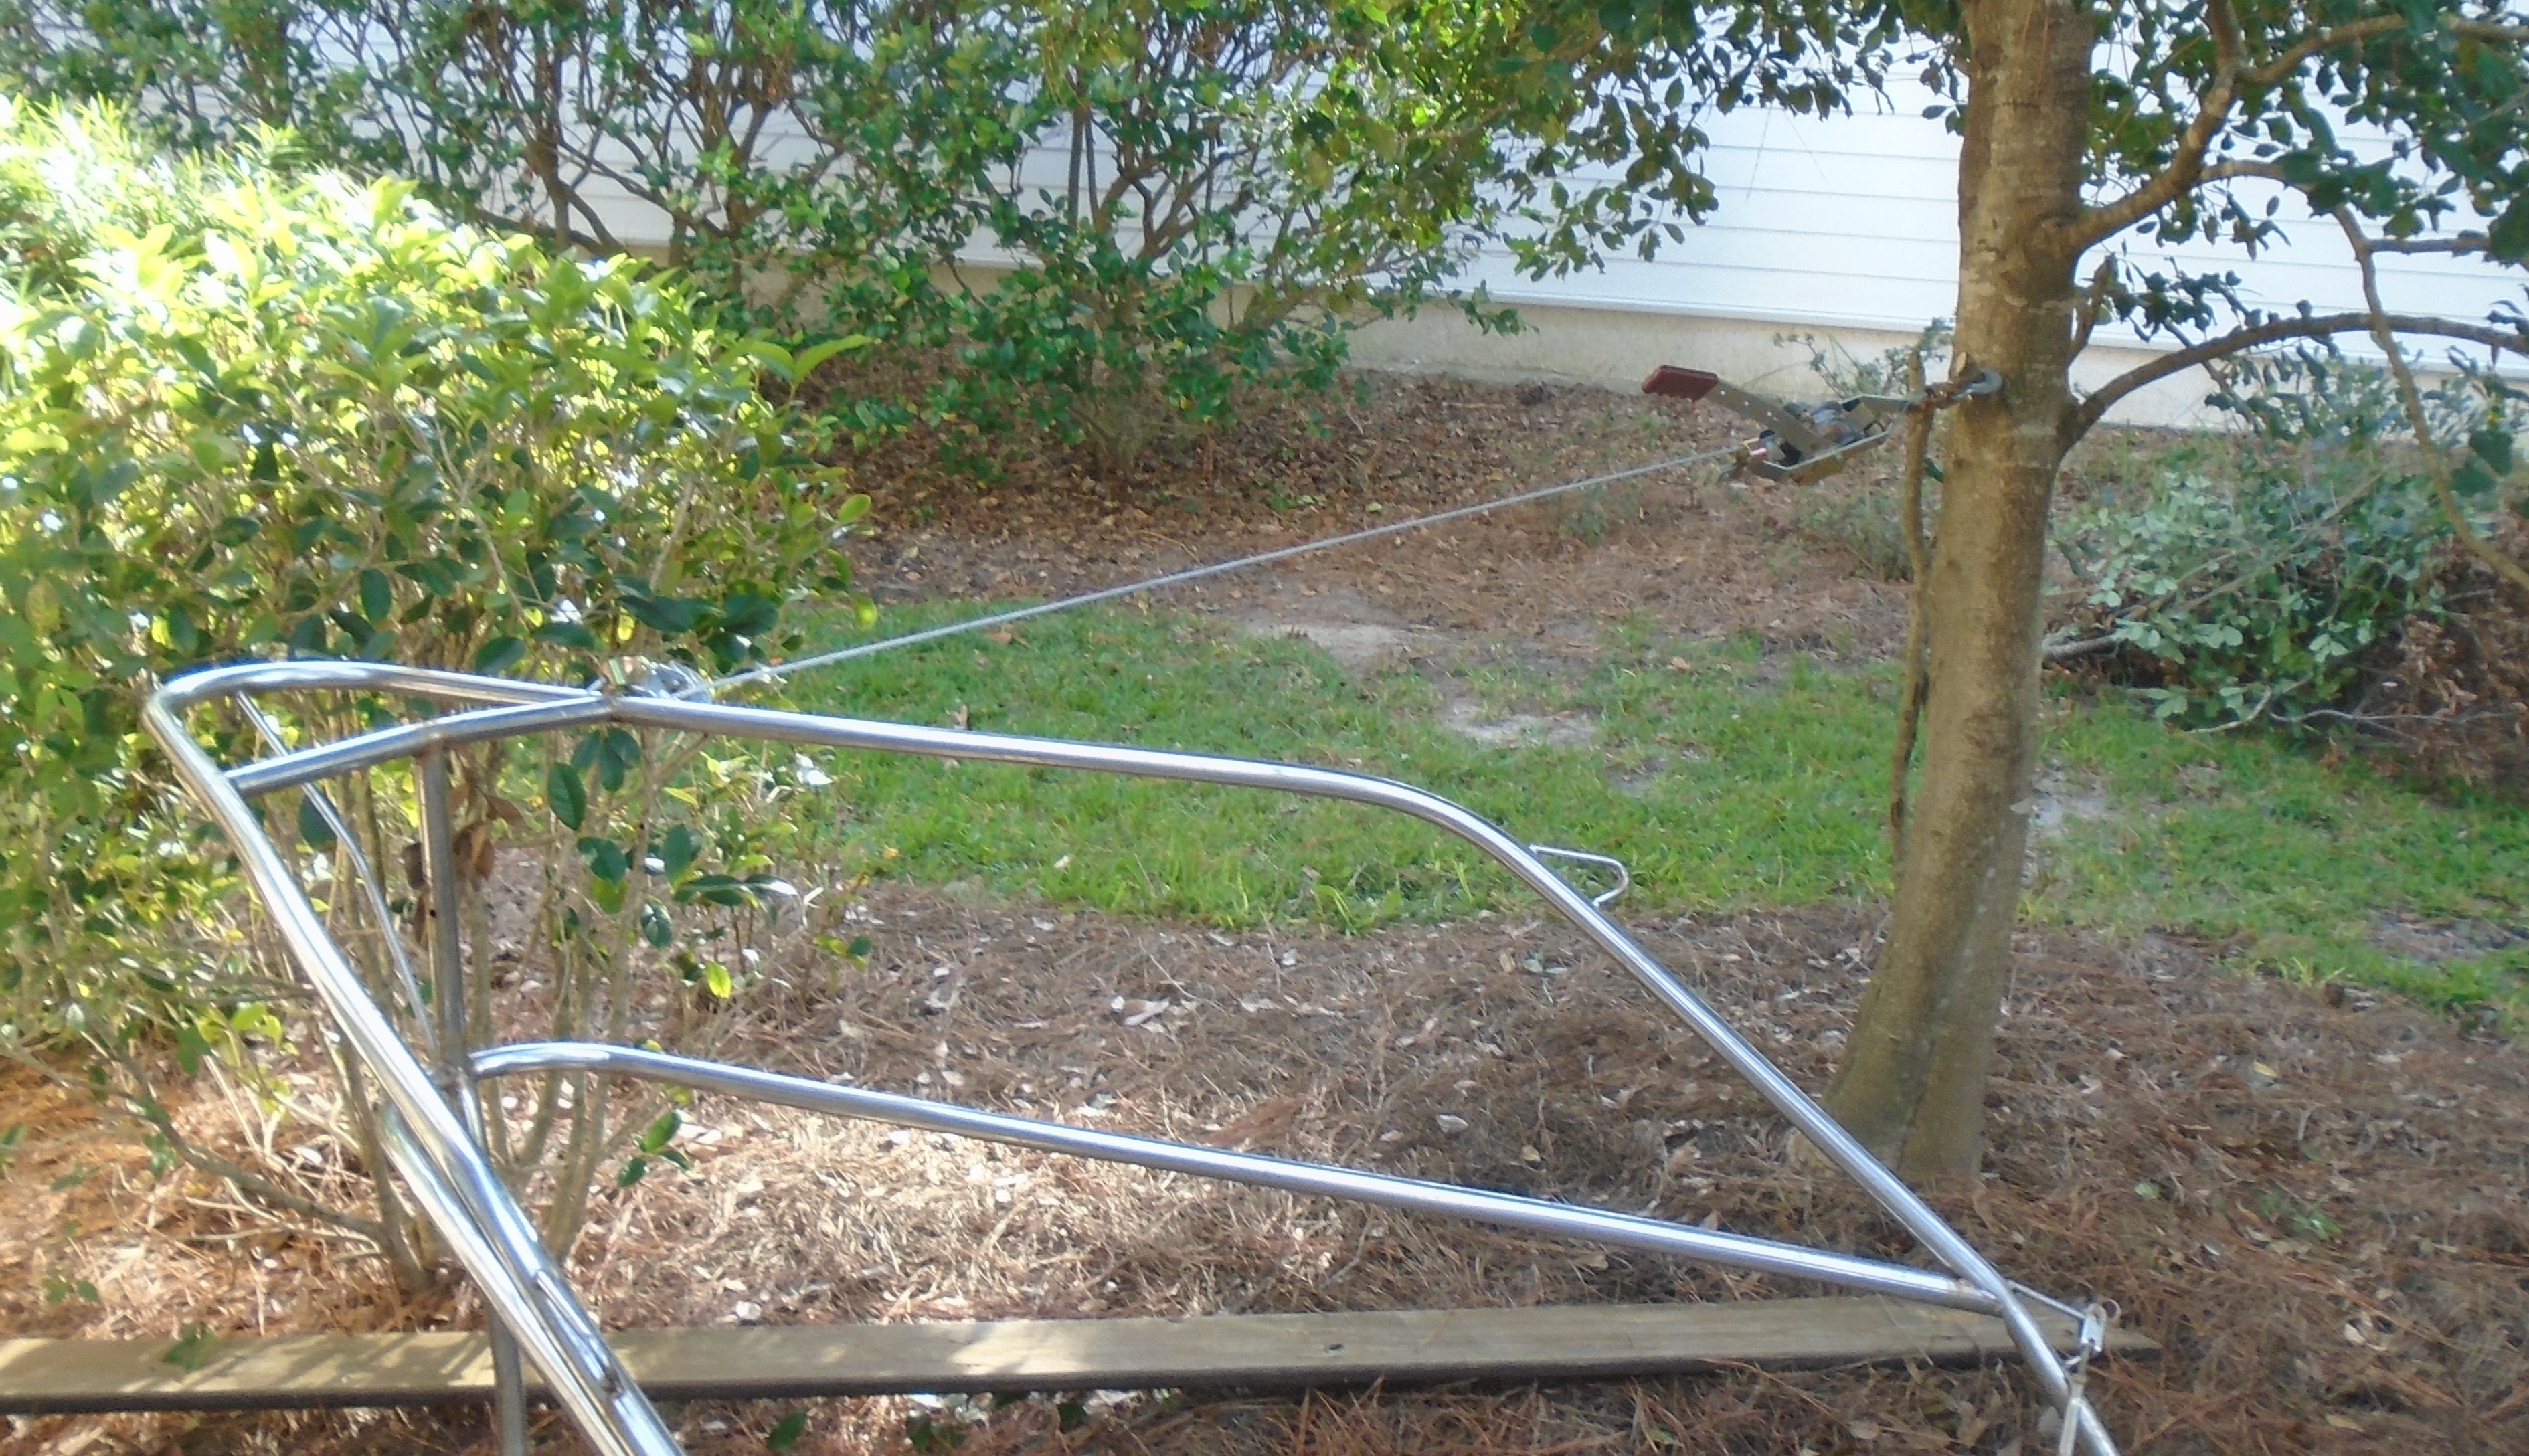
It only worked about halfway. We did get it straighter but the "t-bar" across the top front is bent and we couldn't get the right amount of leverage to pull the lower hoop separate from the upper hoop. Plan fail! Next step - off to the welder so he can look at it. If he can't straighten it, I have a straight "t-bar" section that can be cut from the old swim ladder that maybe can be grafted in to replace the bent one. We'll see but I don't want to have to completely fabricate a new pulpit!
Cheers,
Mark
This has been sitting in my garage for a while, looking forlorn and imitating spaghetti. I would take a swipe at straightening it every now and then between other jobs but 1" stainless tubing is pretty strong! finding a good way to secure the pulpit while pulling on it has been a problem and the other day a friend of mine had what we thought would be a solution. He's about to replace a patio deck around the corner from us and his idea was to bolt the pulpit to the deck so we could apply some serious force to it. The old deck is being completely replaced so we could drill holes, etc., and generally tear things up if needed without harming anything.
I took some measurements from the bow for the locations of the feet, marked them on the deck and bolted the pulpit down:
Then attached the come-a-long to a convenient tree and started applying some real force:
It only worked about halfway. We did get it straighter but the "t-bar" across the top front is bent and we couldn't get the right amount of leverage to pull the lower hoop separate from the upper hoop. Plan fail! Next step - off to the welder so he can look at it. If he can't straighten it, I have a straight "t-bar" section that can be cut from the old swim ladder that maybe can be grafted in to replace the bent one. We'll see but I don't want to have to completely fabricate a new pulpit!
Cheers,
Mark
1 year cost review:
As I promised a while back, I have been keeping a spreadsheet of money spent on the repairs. I broke down the original repair estimate into sections and tried to be as realistic as possible. Just like I said at the beginning of this "journey", I also tried to separate the cost of actual repair vs. boat or component upgrades and stuff I was going to replace anyway. For example, there are no replacement costs for cushions - I (still) have new foam and upholstery in the attic that was delivered the week the hurricane hit. I had planned to replace the cushions anyway so is it a repair cost?
For better or worse, here it is, updated as of yesterday:

A short explanation: this is only a screen shot of a larger spreadsheet. Columns B and D are for previously planned upgrades so disregard. Column C is anticipated repair costs and E is actual money spent. Disregard the total in F.
The only real WAG (actual engineering term!) was the plywood costs. Not knowing how much of the original wood I was going to be able to re-use (basically none) I guessed at this cost and split it up, thus "plywood-bulkhead and floor" which I knew would be replaced, and "cabinetry plywood" which was an unknown. I have over half of the initial ply order still unused but I'll probably miss on this estimate. I have saved on a few other areas so I still think I'll hit close to my original estimate. Also disregard the recovery cost - that was an expense even if I had decided to scrap the boat.
Cheers,
Mark
As I promised a while back, I have been keeping a spreadsheet of money spent on the repairs. I broke down the original repair estimate into sections and tried to be as realistic as possible. Just like I said at the beginning of this "journey", I also tried to separate the cost of actual repair vs. boat or component upgrades and stuff I was going to replace anyway. For example, there are no replacement costs for cushions - I (still) have new foam and upholstery in the attic that was delivered the week the hurricane hit. I had planned to replace the cushions anyway so is it a repair cost?
For better or worse, here it is, updated as of yesterday:
A short explanation: this is only a screen shot of a larger spreadsheet. Columns B and D are for previously planned upgrades so disregard. Column C is anticipated repair costs and E is actual money spent. Disregard the total in F.
The only real WAG (actual engineering term!) was the plywood costs. Not knowing how much of the original wood I was going to be able to re-use (basically none) I guessed at this cost and split it up, thus "plywood-bulkhead and floor" which I knew would be replaced, and "cabinetry plywood" which was an unknown. I have over half of the initial ply order still unused but I'll probably miss on this estimate. I have saved on a few other areas so I still think I'll hit close to my original estimate. Also disregard the recovery cost - that was an expense even if I had decided to scrap the boat.
Cheers,
Mark
McMaster-Carr is your friend! www.mcmaster.comI got lucky, no broken bolts, but I did have a bunch of bent ones. I trash-canned about 25 or so either bent or galled and replaced the washers and nuts. I did spend a few hours with the wire wheel cleaning up the good bolts - if they cleaned up good I think the old bolts are better quality than I've been able to find (at least locally here). I've already had issues with cheap Chinese junk hardware. I ran into that years ago when a Chinese machine shop didn't know what T6-6061 aluminum was!
All the bolts removed and every other one replaced and re-torqued. Ready to mask the cove stripe and paint as soon as another quart of blue shows up.
I hope that your wire wheel was brass. If it was a steel wire wheel you have introduced none stainless free-iron particles to your stainless bolts and they will now start rusting. You can reverse much of that my using the Wichinox or other pickling technique to return the stainless properties. Most people do not realize that stainless steel can rust if contaminated by non-stainless free iron particals. Here is a good article on the matter. http://www.stainlessfoundry.com/metallurgy/knowledgebase/iron-residue-contaminationI got lucky, no broken bolts, but I did have a bunch of bent ones. I trash-canned about 25 or so either bent or galled and replaced the washers and nuts. I did spend a few hours with the wire wheel cleaning up the good bolts - if they cleaned up good I think the old bolts are better quality than I've been able to find (at least locally here). I've already had issues with cheap Chinese junk hardware. I ran into that years ago when a Chinese machine shop didn't know what T6-6061 aluminum was!
All the bolts removed and every other one replaced and re-torqued. Ready to mask the cove stripe and paint as soon as another quart of blue shows up.
Yep, brass wheel. I have been learning a lot about stainless properties from my welder!I hope that your wire wheel was brass. If it was a steel wire wheel you have introduced none stainless free-iron particles to your stainless bolts and they will now start rusting. You can reverse much of that my using the Wichinox or other pickling technique to return the stainless properties. Most people do not realize that stainless steel can rust if contaminated by non-stainless free iron particals. Here is a good article on the matter. http://www.stainlessfoundry.com/metallurgy/knowledgebase/iron-residue-contamination
Cove stripe!
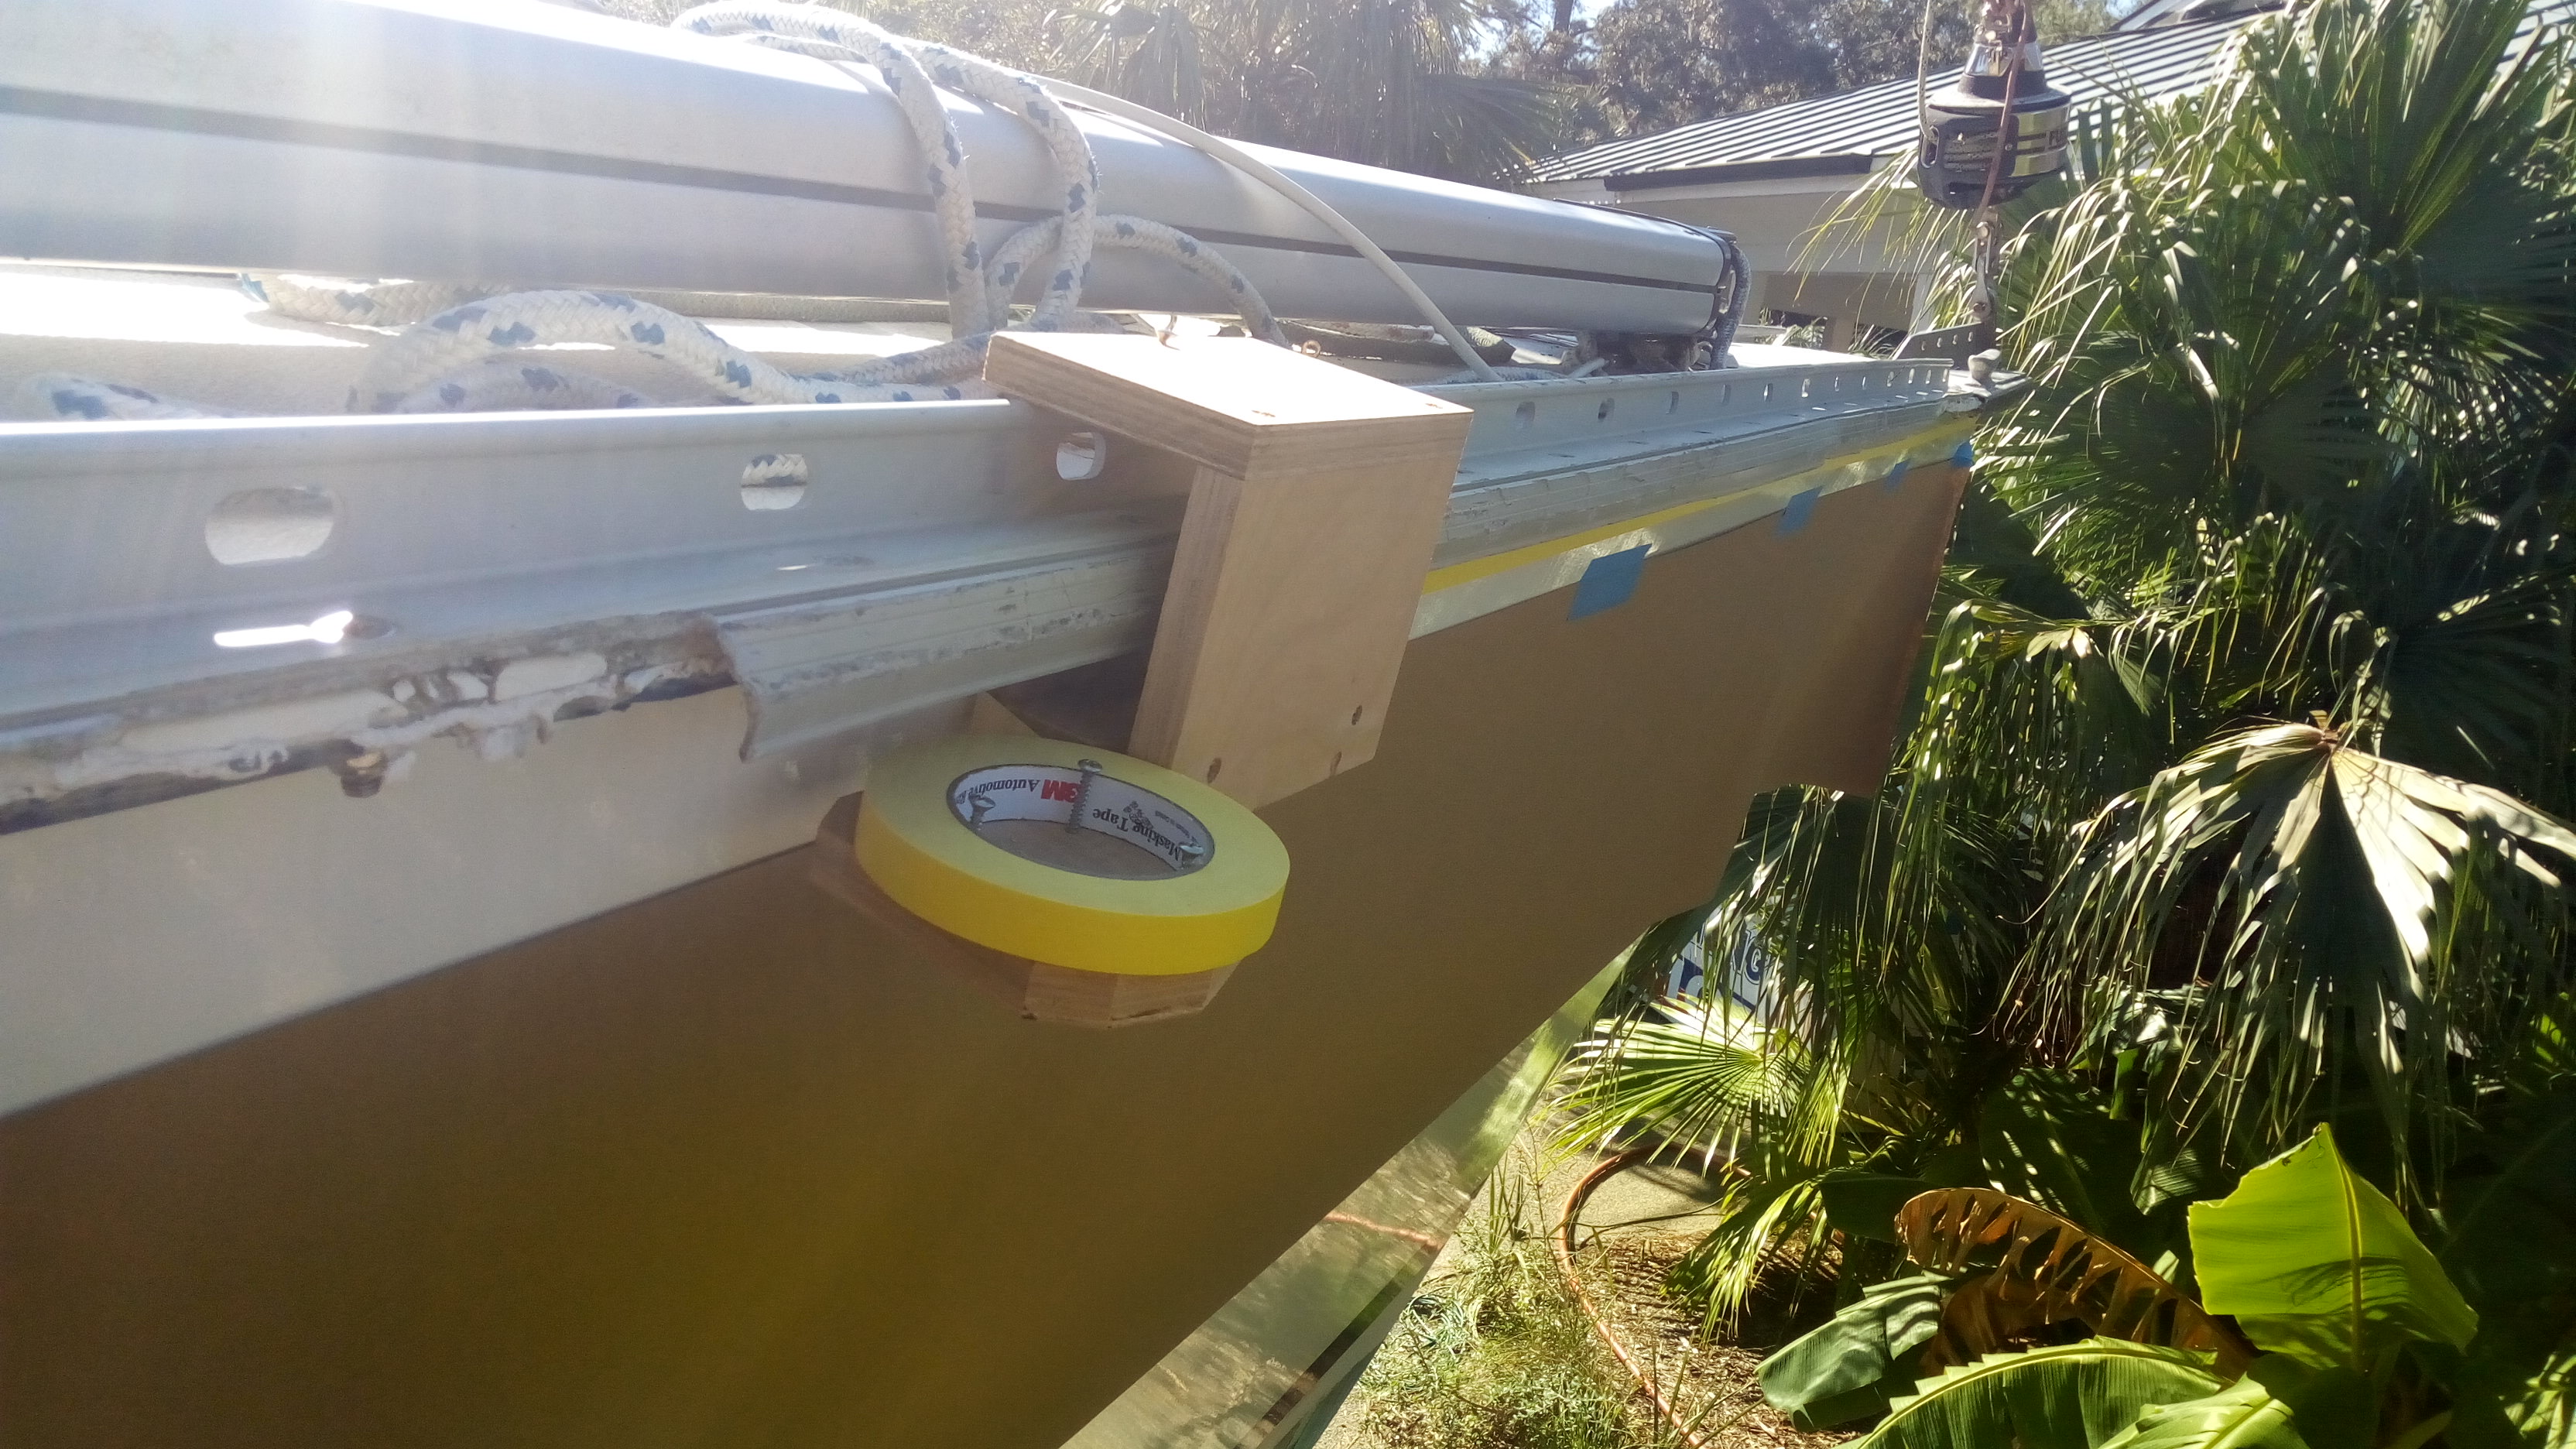
After getting the other half of the toe rail bolts out, it was time to attack the cove stripe. Problem - how to pull a straight tape stripe around the hull, and what to use as a reference?
I decided the cove stripe would look best if it followed the toe rail but how to get a good stripe? A little garage engineering:

I fabbed up a tape dispenser that will set on the top of and slide along the toe rail and measured and set the tape point at the different heights I measured for the stripes. The area the tape slides thru is grooved slightly using the router. Works like a charm!
So to prep, I put up some paper to catch any spills and other boo-boos, then taped everything up. A tip for taping, plan the tape removal ahead of time and layer to make multiple stripes or colors easier. I learned that years ago while painting this:
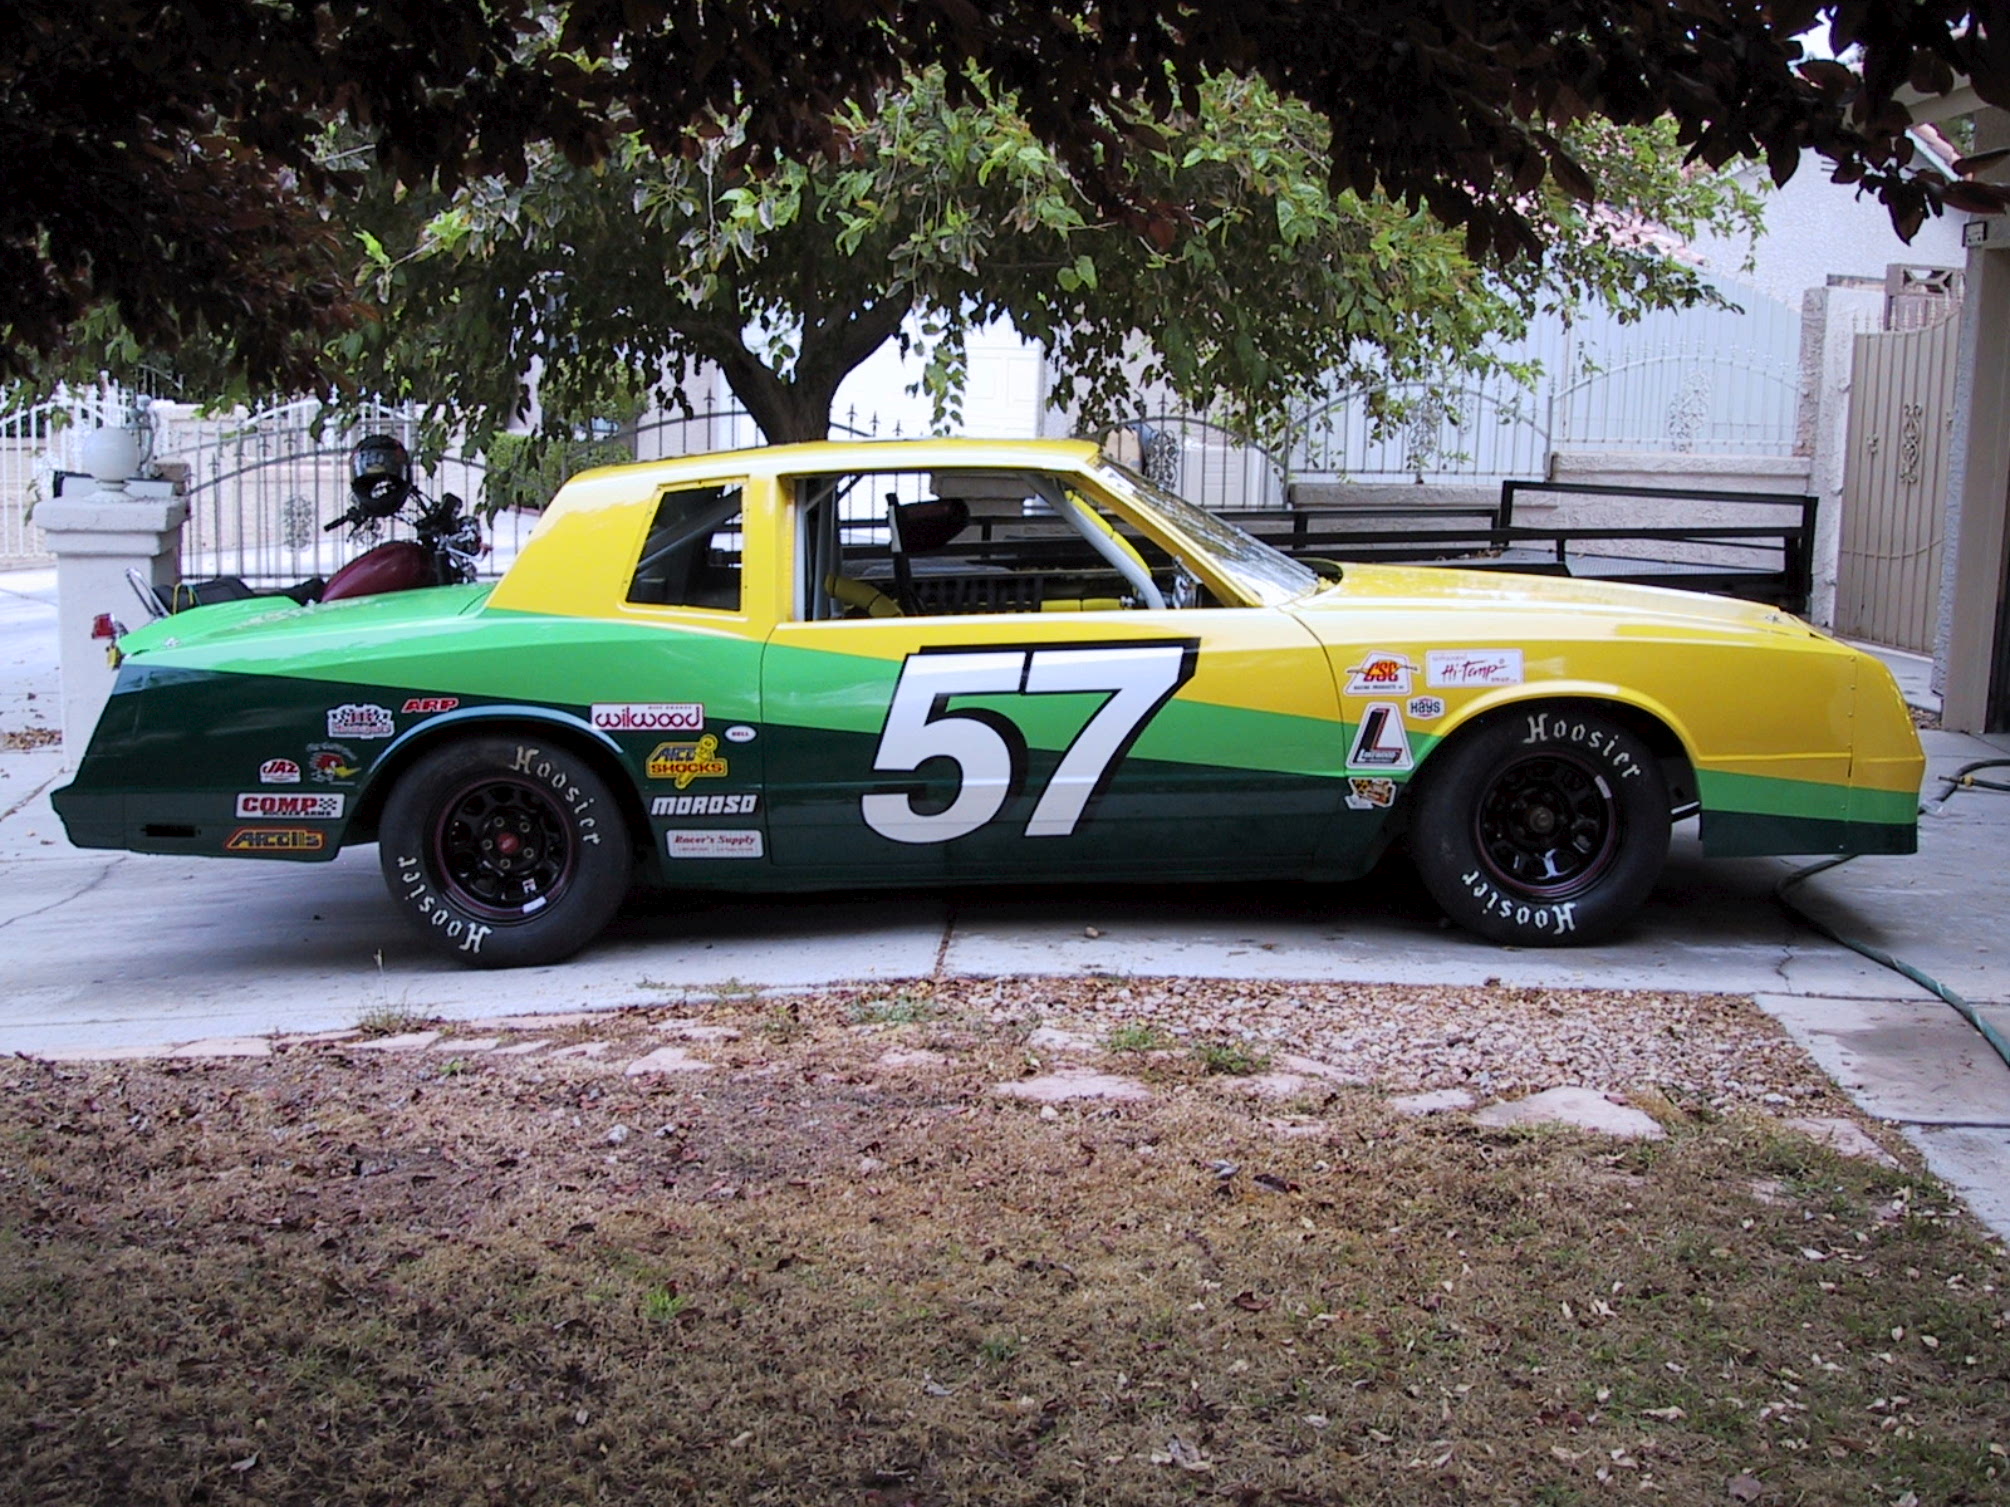
Believe it or not, I painted this race car - 3 colors plus clear coat all in one day! Made possible by strategic taping!
With the stripes taped up, time for some paint. More Royal Blue, tape off and here she is:


I'll get better pics tomorrow, I was running out of daylight!
Cheers,
Mark
After getting the other half of the toe rail bolts out, it was time to attack the cove stripe. Problem - how to pull a straight tape stripe around the hull, and what to use as a reference?
I decided the cove stripe would look best if it followed the toe rail but how to get a good stripe? A little garage engineering:
I fabbed up a tape dispenser that will set on the top of and slide along the toe rail and measured and set the tape point at the different heights I measured for the stripes. The area the tape slides thru is grooved slightly using the router. Works like a charm!
So to prep, I put up some paper to catch any spills and other boo-boos, then taped everything up. A tip for taping, plan the tape removal ahead of time and layer to make multiple stripes or colors easier. I learned that years ago while painting this:
Believe it or not, I painted this race car - 3 colors plus clear coat all in one day! Made possible by strategic taping!
With the stripes taped up, time for some paint. More Royal Blue, tape off and here she is:
I'll get better pics tomorrow, I was running out of daylight!
Cheers,
Mark
Last edited:
It is definatly strange stuff. I was surprised the first time i heard that you could make stainless rust just by lightly rubbing an iron bar on it. The worst if if someone is grinding some non-stainless steel nearby.
Clean some stainless with plain steel wool, and see what happens? LOLIt is definatly strange stuff. I was surprised the first time i heard that you could make stainless rust just by lightly rubbing an iron bar on it. The worst if if someone is grinding some non-stainless steel nearby.
Plumbing and letters:
Work continues, though I have taken a few days off here and there - I had been pushing pretty hard during the painting process and needed some time away!
There was a big hole remaining in the sugar scoop for the shower, so it got replaced. Though I'm not quite ready to run the fresh water plumbing yet I did have to plumb the shower through the transom. I love PEX!

So easy to work with:

Hot & cold measured, cut and prepped before installing the lines:

Hooked up to the shower:

And everything installed and sealed up:

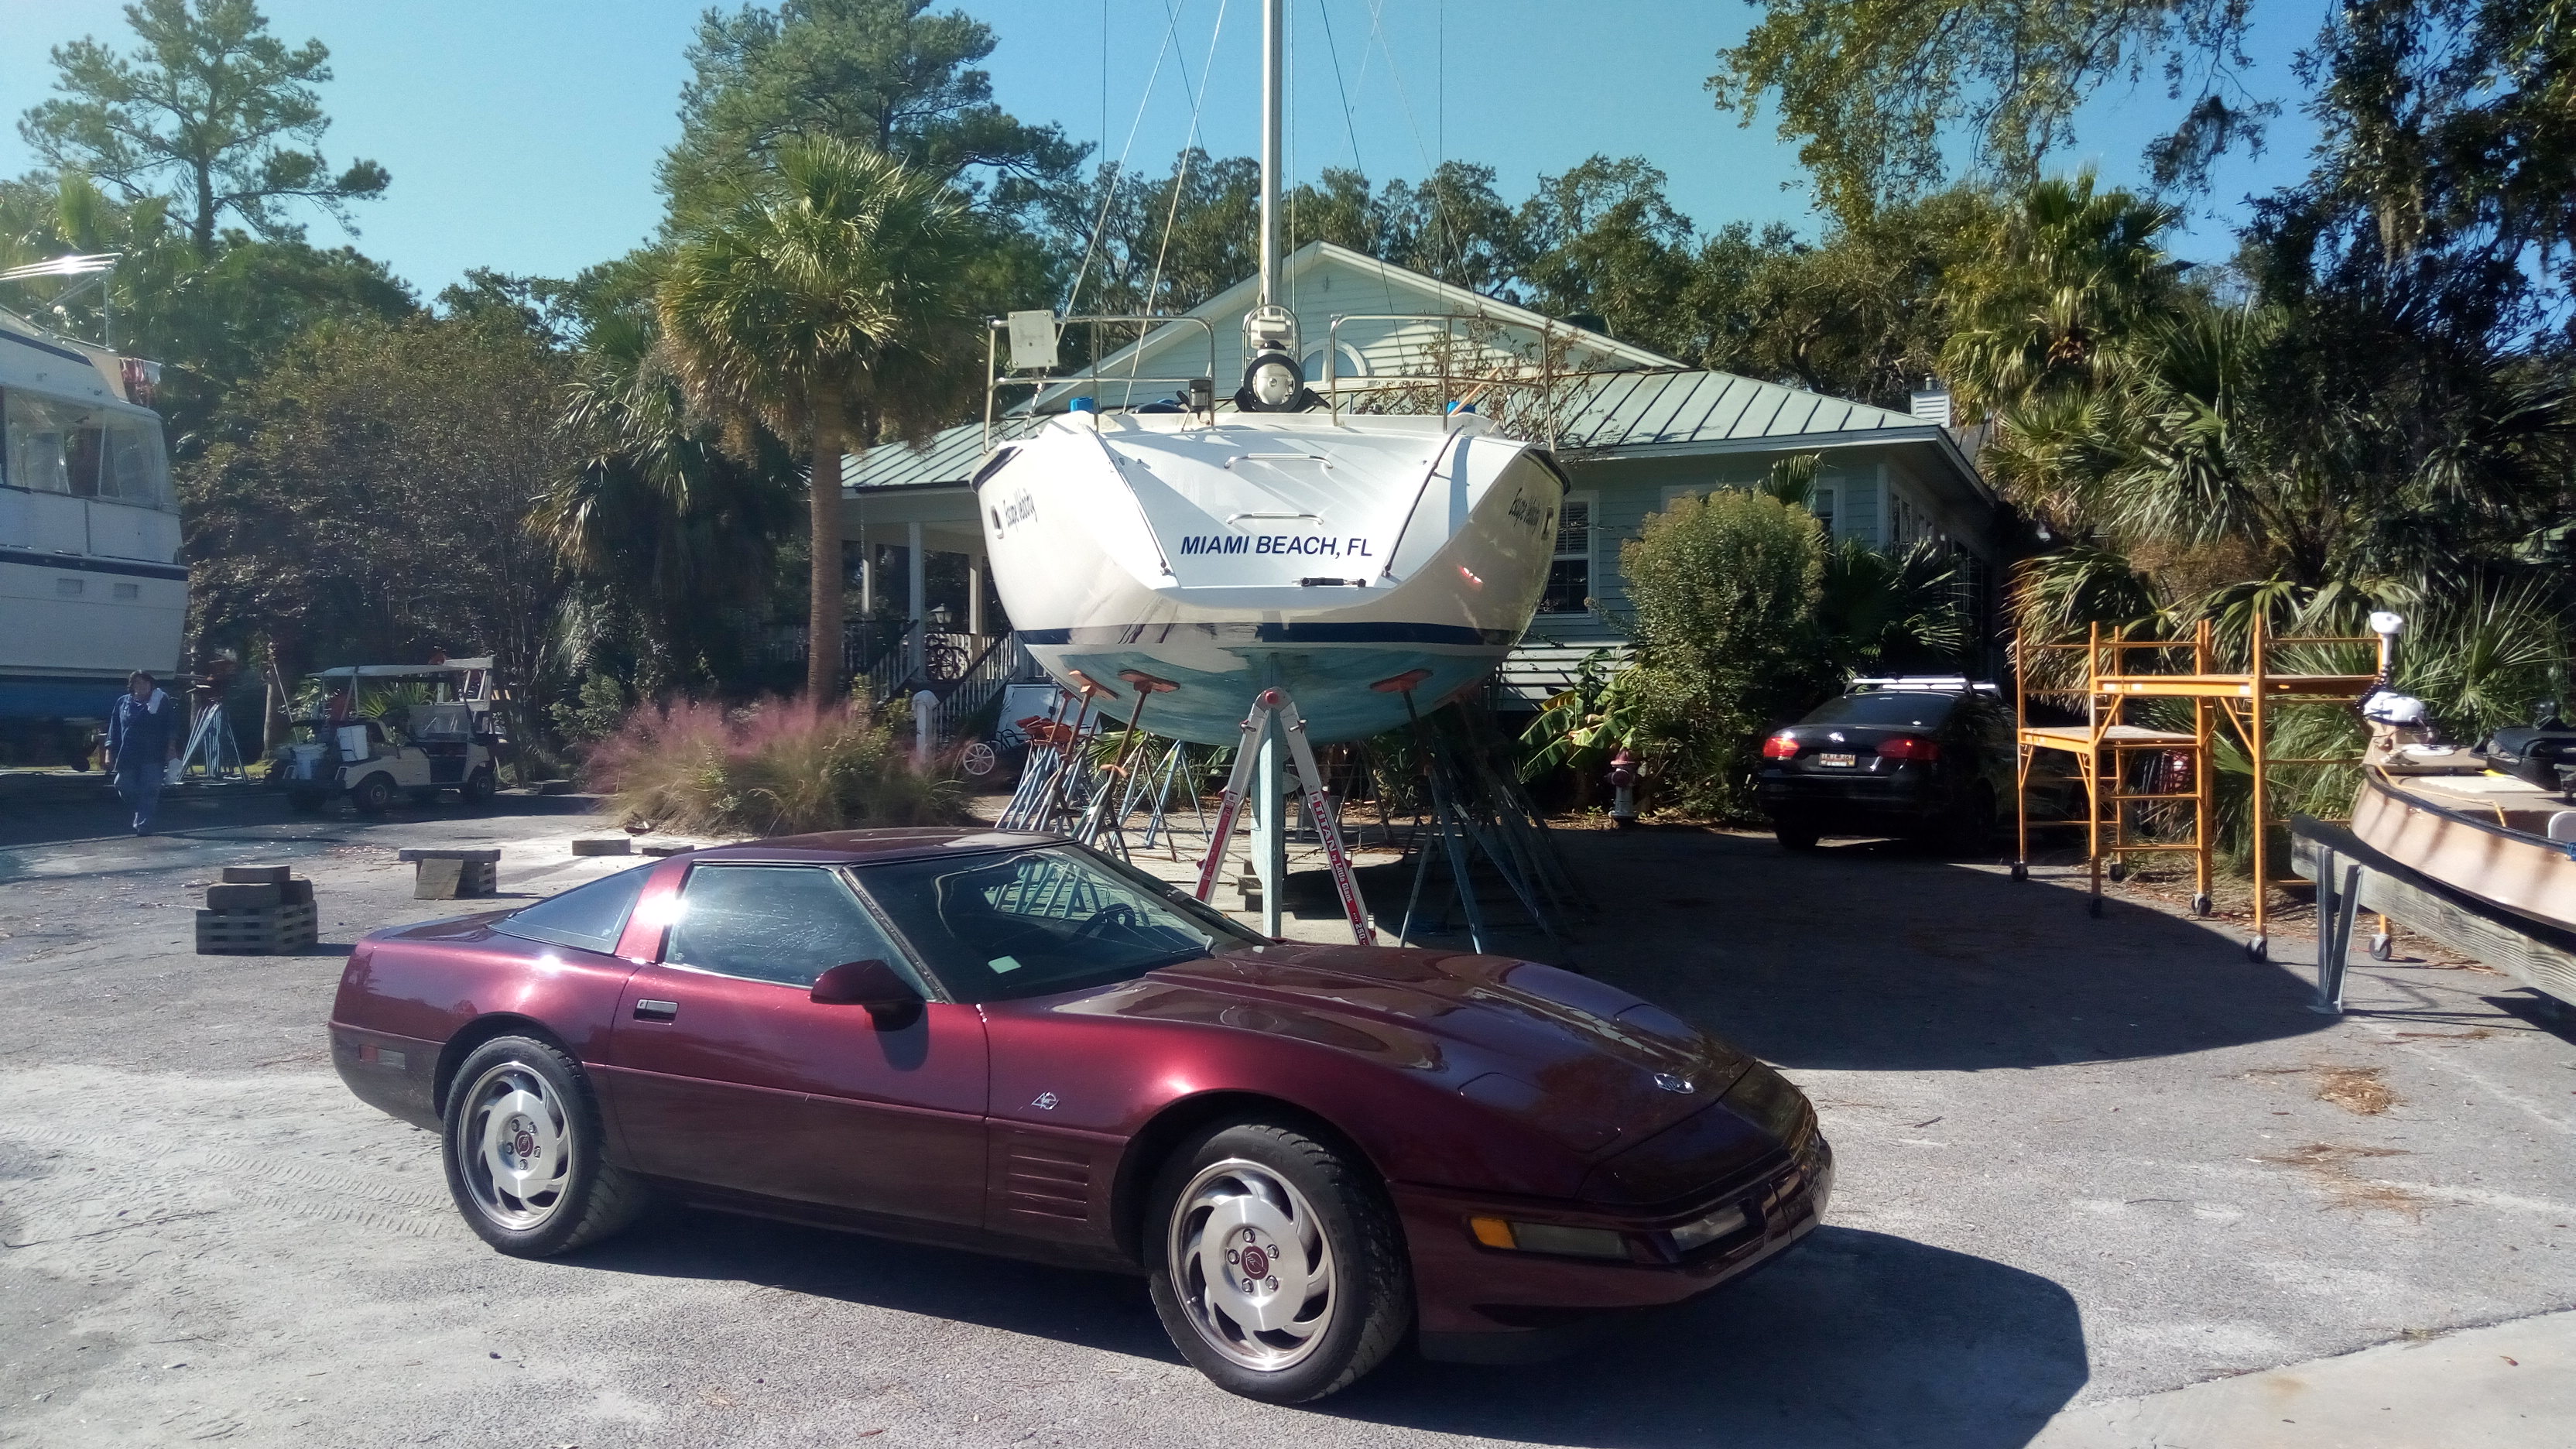
For the first time in a really long time, the space next to me was unoccupied. This might be the first full side photo I've been able to get:

I got a local company to make up the name and hailing port in vinyl. Got them put on:

Next up, working on the deck for a while, and some cool new tools!
Cheers,
Mark
Work continues, though I have taken a few days off here and there - I had been pushing pretty hard during the painting process and needed some time away!
There was a big hole remaining in the sugar scoop for the shower, so it got replaced. Though I'm not quite ready to run the fresh water plumbing yet I did have to plumb the shower through the transom. I love PEX!
So easy to work with:
Hot & cold measured, cut and prepped before installing the lines:
Hooked up to the shower:
And everything installed and sealed up:
For the first time in a really long time, the space next to me was unoccupied. This might be the first full side photo I've been able to get:
I got a local company to make up the name and hailing port in vinyl. Got them put on:
Next up, working on the deck for a while, and some cool new tools!
Cheers,
Mark
The name and port graphics look great.
I have one question. How did you tie in the patch for the big hole shown in post #46? You said that the patch panel was 10 layers thick and that is glassed onto tabs attached to the inside of the hull. The last photo that I saw of that patch was just after you glassed it to the tabbing. I am assuming that you ground a bevel into the hull to tie the patch to the hull, but did you do anything to tie in the first 10 layers of the patch base?
I have one question. How did you tie in the patch for the big hole shown in post #46? You said that the patch panel was 10 layers thick and that is glassed onto tabs attached to the inside of the hull. The last photo that I saw of that patch was just after you glassed it to the tabbing. I am assuming that you ground a bevel into the hull to tie the patch to the hull, but did you do anything to tie in the first 10 layers of the patch base?
Or 6 knots...or so. Or even slower. Dang that’s a great name!Something like 25,020 mph or something like that