At the end of last season, while motoring back to my slip from a nice afternoon sail, I noticed a loud repetitive knocking sound originating from below. The frequency of the knocking seemed to follow the throttle - as I increased the throttle, the frequency increased; decreasing the throttle the frequency of the knocking decreased, and when dropping it to a minimum the knocking seemed to go away completely. I then wanted to determine if the source of the knocking was the BUKH DV10 engine, or something related to the drive train. To make this determination, I simply put the transmission in neutral and revved up and down the engine. There was no knocking or banging sound. I therefore concluded that the knocking was related to the drive train.
I managed to get the boat safely back to my slip without incident, however the knocking persisted the whole way back. After I tied up the boat, I tried forward and reverse at different RPMs and didn't notice the knocking anymore. Was there something attached to the prop that caused it to be unbalanced that became free after forward and reverse in the slip? Was the folding prop stuck causing the prop shaft to become unbalanced? What disturbed me was that the problem seemed to go away on its own without explanation.
I asked the yard mechanic to take a look at the prop area when he pulled the boat to determine if there were any signs of something that would have cause the prop shaft to be unbalanced. He came back that the Cutless bearing was worn, and that that was likely the cause of the noise. I seemed to remember there was always a little play in the bearing and was skeptical of his analysis, although there were no obvious marks anywhere on the hull that would suggest that something was wrapped around the prop hitting the hull.
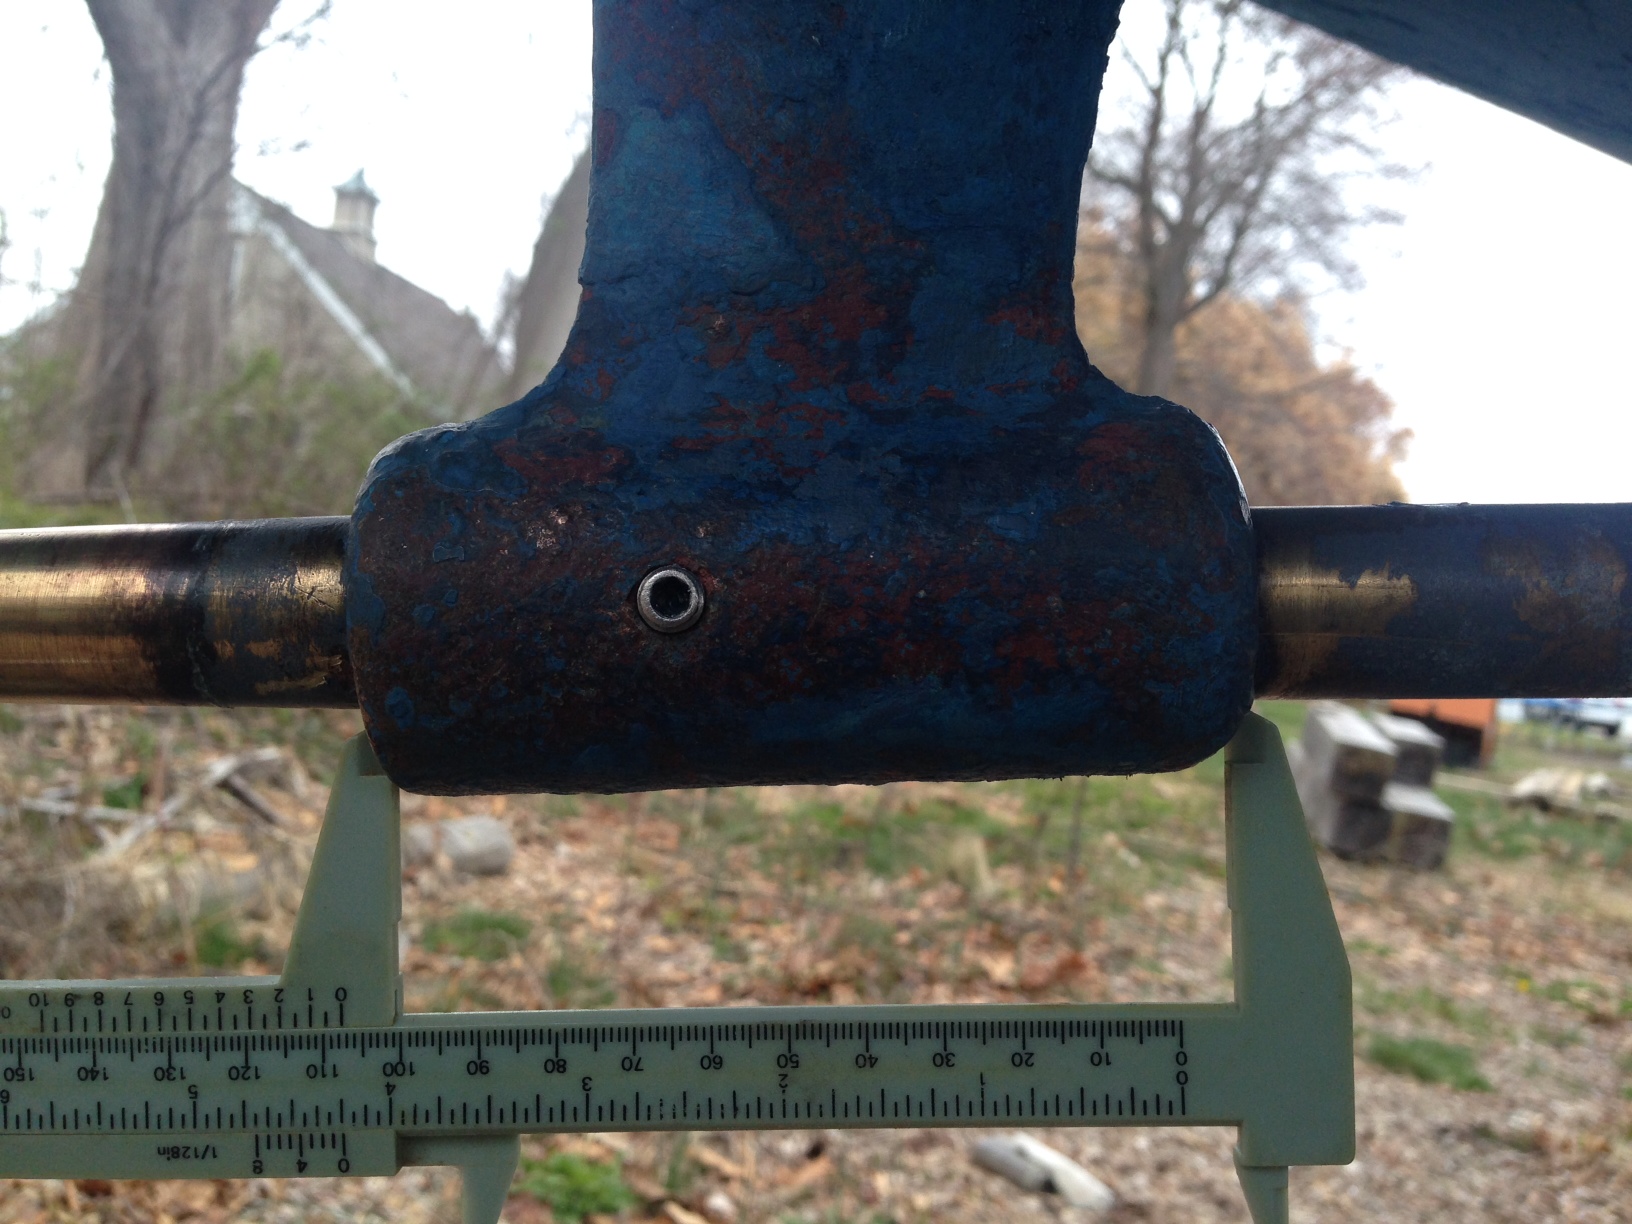
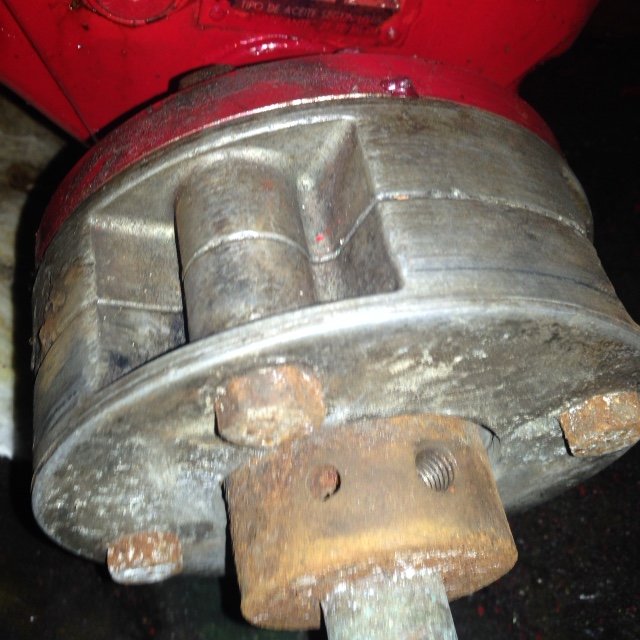
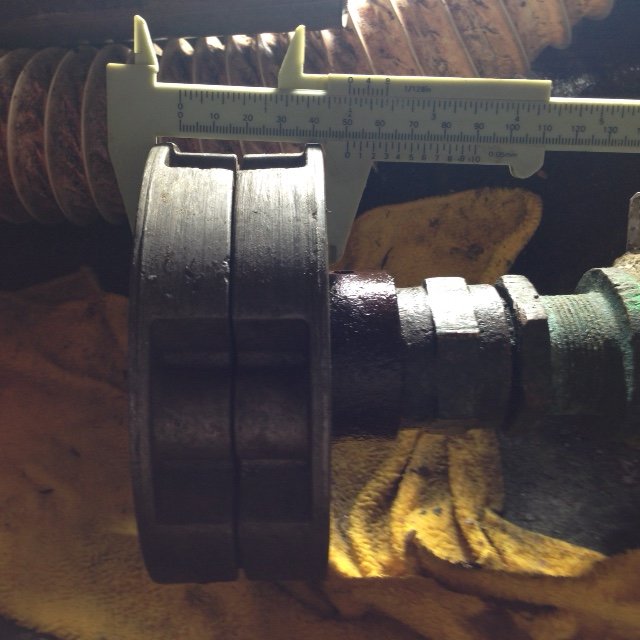
So I started a project to replace the Cutless bearing. My plan was to perform a 'shaft-in' Cutlass bearing replacement using the 'Strut-Pro' bearing removal tool. First, I removed the Martek folding prop. Then, I cleaned up the prop strut to take accurate measurements so I could correctly specify and order the Cutless bearing. This is when I encountered my first obstacle - the Cutless bearing is a non-standard size - I measured 1"x1-3/8"x4-1/4" and the standard size is 1"x1-3/8"x4" - 1/4" short! My options are: (1) have a custom bearing made but that will take time and cost more, (2) use two bearings and cut them so that there combined 'stacked' length is 4-1/4" being careful to align the water channels, (3) use the standard size and justify it to the front of the strut leaving a 1/4" reveal on the aft side, or (4) use the standard size bearing and cut the strut to match the bearing. I'm leaning toward the last option.
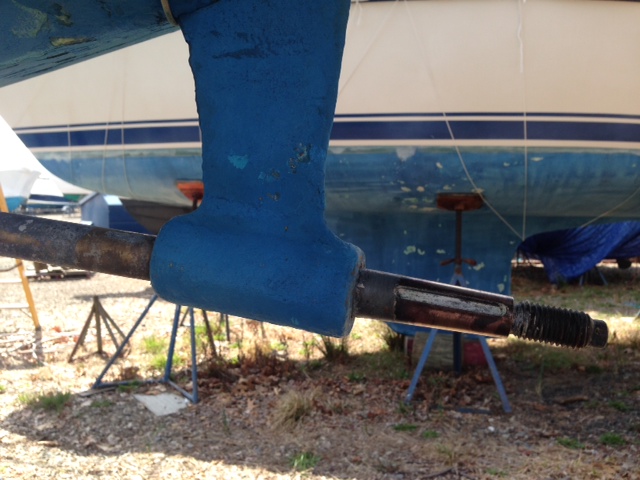
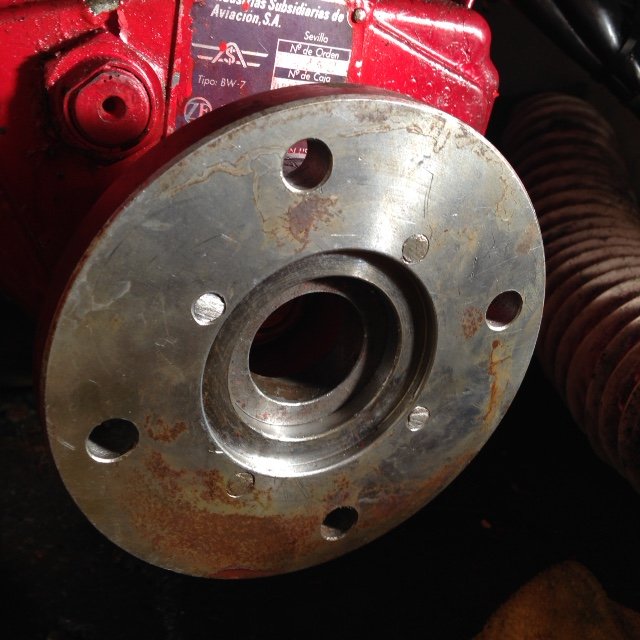
The Strut-Pro tool I was planning to use to remove the bearing without removing the shaft turned out to be harder to find than I thought. My plan was to borrow/rent one because the price of the tool is around $400. In the process of looking around for one, I learned a couple of things. First, in ideal conditions, the tools works fine - but in many more 'less then ideal conditions' the tool is ineffective requiring the shaft to be removed and the bearing removed using traditional methods (e.g. hacksaw blade). Secondly, after talking to some yard mechanics it was recommended to remove the shaft anyway to check it it was bent. Replacing the Cutless bearing with a bent propshaft would cause premature wearing of the bearing. In fact, I believe my prop shaft may be slightly bent because when the prop key is at the 12:00 position there is space at the top of the bearing, and when the prop shaft is at the 6:00 position there is space at the bottom of the bearing. So I gave up on the 'shaft-in' Cutless bearing replacement and opted to remove the brass prop shaft and replace it with a stainless steel prop shaft.'
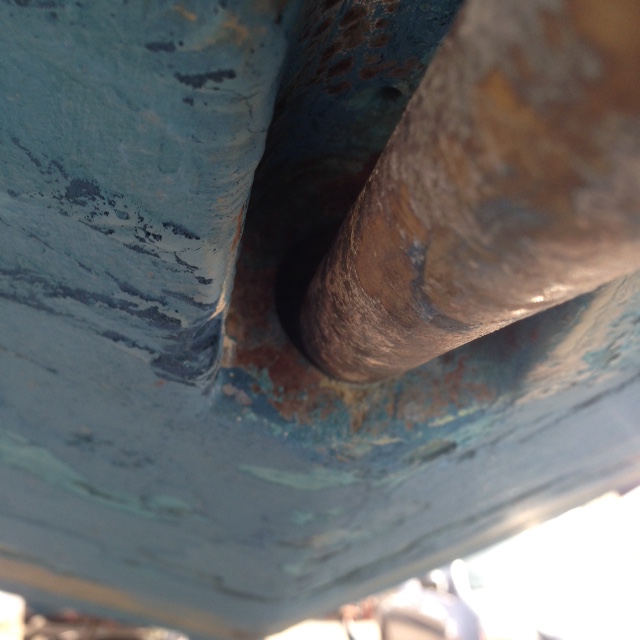
Removing the prop shaft will also give me the opportunity to replace the stuffing box hose and clean/repack the stuffing box. Maybe I would even explore the possibility of replacing the stuffing box with a drip-less system. Also, in order to get the prop shaft past the rudder, the rudder has to be removed. This would provide me with the opportunity to replace the rudder bushings.
So now the fun begins. My overall plan is as follows:
Remove prop (done). Send prop out to be balanced. Remove transmission flex coupling from drive shaft. Replace four engine mounts. Remove [brass] prop shaft. Remove Cutless bearing from prop strut. Re-bed prop strut? Remove stuffing box. Install repacked/new stuffing box/hose/clamps, etc. Measure and order new flex coupling and have fitted with new stainless steel propshaft. Install stuffing box, propshaft, coupling and align. Replace rudder bushings, rudder. Replace prop. Spash. Adjust stuffing box.
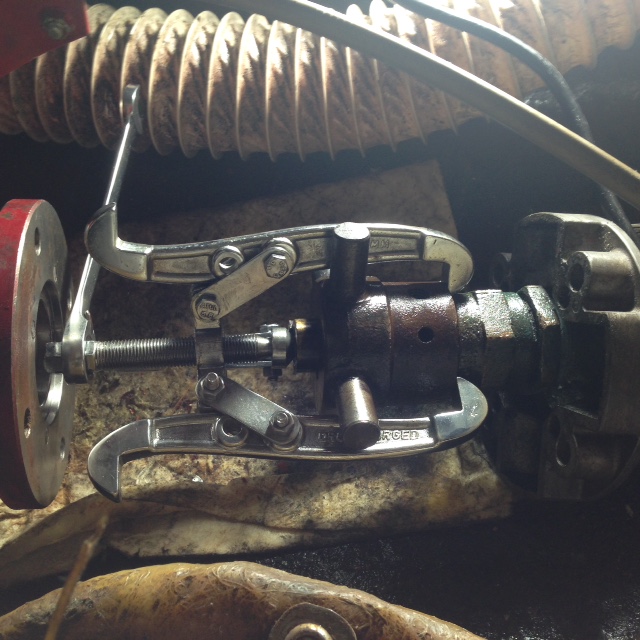
And of course I start this project at the beginning of the season. At the moment, I am wrestling with removing the flex coupling from the prop shaft.
I would love to hear from anyone out there with any similar experience that has any advise.
Thanks!


I managed to get the boat safely back to my slip without incident, however the knocking persisted the whole way back. After I tied up the boat, I tried forward and reverse at different RPMs and didn't notice the knocking anymore. Was there something attached to the prop that caused it to be unbalanced that became free after forward and reverse in the slip? Was the folding prop stuck causing the prop shaft to become unbalanced? What disturbed me was that the problem seemed to go away on its own without explanation.
I asked the yard mechanic to take a look at the prop area when he pulled the boat to determine if there were any signs of something that would have cause the prop shaft to be unbalanced. He came back that the Cutless bearing was worn, and that that was likely the cause of the noise. I seemed to remember there was always a little play in the bearing and was skeptical of his analysis, although there were no obvious marks anywhere on the hull that would suggest that something was wrapped around the prop hitting the hull.
So I started a project to replace the Cutless bearing. My plan was to perform a 'shaft-in' Cutlass bearing replacement using the 'Strut-Pro' bearing removal tool. First, I removed the Martek folding prop. Then, I cleaned up the prop strut to take accurate measurements so I could correctly specify and order the Cutless bearing. This is when I encountered my first obstacle - the Cutless bearing is a non-standard size - I measured 1"x1-3/8"x4-1/4" and the standard size is 1"x1-3/8"x4" - 1/4" short! My options are: (1) have a custom bearing made but that will take time and cost more, (2) use two bearings and cut them so that there combined 'stacked' length is 4-1/4" being careful to align the water channels, (3) use the standard size and justify it to the front of the strut leaving a 1/4" reveal on the aft side, or (4) use the standard size bearing and cut the strut to match the bearing. I'm leaning toward the last option.
The Strut-Pro tool I was planning to use to remove the bearing without removing the shaft turned out to be harder to find than I thought. My plan was to borrow/rent one because the price of the tool is around $400. In the process of looking around for one, I learned a couple of things. First, in ideal conditions, the tools works fine - but in many more 'less then ideal conditions' the tool is ineffective requiring the shaft to be removed and the bearing removed using traditional methods (e.g. hacksaw blade). Secondly, after talking to some yard mechanics it was recommended to remove the shaft anyway to check it it was bent. Replacing the Cutless bearing with a bent propshaft would cause premature wearing of the bearing. In fact, I believe my prop shaft may be slightly bent because when the prop key is at the 12:00 position there is space at the top of the bearing, and when the prop shaft is at the 6:00 position there is space at the bottom of the bearing. So I gave up on the 'shaft-in' Cutless bearing replacement and opted to remove the brass prop shaft and replace it with a stainless steel prop shaft.'
Removing the prop shaft will also give me the opportunity to replace the stuffing box hose and clean/repack the stuffing box. Maybe I would even explore the possibility of replacing the stuffing box with a drip-less system. Also, in order to get the prop shaft past the rudder, the rudder has to be removed. This would provide me with the opportunity to replace the rudder bushings.
So now the fun begins. My overall plan is as follows:
Remove prop (done). Send prop out to be balanced. Remove transmission flex coupling from drive shaft. Replace four engine mounts. Remove [brass] prop shaft. Remove Cutless bearing from prop strut. Re-bed prop strut? Remove stuffing box. Install repacked/new stuffing box/hose/clamps, etc. Measure and order new flex coupling and have fitted with new stainless steel propshaft. Install stuffing box, propshaft, coupling and align. Replace rudder bushings, rudder. Replace prop. Spash. Adjust stuffing box.
And of course I start this project at the beginning of the season. At the moment, I am wrestling with removing the flex coupling from the prop shaft.
I would love to hear from anyone out there with any similar experience that has any advise.
Thanks!


