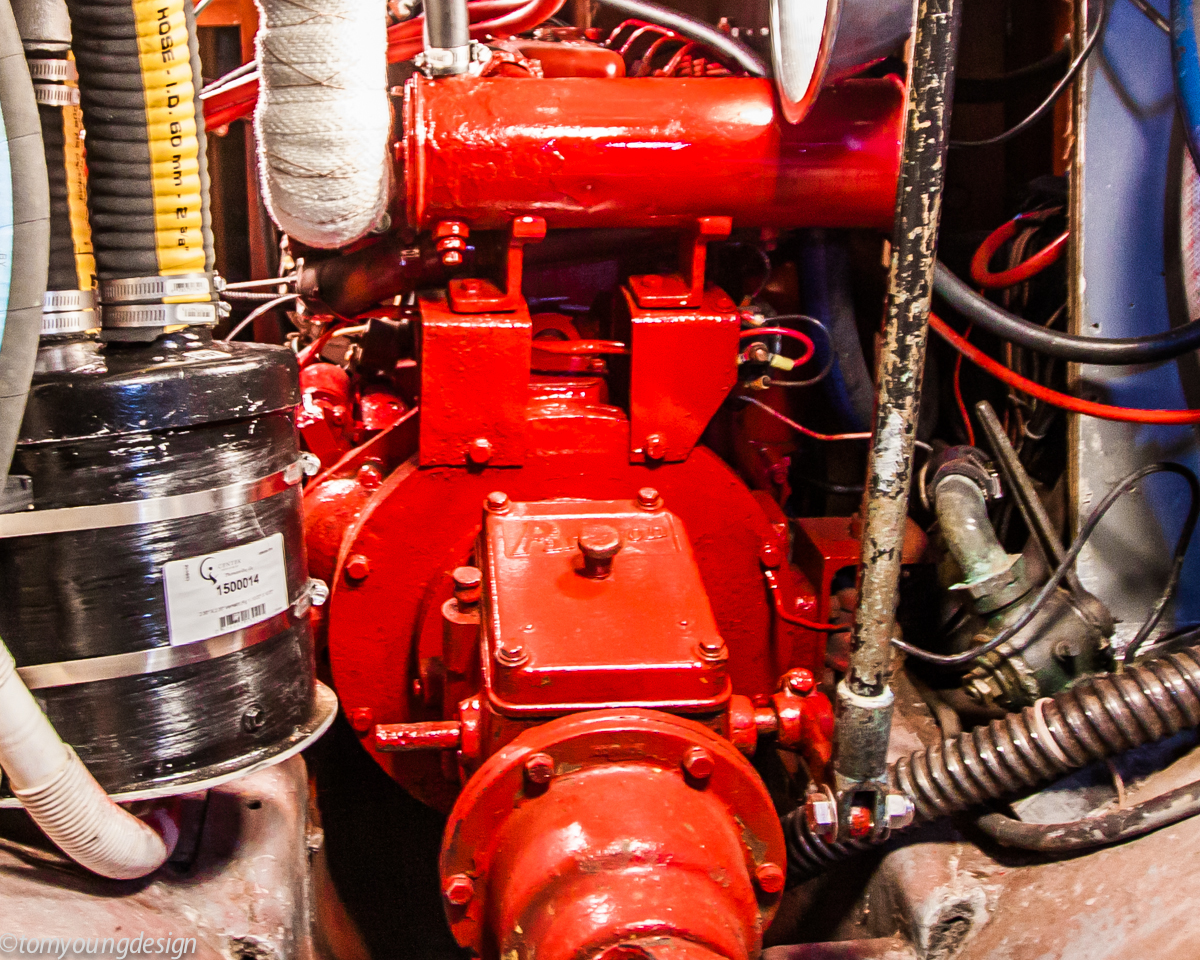
Engine access isn't the greatest on most sailboats, especially older ones like mine. My best access to the shaft and coupling is through a cockpit manhole, here, under dogs, cushions, sheets and feet.
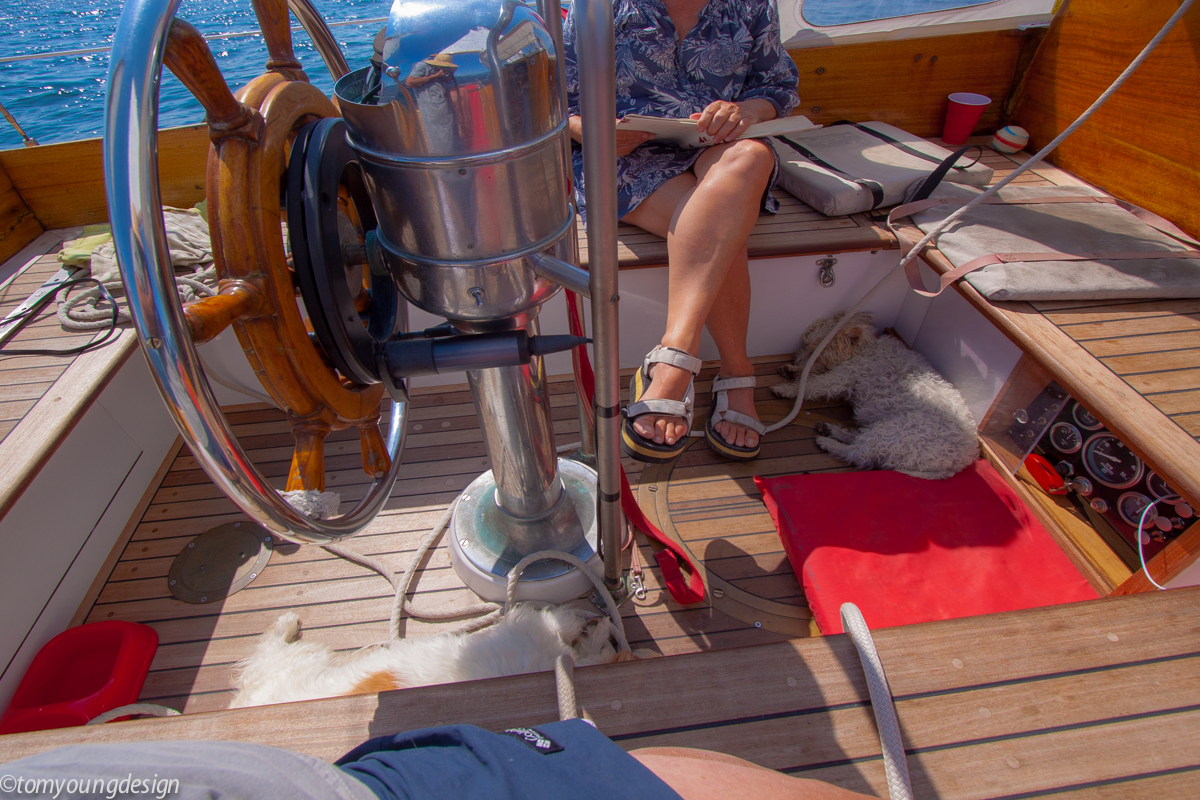
The manhole gets you 'in there' but not in the best position to try and extract a prop shaft from an old rusty coupling. I'm standing on a scrap plywood seat placed just over the shaft and bronze shaft log.
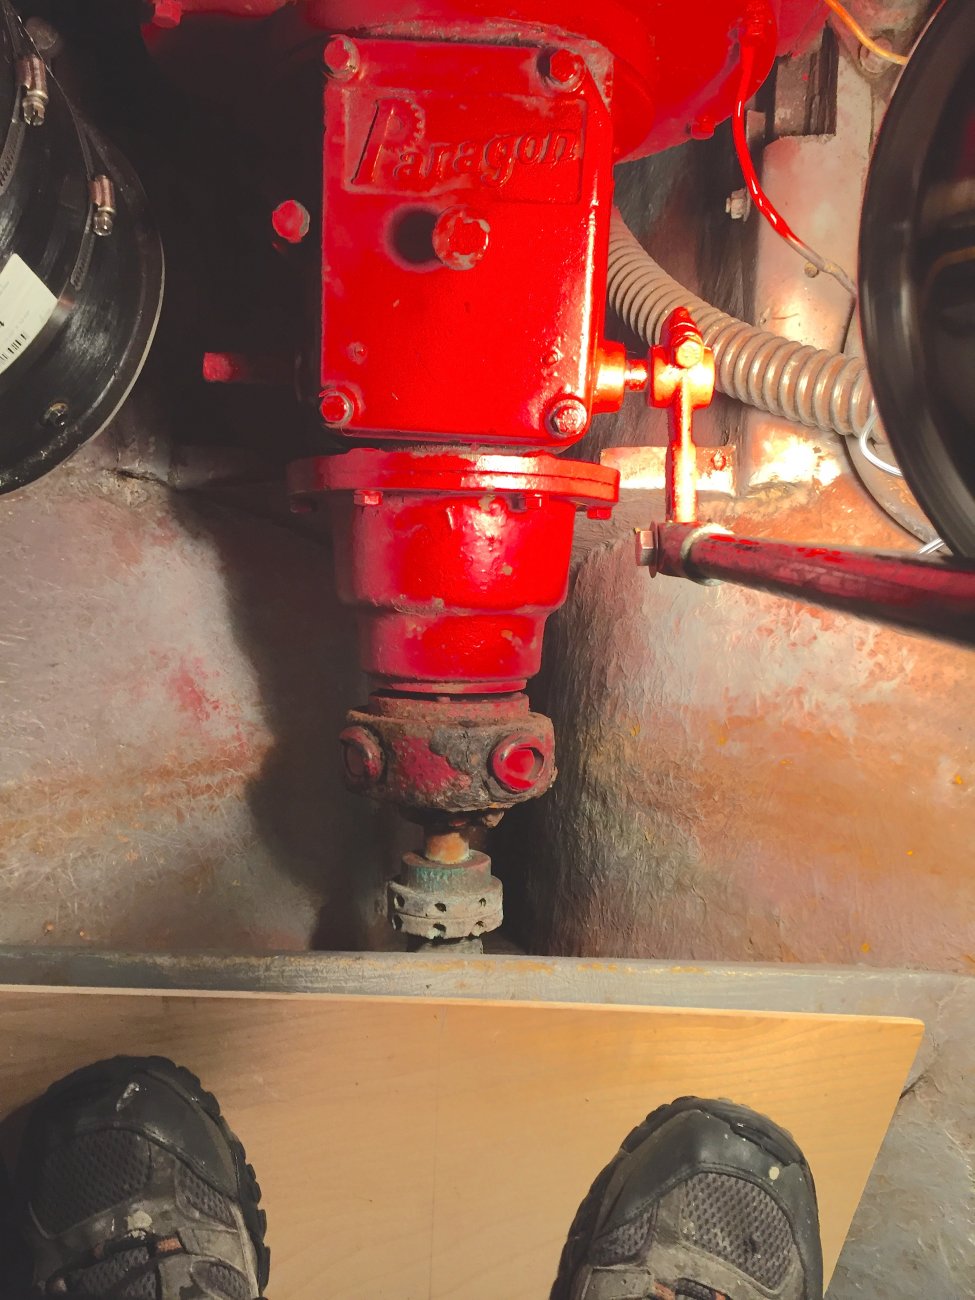
Extraction is not going to happen. When I re-powered about 10 years ago I installed a new cutlass while the shaft and coupling (never separated) where out. I noticed a little wear in the cutlass area so I know the shaft needs replacing today.
Voila, standing in the manhole, in less than 10 seconds, this carbide bad boy nibbled through the 1 1/8" SS shaft. No flying sparks or chips.
Does anyone know about this coupling? My guess is it and the SS shaft were installed in 1974 when the boat had it's first re-power. The cut was easy but one of the 4 coupling bolts heads was corroded to a useless nub. The other 3, SS, were like new.
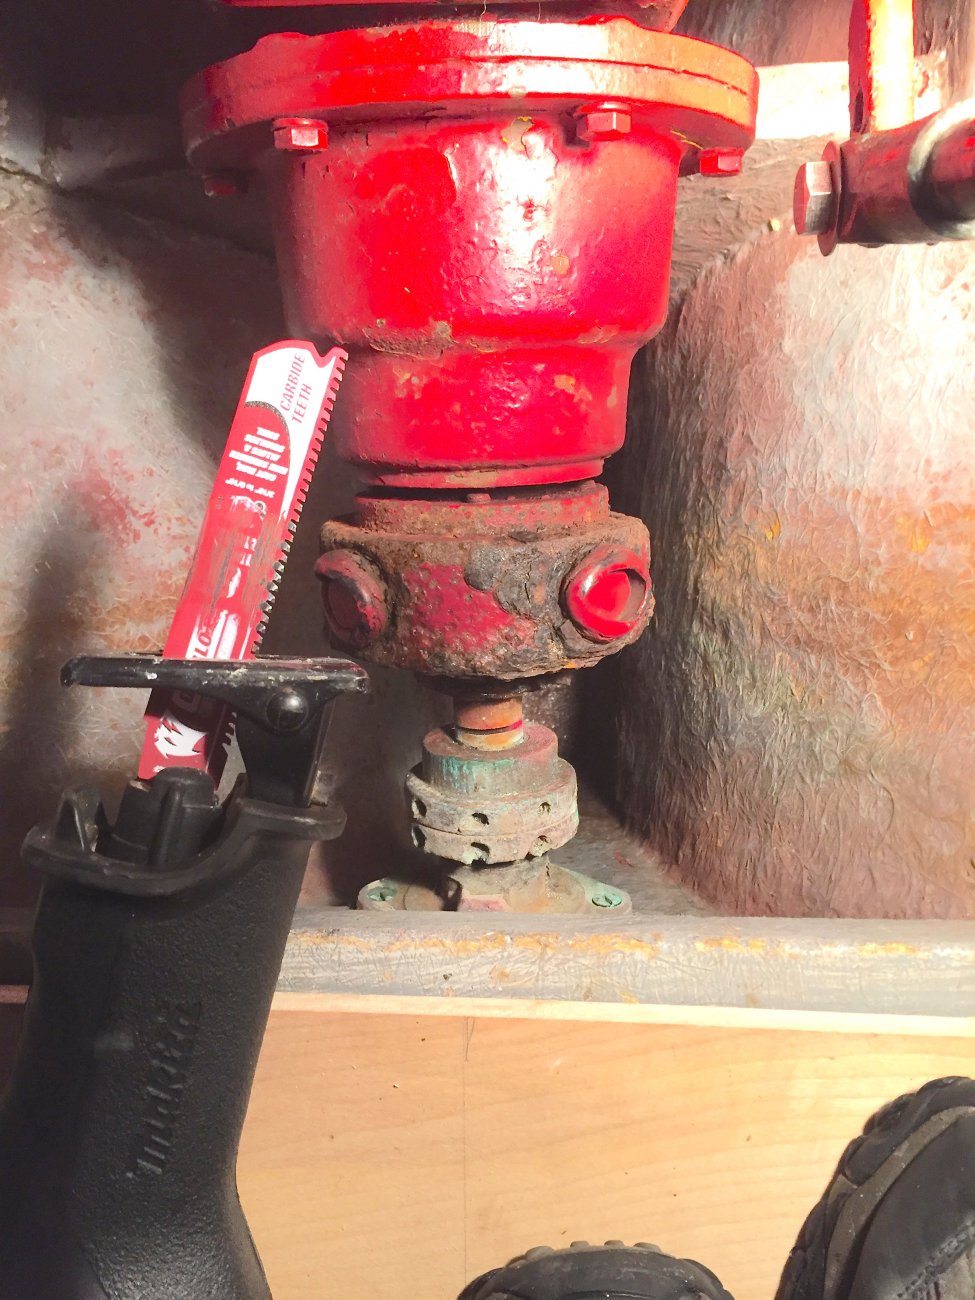
I sort of recollect in re-installing after the re-power 10 years ago, I had trouble with one bolt. Note to self: have the shop rebuilding the transmission check threads on the reverse gear flange.
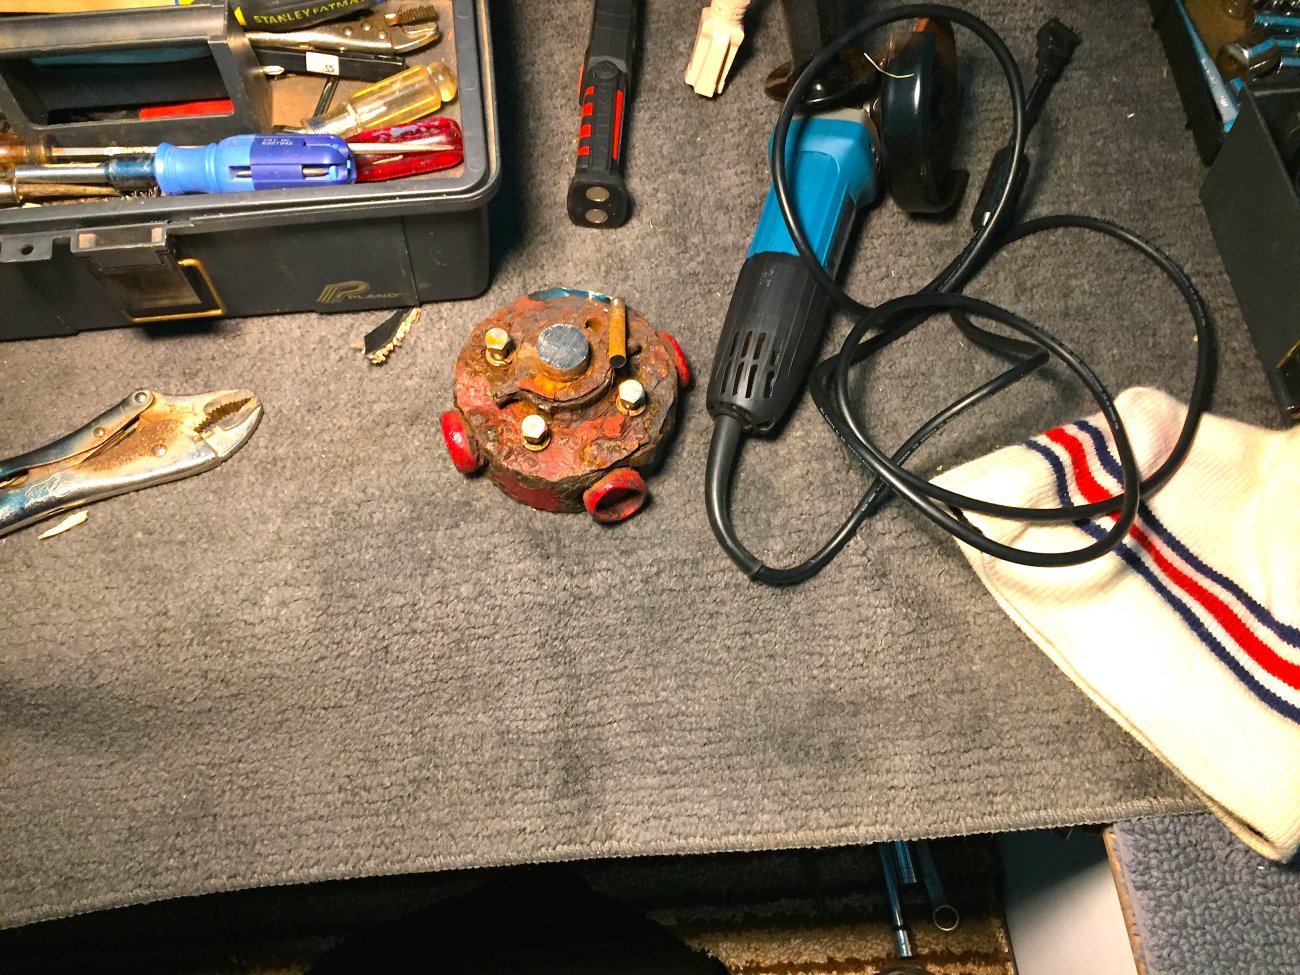
So back in again, this time with an angle grinder, straddling the coupling, there was just enough room to grind the bolt head off. Finally, the bolt head ground down flush, the coupling cracks open from the transmission.
But one stud remains. I want to leave enough of the stud to grab and extract. Where do I cut? Considering this tight space puzzle, the coupling suddenly rolled over.

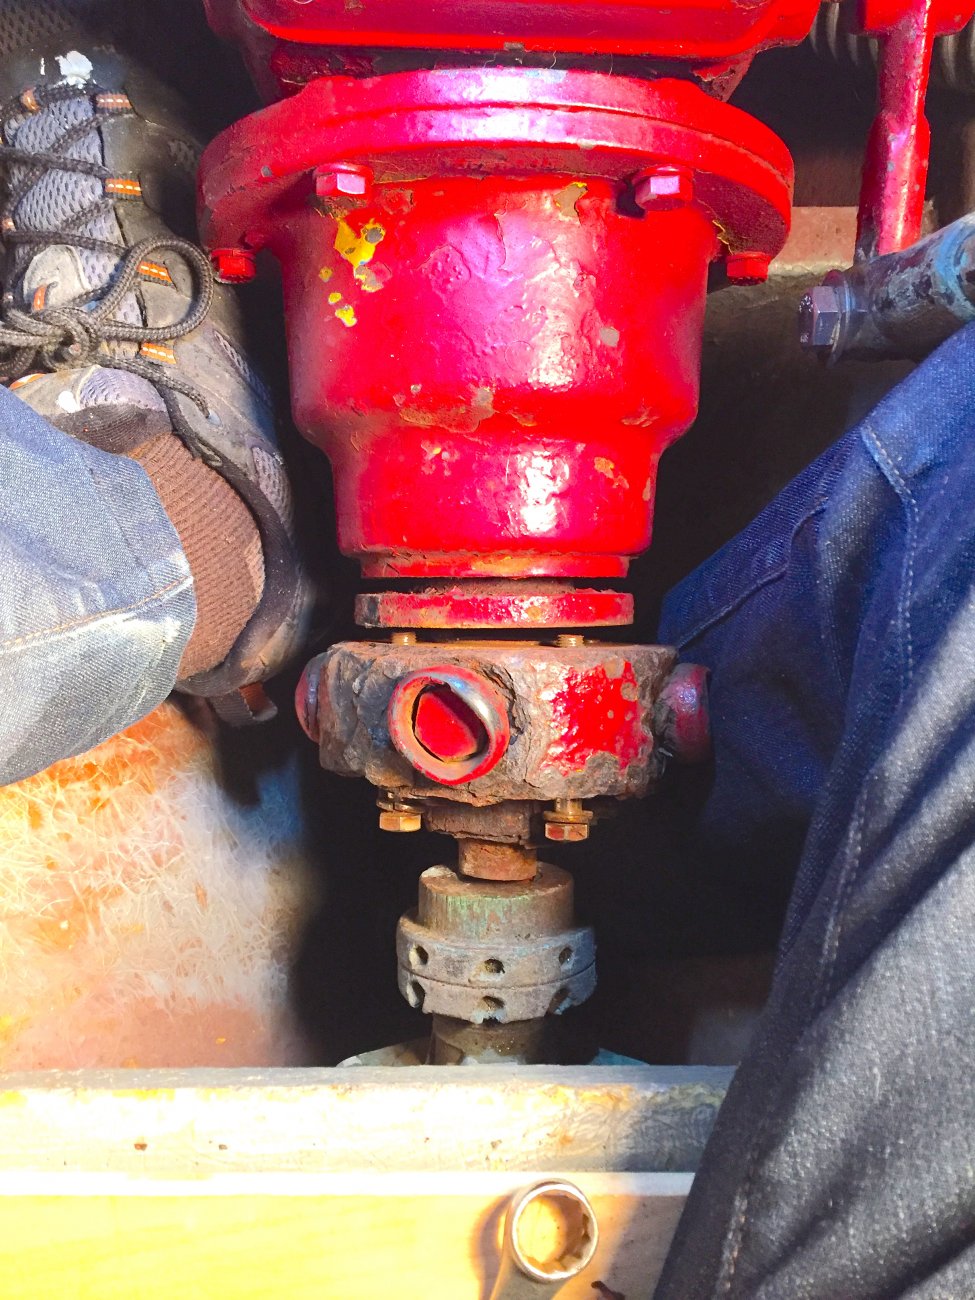
And I was pleased to discover it now cleared the old bronze stuffing box to pull clear. Nice!
This coupling doesn't owe anyone.") Plans are to deliver the coupling; the remaining shaft and prop and the transmission, to be (hopefully), re-built(obsolete tranny but most parts still available).
Plans are to deliver the coupling; the remaining shaft and prop and the transmission, to be (hopefully), re-built(obsolete tranny but most parts still available).
That way they can cut a new shaft the same length, to a new coupling, and fit it all in their shop.
Left is to remove the heat exchanger, linkage, unbolt the transmission and adaptor plate at the bell housing, slide back 2 -3" to free the shaft in the disc, maybe remove adaptor plate (heavy 3/4" steel bolted to trans. from inside), and hoist it through the manhole. In a few days,...
The manhole gets you 'in there' but not in the best position to try and extract a prop shaft from an old rusty coupling. I'm standing on a scrap plywood seat placed just over the shaft and bronze shaft log.
Extraction is not going to happen. When I re-powered about 10 years ago I installed a new cutlass while the shaft and coupling (never separated) where out. I noticed a little wear in the cutlass area so I know the shaft needs replacing today.
Voila, standing in the manhole, in less than 10 seconds, this carbide bad boy nibbled through the 1 1/8" SS shaft. No flying sparks or chips.
Does anyone know about this coupling? My guess is it and the SS shaft were installed in 1974 when the boat had it's first re-power. The cut was easy but one of the 4 coupling bolts heads was corroded to a useless nub. The other 3, SS, were like new.
I sort of recollect in re-installing after the re-power 10 years ago, I had trouble with one bolt. Note to self: have the shop rebuilding the transmission check threads on the reverse gear flange.
So back in again, this time with an angle grinder, straddling the coupling, there was just enough room to grind the bolt head off. Finally, the bolt head ground down flush, the coupling cracks open from the transmission.
But one stud remains. I want to leave enough of the stud to grab and extract. Where do I cut? Considering this tight space puzzle, the coupling suddenly rolled over.
And I was pleased to discover it now cleared the old bronze stuffing box to pull clear. Nice!
This coupling doesn't owe anyone.
Plans are to deliver the coupling; the remaining shaft and prop and the transmission, to be (hopefully), re-built(obsolete tranny but most parts still available).That way they can cut a new shaft the same length, to a new coupling, and fit it all in their shop.
Left is to remove the heat exchanger, linkage, unbolt the transmission and adaptor plate at the bell housing, slide back 2 -3" to free the shaft in the disc, maybe remove adaptor plate (heavy 3/4" steel bolted to trans. from inside), and hoist it through the manhole. In a few days,...
Last edited: