1988 O’Day 192 Restoration

GSBNY

.
May 9, 2019
138
O’Day 192 New York
I figure I should put everything I’m doing to fix up my 1988 O’Day 192 in one place so here I go.

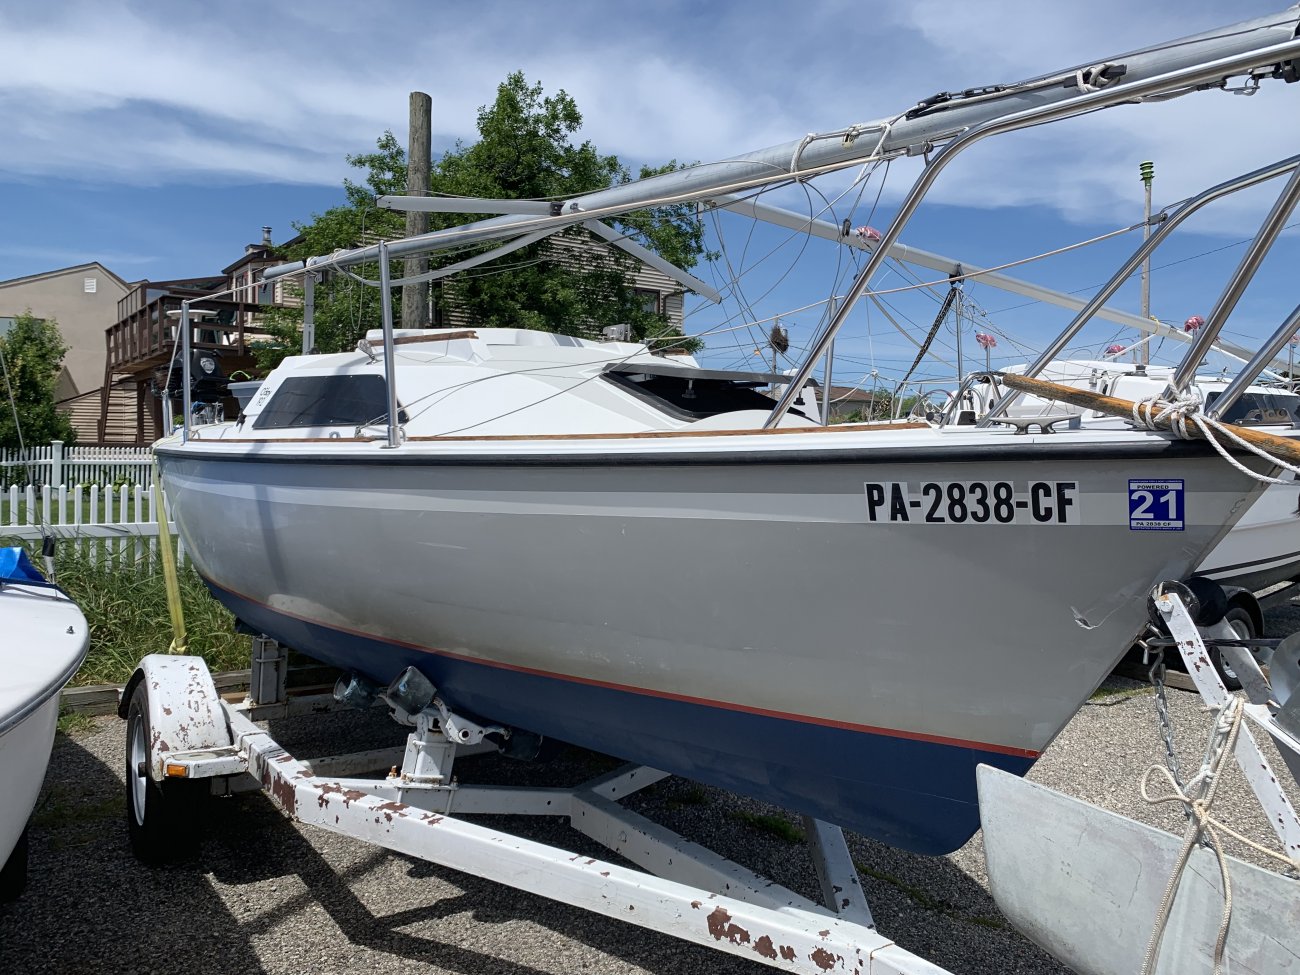
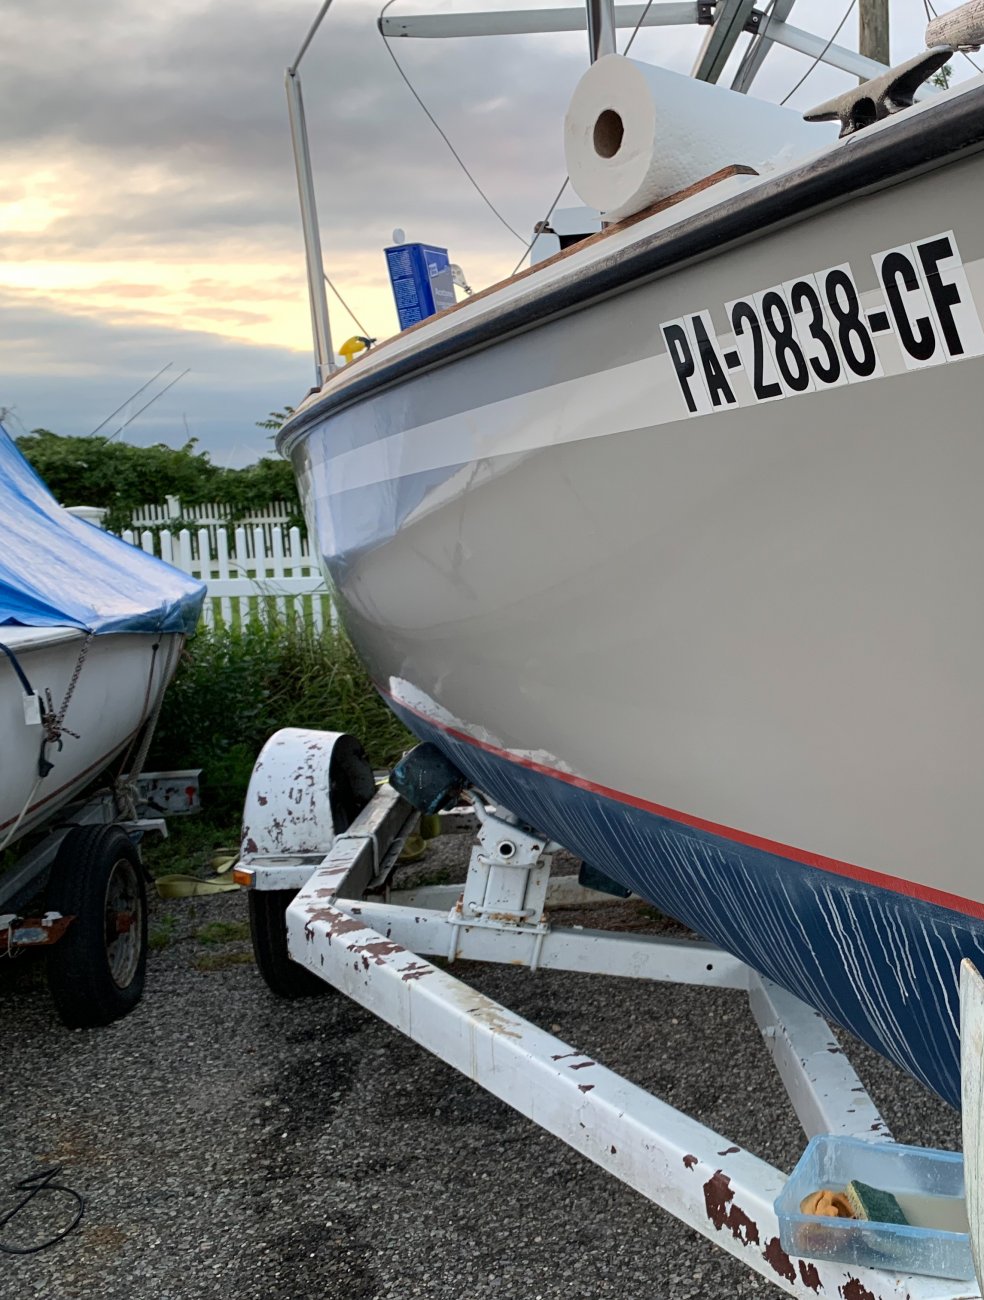
So here’s the boat when it arrived to me and some shots from before.

26589DC9-1946-40DE-8869-599FA649F884.jpeg


8EFB129E-DC7C-48CE-90D6-C9A0CF1D7A21.jpeg


BEA82A1A-466B-461D-9612-0120B95EC995.jpeg


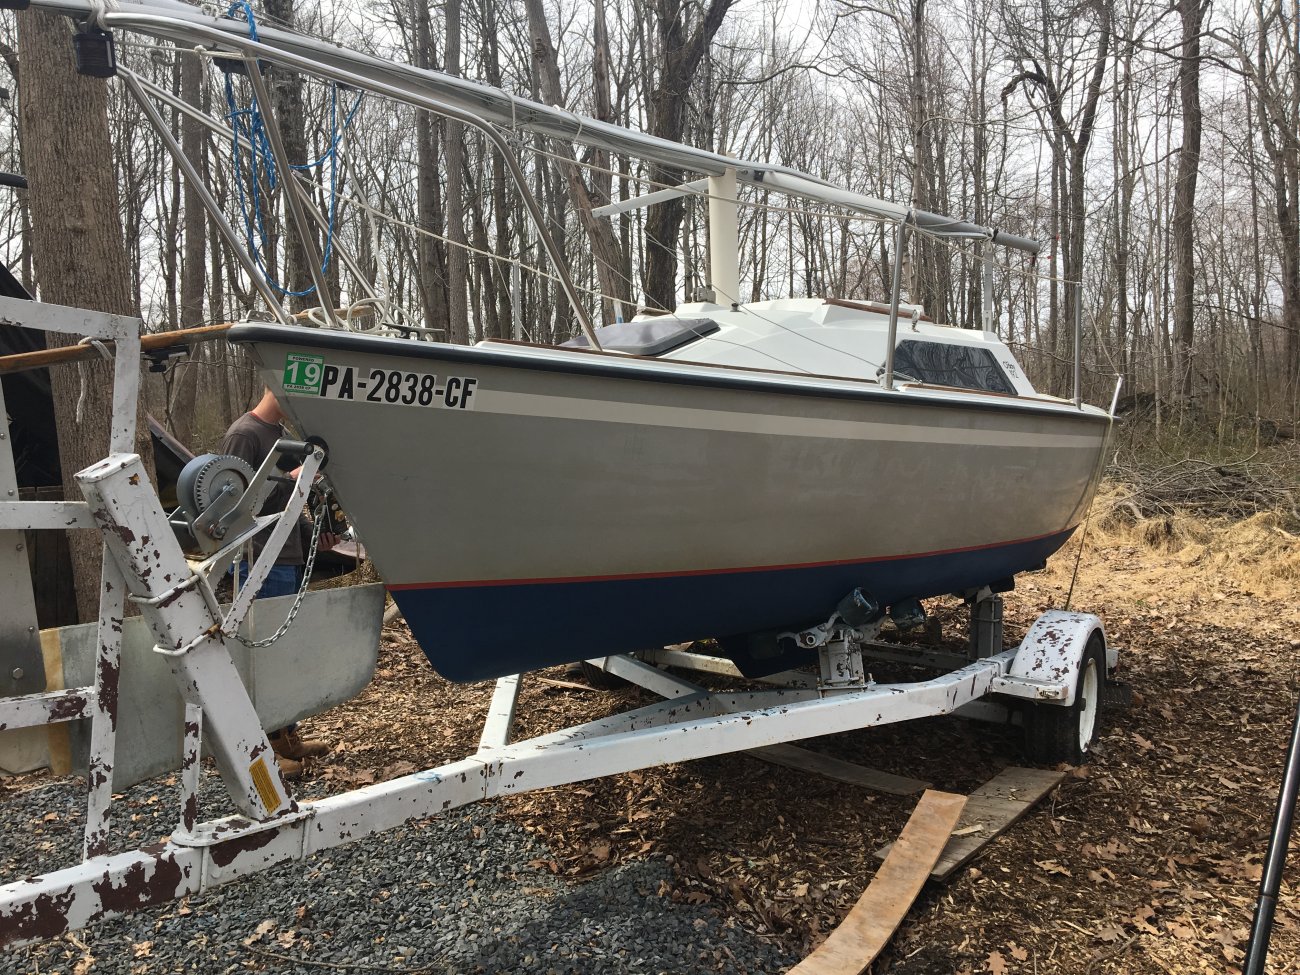
When I got the boat I made a list of things that needed to get done and discovered more along the way.

Oxidized Hull
The hull was oxidized all over the place. After some research and checking the boat I figured out it was a failed coating of Poliglow. Took a bit of experimenting to find the best way to remove it but here’s what worked best:

Zep Heavy Duty Floor Stripper
1000 grit wet sand
3M Heavy Duty Rubbing Compound
Presta Polish
Colonite Fleet Wax

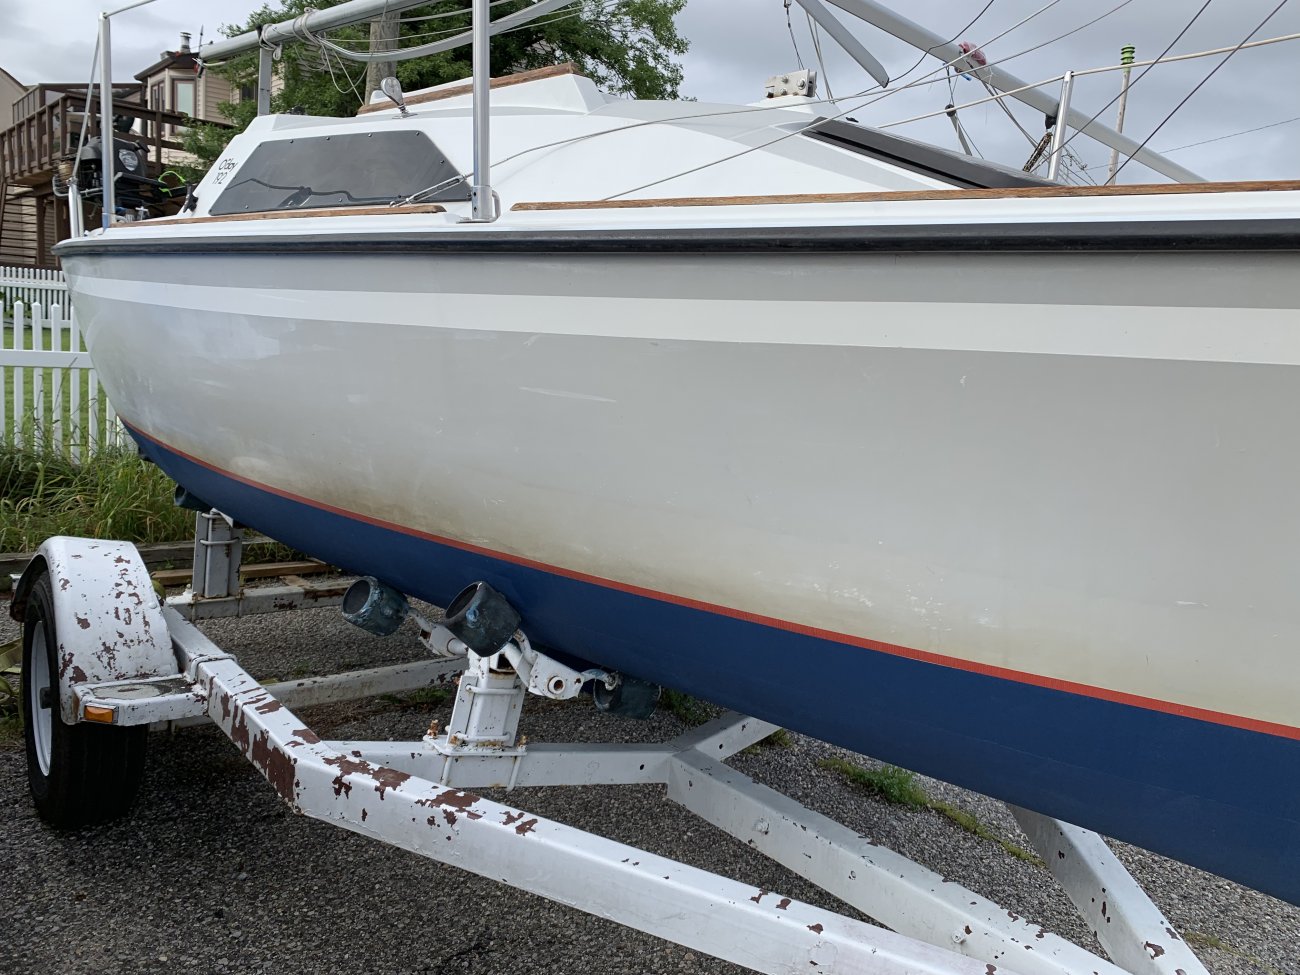
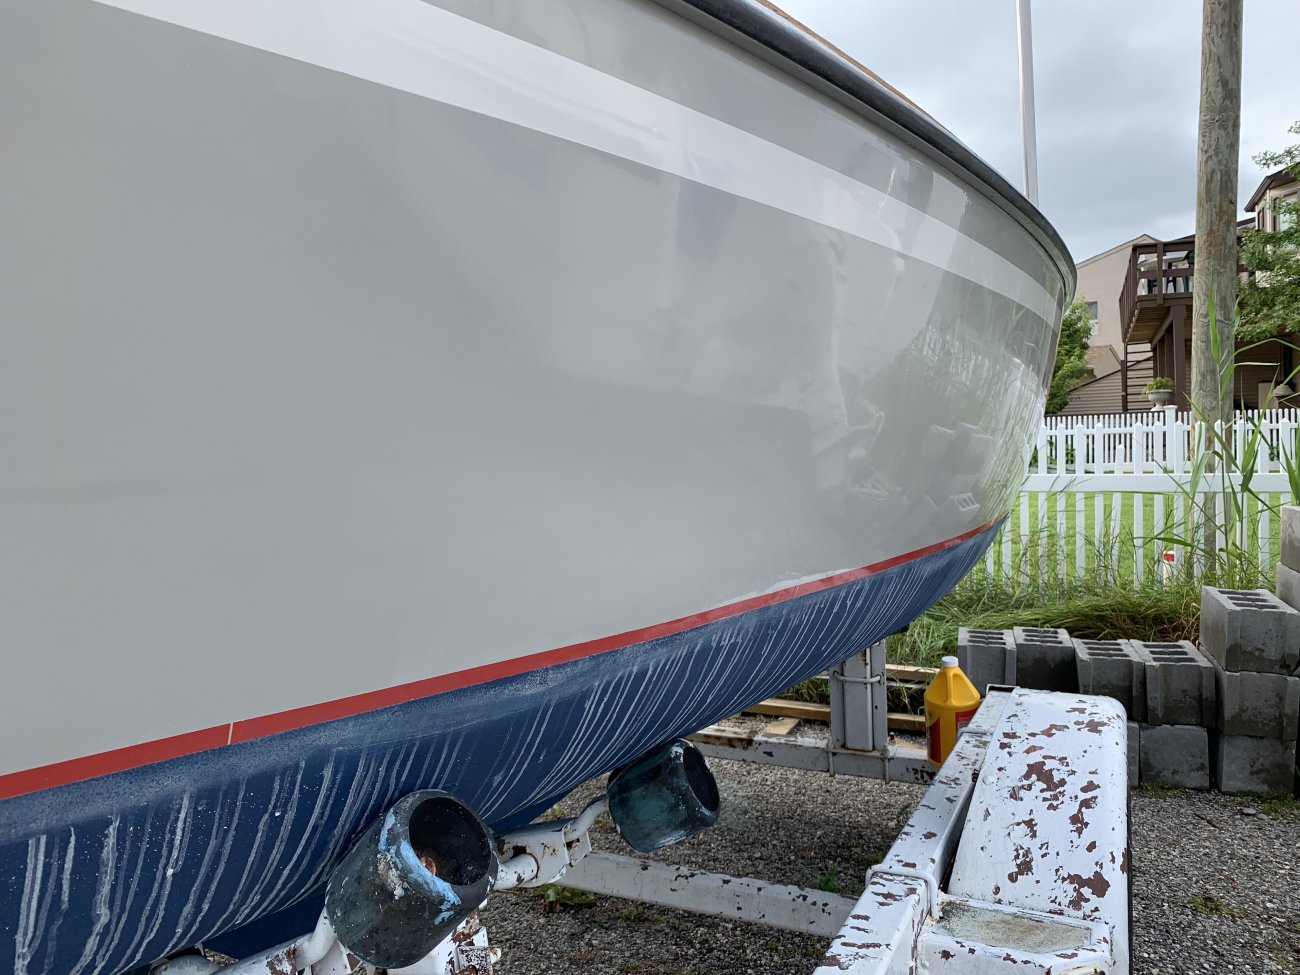
Test area, you can already see the difference.

D50CCC01-BB3B-4ECB-95F0-95DFB9FEA0F4.jpeg


And here’s some of the progress.

3EB822BD-B287-4AAA-98C8-483C40DEC939.jpeg


056B267B-2BB0-467D-8446-48683AA8A611.jpeg


C9BB3666-7A15-4852-AD0E-903F53372999.jpeg


After finishing the hull I had a week of hard rain every day. Killed any chance I had to work but also revealed that there were multiple leaks. So I spent the next week finding and repairing everything I could find. Here’s the spots I found leaking:

Back stay chainplate
Stern light
Stern lifeline stanchions
Stern cleats
Bulkhead mounted compass
Bulkhead mount knotmeter

I used Bed It butyl tape to re bed everything. Then I found another leak and this one a bit more serious. The side stay chain plates were leaking. Figured I’d remove them and re bed like everything else. Wrong. The holes drilled through the deck were much larger than the bolt needed and leaked water into the cabin.

13FE5C3E-BC2E-4FEE-A3D1-D372C242446D.jpeg


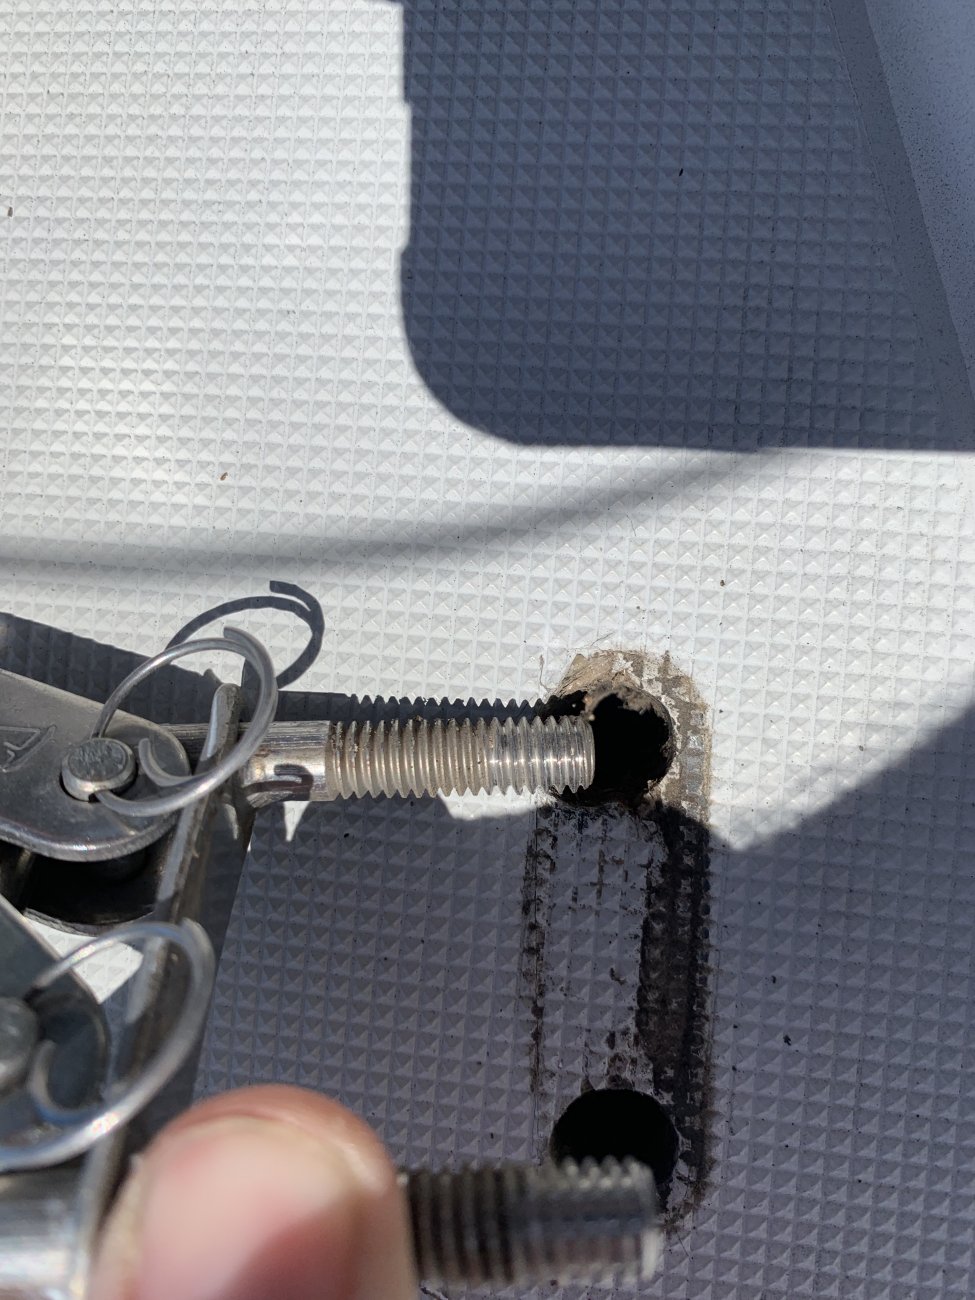
So I cleaned them out, chipped away at some of the core that was exposed, and filled them with thickened epoxy. Since I was already mixing epoxy I figured I might as well just do both sides (port and starboard).

5B5635DF-C0B4-4830-AAF1-173430EA57B6.jpeg


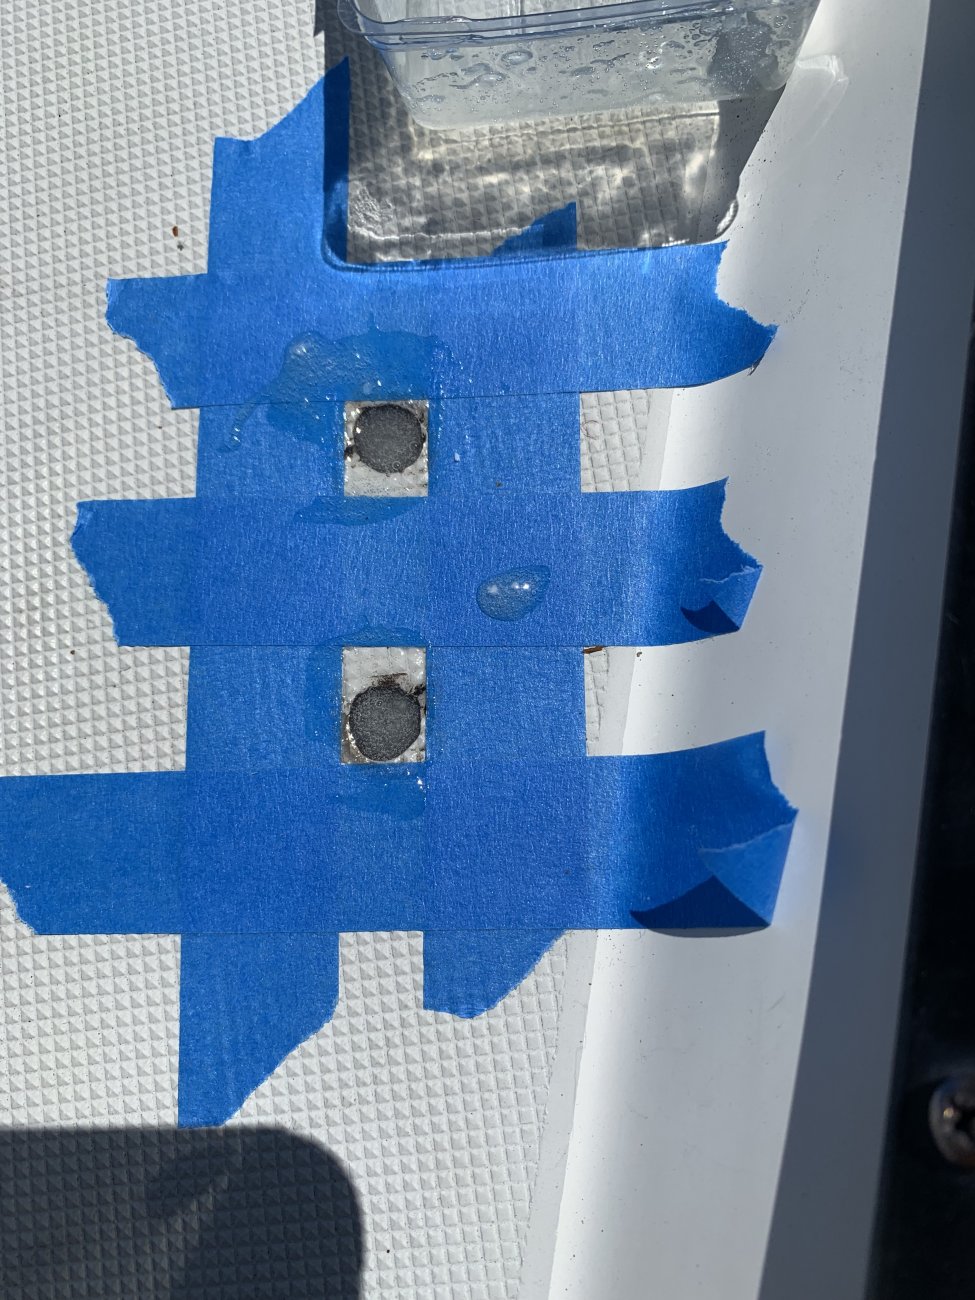
The plan is to drill those holes to the proper size then re bed the chainplates with butyl tape.

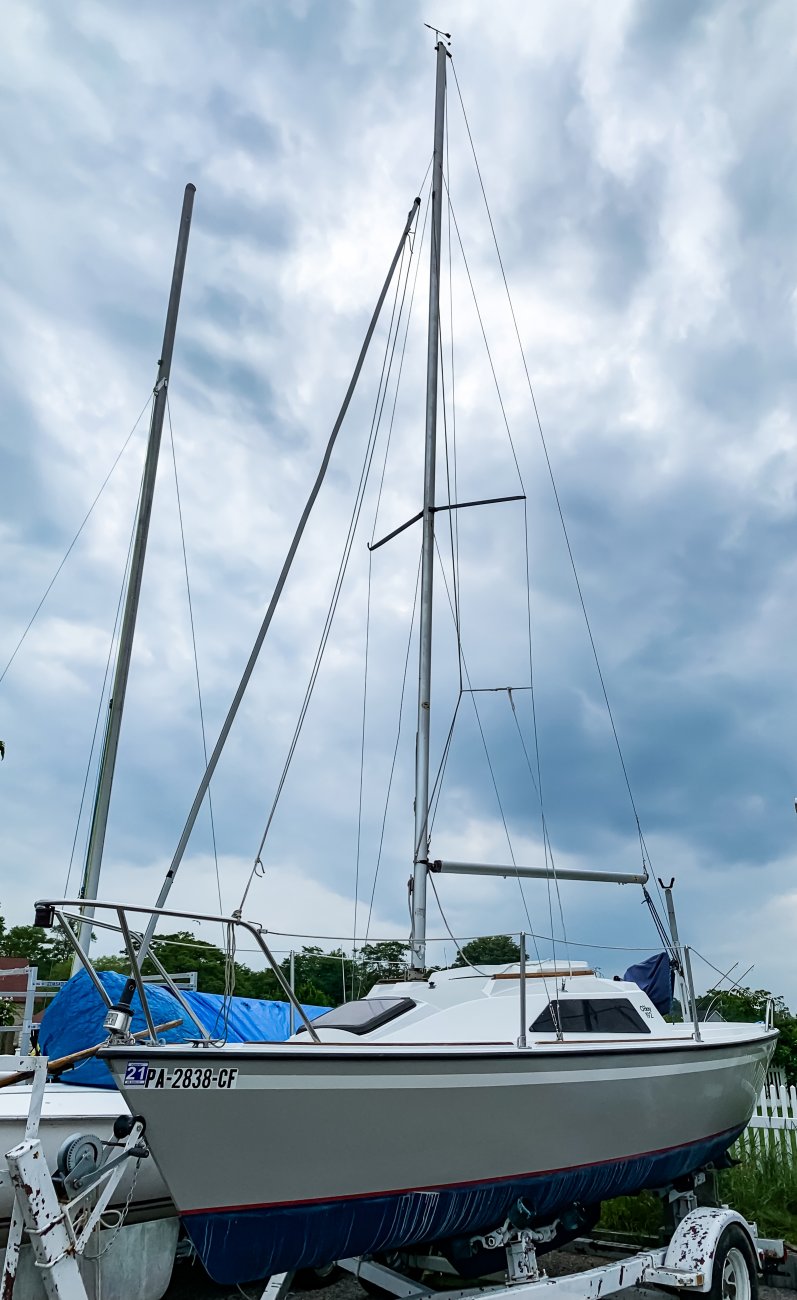
Here’s a shot from when I finally got to put up the mast to see what was going on. Unfortunately, in the process I bent the home made hinge step that the previous owner made. It’s super heavy duty but has very tight tolerances and I was just off enough that I bent it. Going to take the bent step to a machine shop to get repaired hopefully.

1031A2A6-DCBB-4462-9129-8670211DCD48.jpeg


With the rig I found that one of the spreaders was bent. RigRite wanted about $200 for a single spreader so I broke out the heat and got the spreader straight again. Just need to replace the sheaves for the internal boom lines.

Up next:

- Fixing the mast step
- Fixing the ding in the centerboard
- Gelcoat touch up on the hull by the bow
- Installing an inspection port so I can put a new motor mount on.
- Replacing the fuel fittings
- Replacing the cockpit drain hose
- Replace mast head light
- Replace sheaves at outboard end of boom
- Install a vang
- And I’m sure more as I go along

I’ll keep updating as I go. If you have any questions please feel free to ask.
 
Last edited:
Oct 19, 2017
7,746
O'Day 19 Littleton, NH
Wow. Great post. Exciting prospects and beautiful new to you boat. Thanks for the post. You do nice work.
Welcome to our crew GSBNY. I'm looking forward to following your progress.

-Will (Dragonfly)
 

GSBNY

.
May 9, 2019
138
O’Day 192 New York
Thanks Will

Got the chainplates reinstalled today. In the rush of the yesterday I missed that the masking tape was not fully pressed into the nonskid, so I have a tiny mess. Already cleaned it up mostly today.

But, the chainplates are solid and sealed with fresh Bed It butyl tape.

Before:

854C2CEC-94A2-4EC7-B0DC-83FD6B6602C8.jpeg


After:

05F35C7F-86B8-4571-BE76-77CE54FD608C.jpeg


Big difference between the size of the bolt and the size of the holes prior to this. Without any sealant around the bolts, water just went straight to the cabin.
 
  • Like
Likes: Will Gilmore
Sep 29, 2015
110
Oday 222 Lake N ockamixon, pa
For some reason, the bolt holes in the mast step and the mast are too tight, from then factory. The real problem is that when the mast moves, everything moves. I mean the step. So after a while water gets in. I re-drilled the bolt holes in the step and mast. I noticed it after I installed roller furling. Some folks use only the back pin. So if you're bending the mast with the back stay, I'd look at that. Nice boat, nice job.
 

GSBNY

.
May 9, 2019
138
O’Day 192 New York
Thanks, it’s been a bunch of work so far but it’ll be worth it in the end.

I’m going to rebuild the mast hinge which will mean the next thing I do it to check out the step bolt holes. Depending on how they look I may need to fill and re drill those too.

For some reason, the bolt holes in the mast step and the mast are too tight, from then factory. The real problem is that when the mast moves, everything moves. I mean the step. So after a while water gets in. I re-drilled the bolt holes in the step and mast. I noticed it after I installed roller furling. Some folks use only the back pin. So if you're bending the mast with the back stay, I'd look at that. Nice boat, nice job.
Speaking of mast hinges. After taking the stainless one to a machine shop, I’ve realized there’s no way to get this back into shape enough to work again. So I’m back to square one.

The original Z Spar hinge has a broken tab but it’s being held together quite well with 2 through bolted stainless tabs. I just need to grind down a few spots to get the plates to sit flush. I’m only raising and lowering the mast 2 times all year so I don’t need the best hinge action in the planet.

BF9FC25B-4678-4B45-8FDE-4623FF675A5C.jpeg


Next problem is that base attachment holes on the mast are shot. Each of the 3 holes that had rivets into the base are cracked. So, I need to get fresh material to rivet the Z Spar base to. To do that, I’m going to cut 1” off the mast and put a 1” spacer below the step to get the original specs back. That’s what the 1” King Starboard is for. This plate will be sandwiched between the hinge and the deck so I’ll have to get new bolts to make up for the extra length. I just need to cut it to size next.
 
  • Like
Likes: Will Gilmore

GSBNY

.
May 9, 2019
138
O’Day 192 New York
Ok for my next project while I figure other things out, I needed to remove the motor mount. Unfortunately, it was installed on the boat before the deck was joined so there was no access to the nuts holding it. Fortunately, the sealed gas storage locker is right in front of the motor mount so I had a perfect spot to install a 6” deck plate and keep it hidden and protected.

Cut the hole with a skill saw that can scroll and popped the 6” Viking port in. Now that the work is done I can clean it all up.

58E39BE5-D65A-4CB4-90FA-855400DA7A0B.jpeg


23DBA71E-CCA1-411D-AA1F-C92B42EB6908.jpeg


I’m glad I decided to install the port because even if the motor mount was perfect, one of the 4 nuts holding it to the boat was only on the bolt by about 2 threads. I was able to back it off by hand. Yikes.

I think someone trailered the boat with the motor on the bracket because a few of the pivots are torn up. Tomorrow morning I’ll take it to a welder to see if they can reinforce it and get it back on the boat.
 
Nov 9, 2012
2,500
Oday 192 Lake Nockamixon
Tomorrow morning I’ll take it to a welder to see if they can reinforce it and get it back on the boat.
If I had my 'druthers, and needed to change my mount, I'd replace the stock old skool aluminum Garelick with a swanky new Garhauer available from Catalina Direct: https://www.catalinadirect.com/shop...board-motor-mount-two-spring/?SearchResults=1 Well, actually, I might call Garhauer up, and see if they might sell me one direct for a bit lower cost. This Garhauer is pricy, but it is made of stainless steel, and has a very nice handle and action. It is spec'd as standard equipment on the Sage 17 from Sage Marine.

This would require fabricating a new wedge pad to accommodate the wider mount points of the new Garhauer.

As it is, my original aluminum 2 stroke Garelick mount, as much as I don't like it, is still very serviceable and seems to hold my 5 hp 4 stroke motor just fine. And I'm trying to remove items from my project list. One of these days I'll have the boat to the point where spring commissioning is only a matter of polish, wax, and splash!
 

GSBNY

.
May 9, 2019
138
O’Day 192 New York
Whatever mount is on my boat is stainless stainless steel. Not sure who made it but it’s survived 30 years so far. I took it to a local welder today and had them fix the broken parts and reinforce it a bit. Plus I added some brass washers to smooth the action out and take up any play in it. Works like new again.

Before I put the mount back on the transom I wet sanded, compounded, polished, and waxed.

Total repair cost was $40 for the welding and $5 for some new hardware. Forgot to get a before picture but here’s everything buttoned back up on the boat.

0C037208-9178-43B0-B3BA-51B5DF415F70.jpeg


D7C89AEE-0E86-4089-BF3B-5E9B345A52A0.jpeg


Now I’m just waiting for the version 2.0 Starboard plate to come in so I can finish rebuilding the mast hinge. In the meantime, I have some gelcoat touchup to do and I need to rig up my topping lift, lazy jack, and main reefing system.
 
  • Like
Likes: Will Gilmore
Nov 9, 2012
2,500
Oday 192 Lake Nockamixon
That mount is not the stock one typically sold with a 192. The stock mount included an angled fiberglass pad between the mount and the transom, to accommodate the angle caused by the curved transom, and by the reverse counter of the transom. From the little bit I can see of it in your picture, it looks as if the wood motor mount pad has been shaped to accomplish some of this angle correction.

Just for fun, here's a pic I found when I was mocking up the name for my boat. It shows the original aluminum Garelick 2 stroke mount and block. I've seen other guys here make a new spacer block for a wider 4 stroke style mount.

IMG_2242.jpg
 

GSBNY

.
May 9, 2019
138
O’Day 192 New York
That mount is not the stock one typically sold with a 192. The stock mount included an angled fiberglass pad between the mount and the transom, to accommodate the angle caused by the curved transom, and by the reverse counter of the transom. From the little bit I can see of it in your picture, it looks as if the wood motor mount pad has been shaped to accomplish some of this angle correction.

Just for fun, here's a pic I found when I was mocking up the name for my boat. It shows the original aluminum Garelick 2 stroke mount and block. I've seen other guys here make a new spacer block for a wider 4 stroke style mount.

View attachment 167317
That setup makes more sense but if this isn’t the original motor mount from O’Day then I have 0 clue how they could have installed it. The nuts and backing plates are inside the hull but until I put the inspection port in, there was literally no way they could have been put in without the deck off the boat. I did try to wiggle myself down from the quarter berth but got stuck about half way there and I’m not a big person.

Does your boat have any access to the mount from the inside?
 
Nov 9, 2012
2,500
Oday 192 Lake Nockamixon
That setup makes more sense but if this isn’t the original motor mount from O’Day then I have 0 clue how they could have installed it. The nuts and backing plates are inside the hull but until I put the inspection port in, there was literally no way they could have been put in without the deck off the boat. I did try to wiggle myself down from the quarter berth but got stuck about half way there and I’m not a big person.

Does your boat have any access to the mount from the inside?
Oh, yes, you know, your boat being a grey hull is newer than my boat. It's likely they used a different mount, given that it was closer to the end of the production run.

In all the discussion of replacement mounts, the only way I know to do it is to add an inspection port into the back of the fuel locker as you have done to get access to the bolts. I think I removed the starboard quarter berth plywood panel once, and there's no way to get past the fuel locker molding.

My friend had to replace his cockpit drain hose and we removed the port side plywood panel and crawled in over the battery tray from the lazarette (not comfortable) to get back behind the cockpit. It was a bummer that he launched the boat to take his wife and her friend out for a sail, then noticed water coming in to the cabin. He ran and found me to figure out what to do, and we put the ladies up on the foredeck to lift the transom out of the water while he went off to buy new hose and clamps. Then did the replacement in the water at his slip.
 

GSBNY

.
May 9, 2019
138
O’Day 192 New York
I may be going after the cockpit drain hose next. It looks in tact but I don’t want to risk it over a hose that’s a few dollars. I was hoping there was a better way to get to it but it seems like the way you said is the only option.
 

GSBNY

.
May 9, 2019
138
O’Day 192 New York
After weeks of tracking down leaks and fixing them I finally left the bilge cover on for a week. While working the other day I popped the cover off for fun and almost had a heart attack - it was full again.

So I dried it out and began the search for anything I could have missed. As I was going back into the cabin I looked down at my centerboard line and noticed the through hull fitting looked a little funny. So I laid down in the cockpit and looked closer to see this:

56819223-73FC-498A-8B47-68EF259B2EC2.jpeg


Today I went back with a gallon of water and had someone pour it on the fitting while I sat in the cabin and watched the bilge. Sure enough, I got a good trickle coming down the tube straight to the bilge.

So I backed the fitting out and snuck some butyl tape in there and tested it again. Passed the test perfectly, tomorrow it’s supposed to rain hard so that’ll be the true test.

Also, finally got my 1” spacer:

C6D16CDC-FD49-46E2-8558-5D9553FB4E4F.jpeg


Next up, time to cut the mast to get to some fresh material to rivet to. Getting so close to being ready to launch.
 
Last edited:
  • Like
Likes: Will Gilmore

GSBNY

.
May 9, 2019
138
O’Day 192 New York
From this:

8CD43F9C-705C-445B-B89A-BD7F48B4A661.jpeg


FD6B153D-3DF9-4278-B0BF-5BA066759F97.jpeg


To this:

2A5D322B-622D-4300-AA1B-BACEA202F833.jpeg


Since my 1” spacer arrived I could verify the thickness and cut the mast today. Got a good measurement on the mast and cut it with a hacksaw so I could go slow and keep an eye on it. Came out square and cleaned it up with a file to take the burrs off. The original step slipped right in.

I spliced the toppling lift line to the top of the mast and got everything for my lazy jack system laid out. Put the new rudder down haul line on, and studied up on the owners manual to figure out the rest of the rigging. I’ll need to make a mounting point on the deck for the vang and I still need to find a pin and sheaves for the outboard end of my internally run lines in the boom (outhaul, topping lift, reef lines).

Before I could do anything else this ended up happening so I had to pack it in and head home.

60404A78-6504-4537-97FA-001031F14312.png


At least it will be a good test for all the leaks I just fixed.
 
  • Like
Likes: Will Gilmore

GerryG

.
Sep 16, 2018
29
O'Day 19 Bayport, NY
Hey, I just came across this thread. Your boat looks great, GSBNY. I just got an '82 19 in October and have been dealing with water in the bilge like you describe. We actually just launched out of Tanner Park last week, and, after motoring a mile to the deeper area, we had a great sail up to the Fire Island light and back.

We are away for a month now, but before we left, we took a stab at sealing up some points, including the cockpit drain hose, since the boat will sit in the driveway for a month, we figured it was a perfect time to let the 5200 take it's time curing. Took off the hose and discovered a break in the accordion folds on the underside. Then removed the through hull fitting to seal it, and found crumbled sealant and a crack along the threads. Replaced with a brass fitting and new hose, sealed with 5200 and we'll see what happens when we get back. Also sealed the rudder mounts the same way. The one down side we've had with this boat is the water in the bilge, which then leaks into the cabin.

Anyway, maybe we'll see you out there.
 

GSBNY

.
May 9, 2019
138
O’Day 192 New York
Hey, I just came across this thread. Your boat looks great, GSBNY. I just got an '82 19 in October and have been dealing with water in the bilge like you describe. We actually just launched out of Tanner Park last week, and, after motoring a mile to the deeper area, we had a great sail up to the Fire Island light and back.

We are away for a month now, but before we left, we took a stab at sealing up some points, including the cockpit drain hose, since the boat will sit in the driveway for a month, we figured it was a perfect time to let the 5200 take it's time curing. Took off the hose and discovered a break in the accordion folds on the underside. Then removed the through hull fitting to seal it, and found crumbled sealant and a crack along the threads. Replaced with a brass fitting and new hose, sealed with 5200 and we'll see what happens when we get back. Also sealed the rudder mounts the same way. The one down side we've had with this boat is the water in the bilge, which then leaks into the cabin.

Anyway, maybe we'll see you out there.
It’s been a month of non stop work but hopefully I’ll see you out there soon. I can see Tanner Park from where I’ll be keeping it.

My cockpit drain isn’t leaking (knock on wood) but it’s bugging me enough that I may change it anyway. It’s the original hose and outlets and it’s the only thing that can leak that I haven’t repaired yet. The only way to get there is to remove the port bulkhead and crawl through to the transom. Only other way would possibly be to install a deck plate on the cockpit liner right above it.
 
  • Like
Likes: GerryG
Nov 9, 2012
2,500
Oday 192 Lake Nockamixon
I would not terminate the vang at the deck. It should be free to pivot at the same point as the gooseneck, otherwise it will effectively prevent the boom swinging outboard, because as it moves outboard, it would tighten and pull the boom down. The Star uses a curved track on the deck so that the vang maintains the same downwards pull on all points of sail. My Force 5 has vang rigging slightly behind the gooseneck pivot, and I often need to release it some to let the boom out.

Vang on my 192 is rigged to a bail through bolted through the mast. The downhaul purchase is also rigged through this bail. It's not completely ideal as there needs to be some tension on the vang and the downhaul to hold that bail up.

IMG_2720.jpg


Not the greatest picture, as I had to crop it down a lot, and the hatch is slid forward, but you probably get the idea. Yellow line is asym spin halyard.
 

GSBNY

.
May 9, 2019
138
O’Day 192 New York
Worded that wrong, the vang will be attached to the base of the mast like yours. I’m not sure if I want to install a bail like yours has or if I’m going to attach it with a spectra loop.

I wish I had the Dwyer mast since I know the parts well and have access to them. Figuring out the Z Spar setup has been a bit tricky piecing it back together but I’ve been able to get more info from the Hunter owners who also have Z Spar rigs.

So does anyone know which masthead light was used on the Z Spar mast? Working on that next.
 
Nov 9, 2012
2,500
Oday 192 Lake Nockamixon
So does anyone know which masthead light was used on the Z Spar mast? Working on that next.
Personally, I'm not keen on masthead 360º anchor lights on small boats. Where many small boats anchor, closer in to shore, I think they have to deal with smaller fishing type boats, who might not be looking up for masthead lights. Admittedly, I don't anchor out in areas with a lot of traffic, but I'm more inclined to hoist one of these lights about 1/3 of the way up the mast with the main halyard, with a light line to the backstay to prevent it whacking the mast. Also because I have installed a cigarette lighter socket near my electrical panel. https://store.marinebeam.com/utility-led-anchor-light-w-dusk-to-dawn-photocell-fx-ml-01/
 

GSBNY

.
May 9, 2019
138
O’Day 192 New York
Personally, I'm not keen on masthead 360º anchor lights on small boats. Where many small boats anchor, closer in to shore, I think they have to deal with smaller fishing type boats, who might not be looking up for masthead lights. Admittedly, I don't anchor out in areas with a lot of traffic, but I'm more inclined to hoist one of these lights about 1/3 of the way up the mast with the main halyard, with a light line to the backstay to prevent it whacking the mast. Also because I have installed a cigarette lighter socket near my electrical panel. https://store.marinebeam.com/utility-led-anchor-light-w-dusk-to-dawn-photocell-fx-ml-01/
So that was my original plan. I have a jib halyard on the mast but since I have the CDI furler, the halyard doesn’t do anything. Since I’m rebuilding everything else at the moment I’m kind of just thinking about going for it.

I will be anchoring out a bunch overnight but mostly in protected coves and away from any channels (that’s the whole point of me buying a boat with minimal draft).
 
  • Like
Likes: Brian S