Repairing Hunter 40 damage from Hurricane Matthew

May 8, 2013
629
Hunter 40 Dataw Island, SC
when you heading out again? and any more news on the Marina?
I'll be home for a few weeks. Scheduling says they're having a difficult time getting simulator slots for training.

Marina news is mixed. Lawyers and courts are now in the picture (not me - I'm still trying to stay under the radar). It's a big soap opera here with not much new news but I don't think I'll have to move the boat anytime soon. It still looks like there may not be any wet slips for the foreseeable future - it would be ironic if after finishing a multi-year rebuild I had to find a new home to get back in the water.
 
  • Like
Likes: Rick D
May 8, 2013
629
Hunter 40 Dataw Island, SC
Personally I think its a great install, and I always try to avoid marine stores for most things. Auto shops or semi tractor suppliers are much cheaper. You will be able to tell how well it works soon enough and adapt accordingly if necessary. Nice work Mark, it's great to watch someone accomplish in three months what would take me three years!
Thanks! Although I agree mostly with you and do buy from the local hardware stores, etc., whenever I can, there sometimes is a difference in parts and materials (and quality!). Our go-to local hardware store has recently taken lots of flak from the professional marine guys - they must have switched suppliers for stainless fasteners because the quality of their screw, bolts, etc., has gone to the dogs. Cheap Chinese metal but you can't tell until it's too late. I've tried over the years to know when a trip the the marine chandler is a must but these days it's getting hard to tell. I've got stories (from other ventures) of dealing with overseas suppliers and manufacturers who don't know the differences between grades of aluminum and steel. It's actually scary because the inferior parts have started seeping into the commercial aviation market where it really matters!
 
May 8, 2013
629
Hunter 40 Dataw Island, SC
Hmmm...i think i would keep the loop at the transom and not have the big "high rise" at the engine. And get rid of the check valve in the exhaust line. If you had a raw water pump failure, hot exhaust gases can damage a check valve. And its another maintenance item..How would you maintain it? How do you know it's going to do what you want when the occasion presents itself? If it sticks, you have no engine...There is a lot of moment arm in the high rise off the engine. The high rise will not vibrate the same as the engine and cracks etc can occur. I see there is a braided section called flexible exhaust. Not familiar with it but how will it do under engine vibration? It's an automotive part but is it designed to be installed farther downstream in an automotive install? Keep CO going outside...You're doing a fantastic job refurbing the boat. I dont think I can agree with the exhaust system....
I searched for some illustrations to try to show the various exhaust system designs but I'm not sure I can show them here due to copyright issues. I'll try to draw something when I have time to show what I'm dealing with as far as design criteria.

I put the check valve in to prevent water intrusion from following seas. Not really necessary since water can't back-fill past the siphon loop anyway, but it is for peace-of-mind. I'm not worried about it failing due to raw water pump failure. There's a bunch of exhaust components that would be damaged first - the exhaust hose, the lift muffler, plus loss of raw water would rapidly cause an engine overheat.

The moment arm of the siphon loop was the primary reason for the flexible exhaust section. The shrimp boat community locally here has been using a similar setup for several years - I talked to some of these guys for help when working on my exhaust design. The point of the flexible section is to isolate the engine vibration and movement from the upper section of the siphon loop, removing the effects of the long moment arm.

The flexible section when installed in cars is usually mounted downstream slightly from the catalytic converters but still close to the engine. They see pretty high temps and pressures, greater than what a dinky marine diesel should produce. I know the shrimpers around here swear by them so I've got high hopes. I'll be doing a lot of testing and checking, temps, CO monitors, etc. for the install.

Cheers,

Mark
 

Gunni

.
Mar 16, 2010
5,937
Beneteau 411 Oceanis Annapolis
Diesel manifold gas temps run 1000 degrees, maybe a bit higher if you run rich (improperly pitched prop). Wood burns at 500 d. Let's suppose that you find a pipe wrap that reduces the surface radiation temp in half - you are still dangerously close to the ply bulkhead ignition temp. All of this in a tight, poorly ventilated engine bay. My experience with dynamat is that it is an insulator, not a heat shield. It is a combustible foam material. I would ignore the endorsements of the hot rodders. At the very least that bulkhead needs a ceramic shield and a reflective air gap.

Looks like you understand that the discharge loop is to prevent seawater backflow that could hydro-lock the engine, but I share Maulden's concerns about a backflow valve. Astonished at the poor OEM design, just a terrible set up that puts you with a range of poor options. I would consider losing cabin space to get this properly plumbed. Basically enlarge the engine bay and get the room you need.
 
May 8, 2013
629
Hunter 40 Dataw Island, SC
Diesel manifold gas temps run 1000 degrees, maybe a bit higher if you run rich (improperly pitched prop). Wood burns at 500 d. Let's suppose that you find a pipe wrap that reduces the surface radiation temp in half - you are still dangerously close to the ply bulkhead ignition temp. All of this in a tight, poorly ventilated engine bay. My experience with dynamat is that it is an insulator, not a heat shield. It is a combustible foam material. I would ignore the endorsements of the hot rodders. At the very least that bulkhead needs a ceramic shield and a reflective air gap.

Looks like you understand that the discharge loop is to prevent seawater backflow that could hydro-lock the engine, but I share Maulden's concerns about a backflow valve. Astonished at the poor OEM design, just a terrible set up that puts you with a range of poor options. I would consider losing cabin space to get this properly plumbed. Basically enlarge the engine bay and get the room you need.
The factory exhaust (hot side) was closer to the bulkhead than my setup - albeit not of the same length - with no radiant heat problems. Not sure that I'm creating a problem here.

The dynamat I'm using is not the foam type, it's the thin (1/8th inch) rubber with aluminum face. I'll have to recheck the specs but I have never heard that it's combustible. Maybe we're thinking of two different products.

I added the check valve for me - it's not a required item based on the rest of the system. If it works, great, if not, my bad.

Agree on the poor OEM design. This system is the best I could engineer. I am always open to a better suggestions, but giving up cabin space is admitting defeat. Plus the admiral won't have it :badbad:

Cheers,

Mark
 
  • Like
Likes: scottdube
May 8, 2013
629
Hunter 40 Dataw Island, SC
When do you sleep?
Hi Kermie!

Going to bed now! I do sleep on occasion:snooze: Long but productive day today - more paint in the aft cabin, just one more section to go, and I pulled the compression post to strip and repaint. First primer coat is drying now. Pics to follow.

Cheers,

Mark
 
Jan 25, 2011
2,399
S2 11.0A Anacortes, WA
Mark, I really have to commend you on your project. However, I really think you need to rethink your exhaust design..with no loop or high spot near the the hull outlet, the whole exhaust system will fill with water in following seas. It will fill up to the check valve..In the design phase, you have to assume no check valve. The crusties etc will eventually make it fail and you have no idea when... It's a given. Before it fails, does the engine exhaust and raw water pump have the necessary pressure to clear it? And, when it fails, do those pressures exist to clear it? Especially during heal when the waterline goes up? The shrimpers dont heal...I do have the same concerns that Gunni has. Keep flying my airplanes!!!
 
May 8, 2013
629
Hunter 40 Dataw Island, SC
Thanks guys for all the questions and comments on the exhaust system - it is appreciated! We'll return to that soon but for now some updates on progress in other areas:

Painting progress in the aft cabin:


And the compression post in the garage getting a facelift:


After stripping the old paint and sanding & prepping, I slid a broomstick in each end of the CP and propped them up on the sawhorses to make a rotisserie so I could spin it for painting. Worked great!


Paint finished - I'll give it another day to cure before reinstalling. Note the roll-around air conditioner - this has been a lifesaver for working in the garage during the summer. I'm considering getting another one for the boat while it's on the hard - I'm currently sweating out several gallons of water a day and changing shirts about 3 times a day!

I inspected the mounts (teminology?) for the compression post, both at the base and the cabin roof and deck, all good, solid, no rot! Nice when something goes my way once in a while. I will replace all the fasteners for good measure though.

Next up, Fixing the damage to the bow!

Cheers,

Mark-san
 
May 8, 2013
629
Hunter 40 Dataw Island, SC
Repairing the bow:

I have neglected the damage to the bow up until now because I wanted to concentrate on other areas first, but now is the time to start tearing into it to see just what needs repairing. First off the bow railing came off. It's bent but can be straightened, plus I want to reinforce it in a few areas but the other damage needs to be fixed first. Next up was removing the anchor rollers:


I had to grind off a few bolt heads to get them off, but in the end I won!


Just slightly mangled.

Next up was to remove the (not sure what else to call this) trim piece that sandwiches between the bow chainplate and the deck. The damage to the starboard rail meant a few bolts had to be drilled out:


The trim piece:


Port side ok, starboard side mangled. It's currently at the machine shop. They're going to fab up a new piece for the starboard side and re-weld. I have had to delay working on fixing the fiberglass damage:


because we've gotten about 6" of rain in the last 3 days! I've got a few days of (hopefully!) dry-ish weather to get on this. This is the project for this weekend.

I also cleaned up the rub marks on the starboard side from the boat that hit me. Before:


and after:


It only looks ok from 20 feet away. Up close lots of scratches and chips in the paint, but I'm planning a full hull repaint anyway.

That pretty much catches up with all the work to date. More as things progress!

Cheers,

Mark-san
 
  • Like
Likes: pateco

Gunni

.
Mar 16, 2010
5,937
Beneteau 411 Oceanis Annapolis
Mark;
You are getting great results with your interior paint finishes. Are you still using a process of epoxy primer and two-part topcoat described earlier? Given the materials I would be interested in your PPE protocol and respiratory protection.
 
May 8, 2013
629
Hunter 40 Dataw Island, SC
Mark;
You are getting great results with your interior paint finishes. Are you still using a process of epoxy primer and two-part topcoat described earlier? Given the materials I would be interested in your PPE protocol and respiratory protection.
Thanks! I'm pretty happy with the results so far. I'm not using the epoxy primer/two-part for the aft cabin and v-berth (when I get to the v-berth, that is). The main cabin didn't have much (or any) paint prior to what I have applied so the two-part was an easy choice. Both the v-berth and aft cabin, however, had already had paint coats applied - seems to be a cream-like color. I don't know if that was factory or PO choice but it has altered my paint strategy. Two-part can and will eat through a primer coat if applied like I am doing, i.e, hot-coating, and lift and craze any single stage paint underneath. So my choice was to sand or strip all the old paint or go with a single stage. I'm using Interlux Brightsides single stage for the remainder of the interior paint. It applies easy and over prepped fiberglass/gel coat doesn't need primer.

As far as PPE, I've got a friend who loans me his suit/air hood when I need to paint inside. Might be overkill right now for the Brightside because I have plenty of ventilation and could probably get away with a good respirator but since I've got access to the good stuff might as well use it! It does tend to get pretty hot inside the air hood though :redface:

Cheers,

Mark-san
 
May 8, 2013
629
Hunter 40 Dataw Island, SC
Friday update:

More aft cabin paint yesterday:


I'll let the paint cure for a day or so before I the tackle the last area - I think I can get the rest in one go. I'm leaving the upper aft interior hull sides unpainted for now until I find the time to install the new Lewmar portlights in the hull. No sense wrecking new paint since I'll have to glass reinforcements into the hull for the portlights.

I also started grinding and prepping the bow for glass and epoxy. If the weather holds I'll get part of it done tomorrow. I can't do it all in one go - I'll fix the upper deck section and the prow, then the hull joint lip after the deck cures. Should be fun to watch - I don't have any slow cure epoxy right now, just the fast cure. We'll see if the temps cause the epoxy to kick off in the cup. I'll try mixing the smallest batches I can:yikes:

I also started working on the mast. Today, LED lights for the tri-color and steaming light. The deck light hasn't worked for years - I found a combo steaming/deck light fixture, not sure yet if I will replace what I have now but I'm not sure I can get an LED bulb for the current deck light. I'm going to replace all the wiring for good measure while the mast is down, check all the pulleys, replace the VHF antenna/coax and try to get the wiring for the wind instruments and radar in as well. Hopefully I can get the mast back up before leaving for Japan!

Cheers,

Mark-san
 

Gunni

.
Mar 16, 2010
5,937
Beneteau 411 Oceanis Annapolis
Brightsides enamel! I've worked with that, what a great paint. Flows out like paints of old.

If you epoxy your hull and leave it for some future date you should consider coating the epoxy with a sandable top coat to provide UV protection. Epoxy doesn't hold up well to sunlight and will become crazed and chalky. Been there.
 
May 8, 2013
629
Hunter 40 Dataw Island, SC
Brightsides enamel! I've worked with that, what a great paint. Flows out like paints of old.

If you epoxy your hull and leave it for some future date you should consider coating the epoxy with a sandable top coat to provide UV protection. Epoxy doesn't hold up well to sunlight and will become crazed and chalky. Been there.
Yep, Brightsides is good stuff! I'm planning to use Interlux Perfection for the hull and I'll have to alter my original plan for that due to your experience with the primer. I hadn't considered the epoxy degradation due to UV. My original plan was to do the bodywork and several coats of primer on one of my leave periods, then on the next one do a final sand then paint. I might have to condense that and do it all at once. Not ready yet for exterior paint though so I have time to plan that out. The more I look at the paint currently on the hull the more I think I should strip to gel coat first. The paint is really rough, lots of chips and loose paint, plus all the scratches from being thrown around plus all the repair areas.

Today I was thwarted doing most of my outside work by the weather gods. We had the threat of rain for most of the afternoon but no actual rain. I needed about 6 hours of predictable conditions to get the bow repairs underway and just didn't have it. I did get the compression post back in though.

Tonite I made the modifications to the lift muffler. This is not the final muffler! I do have one on the way but it probably won't arrive until after I'm gone and I want to be able to test the exhaust system before leaving. The new muffler is dimensionally the same as the original but has a horizontal inlet and horizontal outlet. The factory one has a vertical inlet, so I figured I could reposition the inlet:


so I cut off the inlet tube and cut a hole to fit to reposition it horizontally:


I glued the plug from the holesaw back into the top and re-glassed everything in place:


I don't have any high-temp epoxy so this is probably not a long-term deal but it should work ok for a few test runs.

Hopefully I can get a good weather window tomorrow!

Cheers,

Mark-san
 
May 8, 2013
629
Hunter 40 Dataw Island, SC
When the weather gods cooperate!

Yay, no rain today! Of course that means 85 degrees and 100 heat index, but take it when ya got it :thumbup:

I had already ground the areas that needed attention up at the bow so I started the glasswork here. I have three areas to deal with - the deck where the cleat partially pulled through, the upper hull lip and the stem, which is mainly surface damage, though some of the damage is pretty deep. I have to deal with the deck and hull lip separately since they should stay separate, so I formulated a plan. Here I sandwiched a piece of plastic between the deck and hull lip:


The need for excess plastic will be apparent soon! Then I added the epoxy and glass layers:


Since the deck still had a slight crown to it and needed to cure flat, I cut two pieces of scrap ply to length and folded the extra plastic over the new glass, then clamped the deck between the ply pieces to flatten it:


After drying I removed the clamps, all good! Tomorrow I'll start on the hull lip. By the time it's finished I should have the repaired stainless trim piece back and I'll be able to put everything back together.

I also started on building the stem back up, not much here photo-worthy until it's finished. Pics of that when appropriate.

Cheers,

Mark-san
 
  • Like
Likes: pateco
May 8, 2013
629
Hunter 40 Dataw Island, SC
Odds & ends:

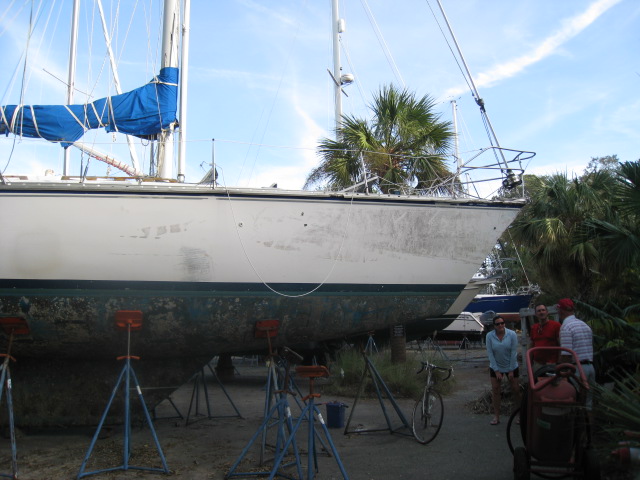
Finally got a dry spell - unfortunately the heat has arrived! Midday work outside is nearly impossible, so I'm going out at first light and working until it's too hot, then going out again early evening until too dark to see what I'm doing.

Repairs on the stem are almost there - final sand tonite to check and if it looks good I'll get primer on it tomorrow.

After a few days of unbearable heat down below I broke down and bought an air conditioner. It fits on the bridge deck and blows in through the companionway. I couldn't get a very high BTU unit because I have to run a 75' extension cord to run it. But with a few fans running below it's bearable for all but a few hours a day. So -

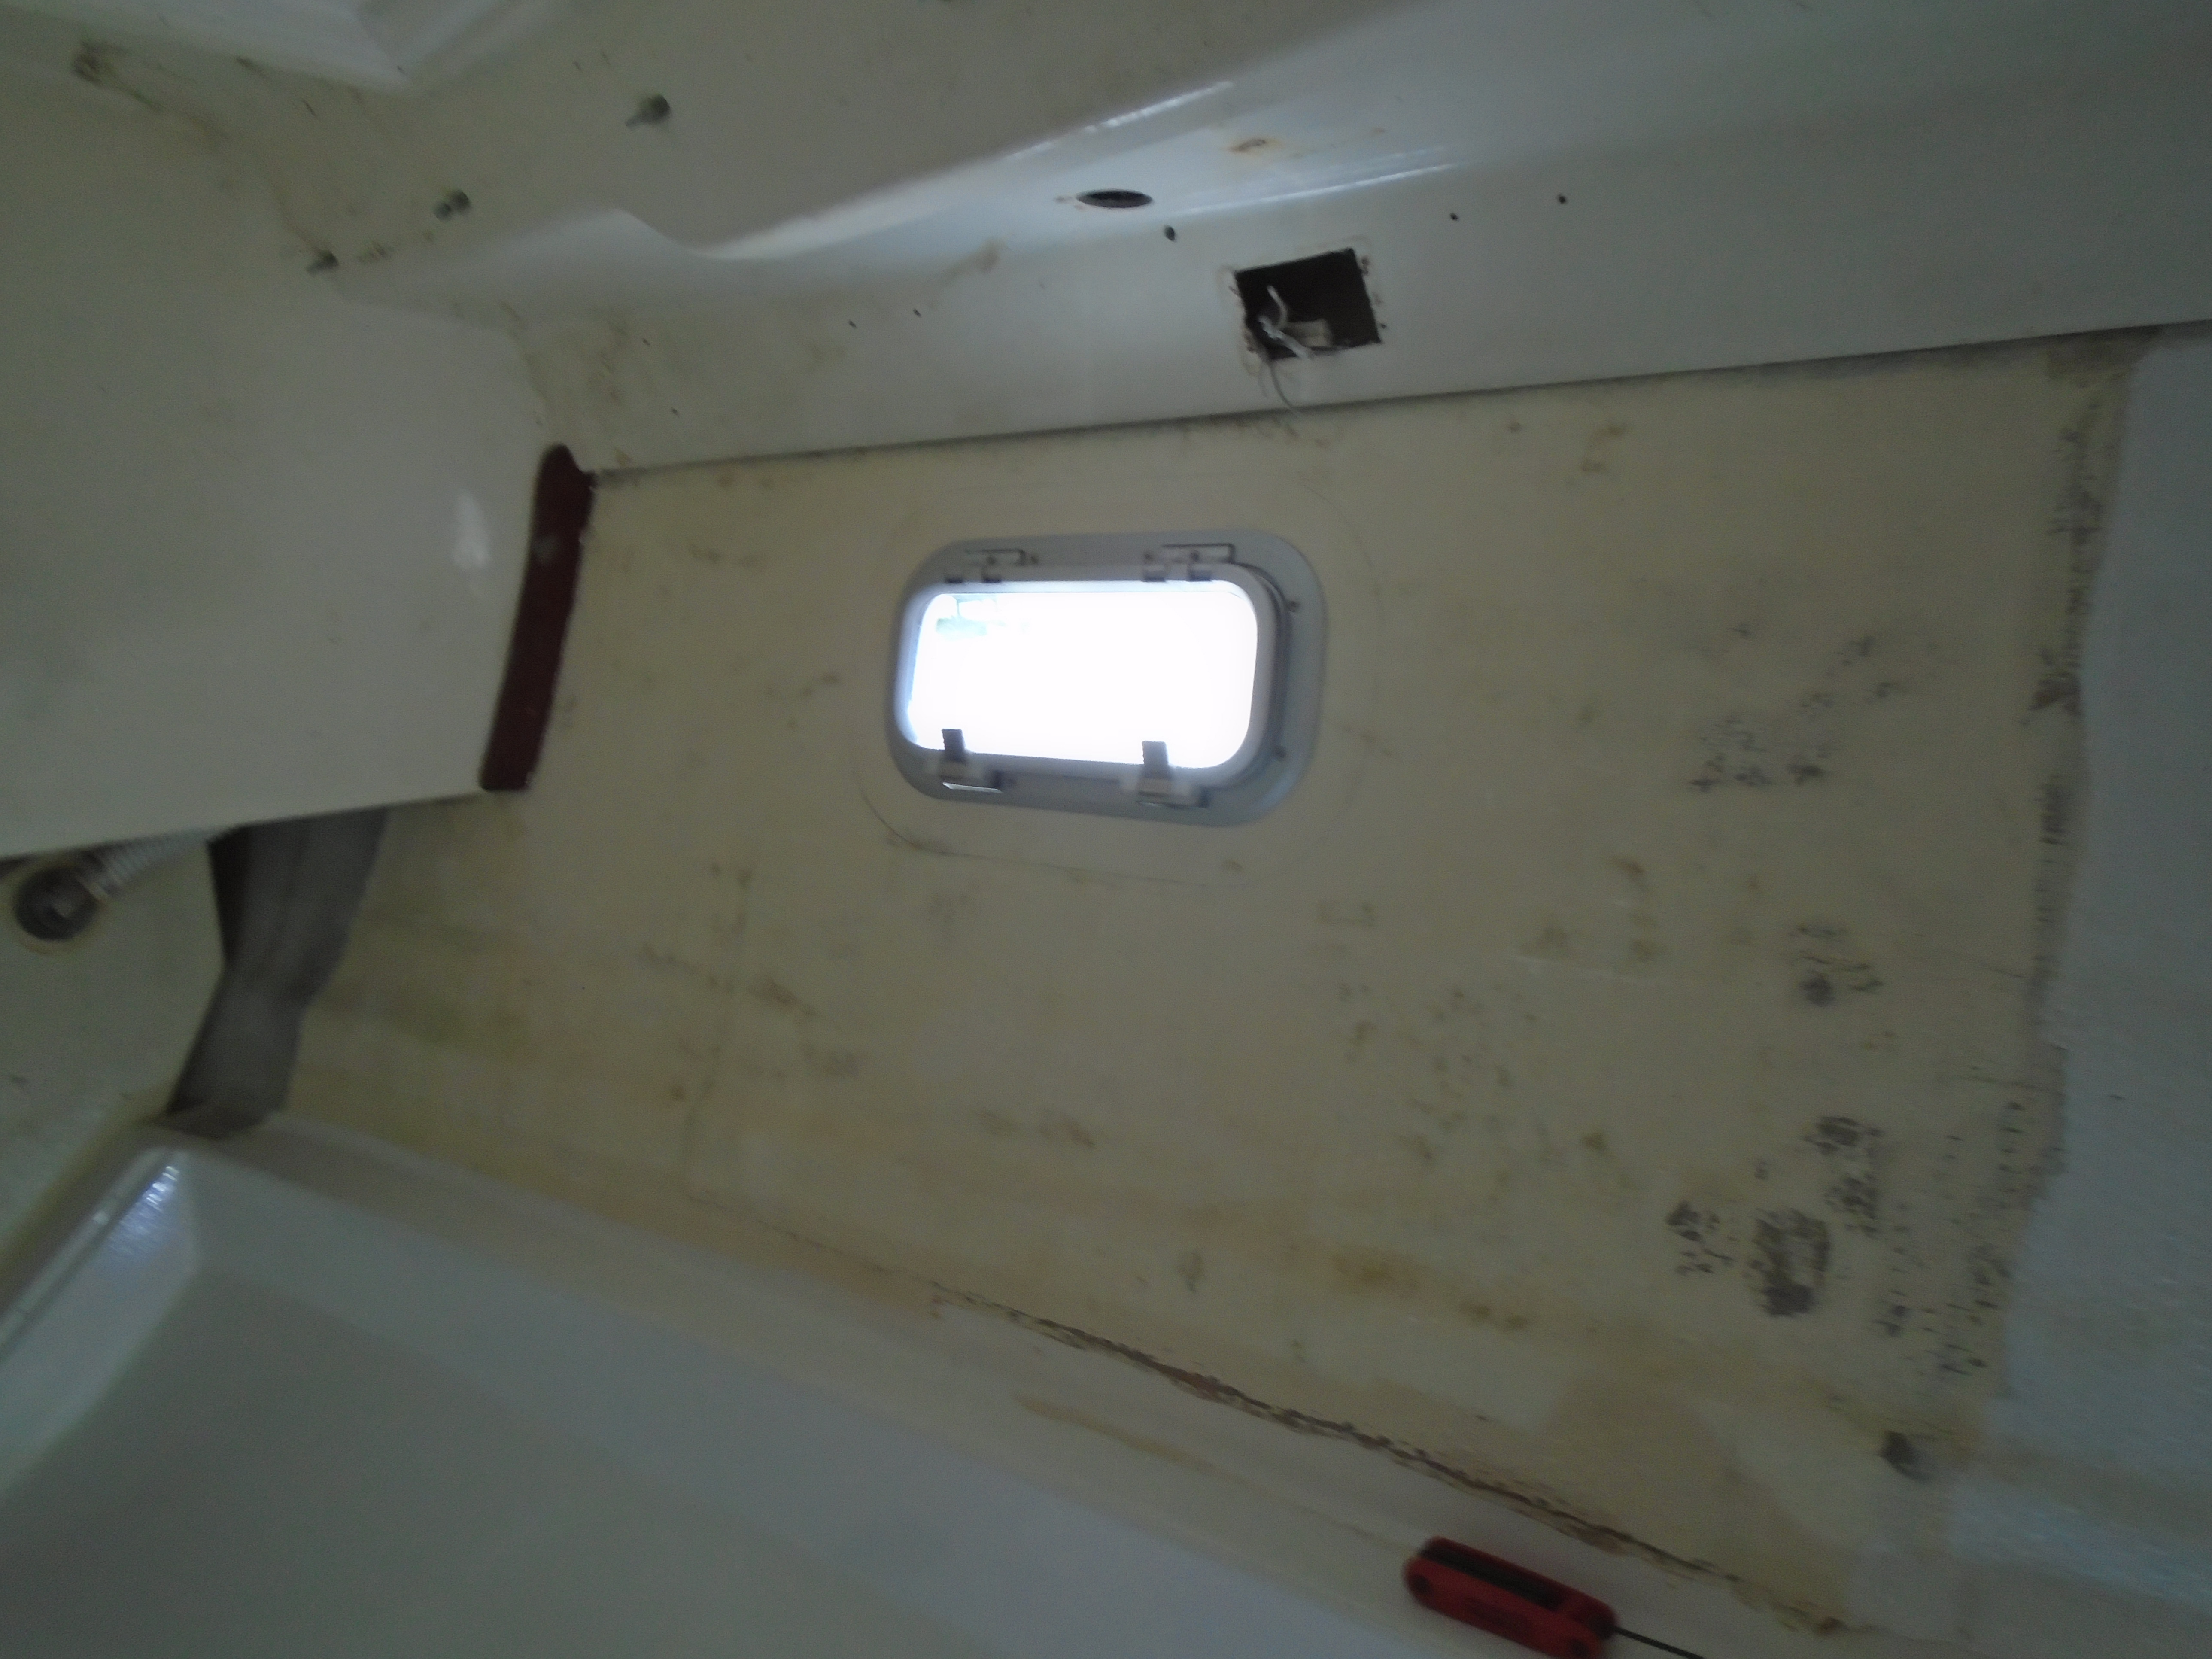
Time to set aside repairs and install some upgrades! One complaint I have had about the boat is the ventilation in the aft cabin. The opening portlights open into the cockpit - not very useful for allowing breezes in. So my plan was to put some portlights in the hull sides. Lewmar Atlantic 30s to the rescue! I've been working up the install for a while now and had to deal with two potential issues. One, Lewmar says the mounting area has to be flat within 2mm. When I placed the portlight against the hull the curvature was just beyond this tolerance, so I figured I would have to fabricate something. The second issue is that ABYC recommends that in-hull ports (fixed or opening) should not protrude from the hull. They should be flush or recessed. I took a walk through the yard and looked at all the boats with in-hull ports. Seems to be about half have flush or recessed and half have the frame of the portlight outside the hull. Time to dig in a see which way is best.

I made up a bunch of templates for several scenarios:


Next up was to position a template against the inside of the hull. Then I drilled two test holes a half inch below the estimated upper edge of the opening. This was to check the position and level on the outside of the hull. With all looking good, I marked the hull and drilled the perimeter corners:


Next up, cutting big holes in the hull - intentionally! The handheld router worked well for this:


Now for the good news - the hull relaxed just a little around the hole, just enough to fall within the Lewmar tolerance limits. This helped a bunch since I don't need to spend a ton of time fabricating a window mount. I had already planned and made reinforcement plates for the hull anyway for this.

Portlight installed temporarily:


Clamping the flange in place pulled the hull sides just the little bit more I needed so I figured I could use the portlight in place to hold the hull sides in shape while I glassed in the reinforcement plates. Stay tuned!

Cheers,

Mark
 
  • Like
Likes: Rick D