Replacement of soles in a 1983 H31

SFS

.
Aug 18, 2015
2,069
Currently Boatless Okinawa
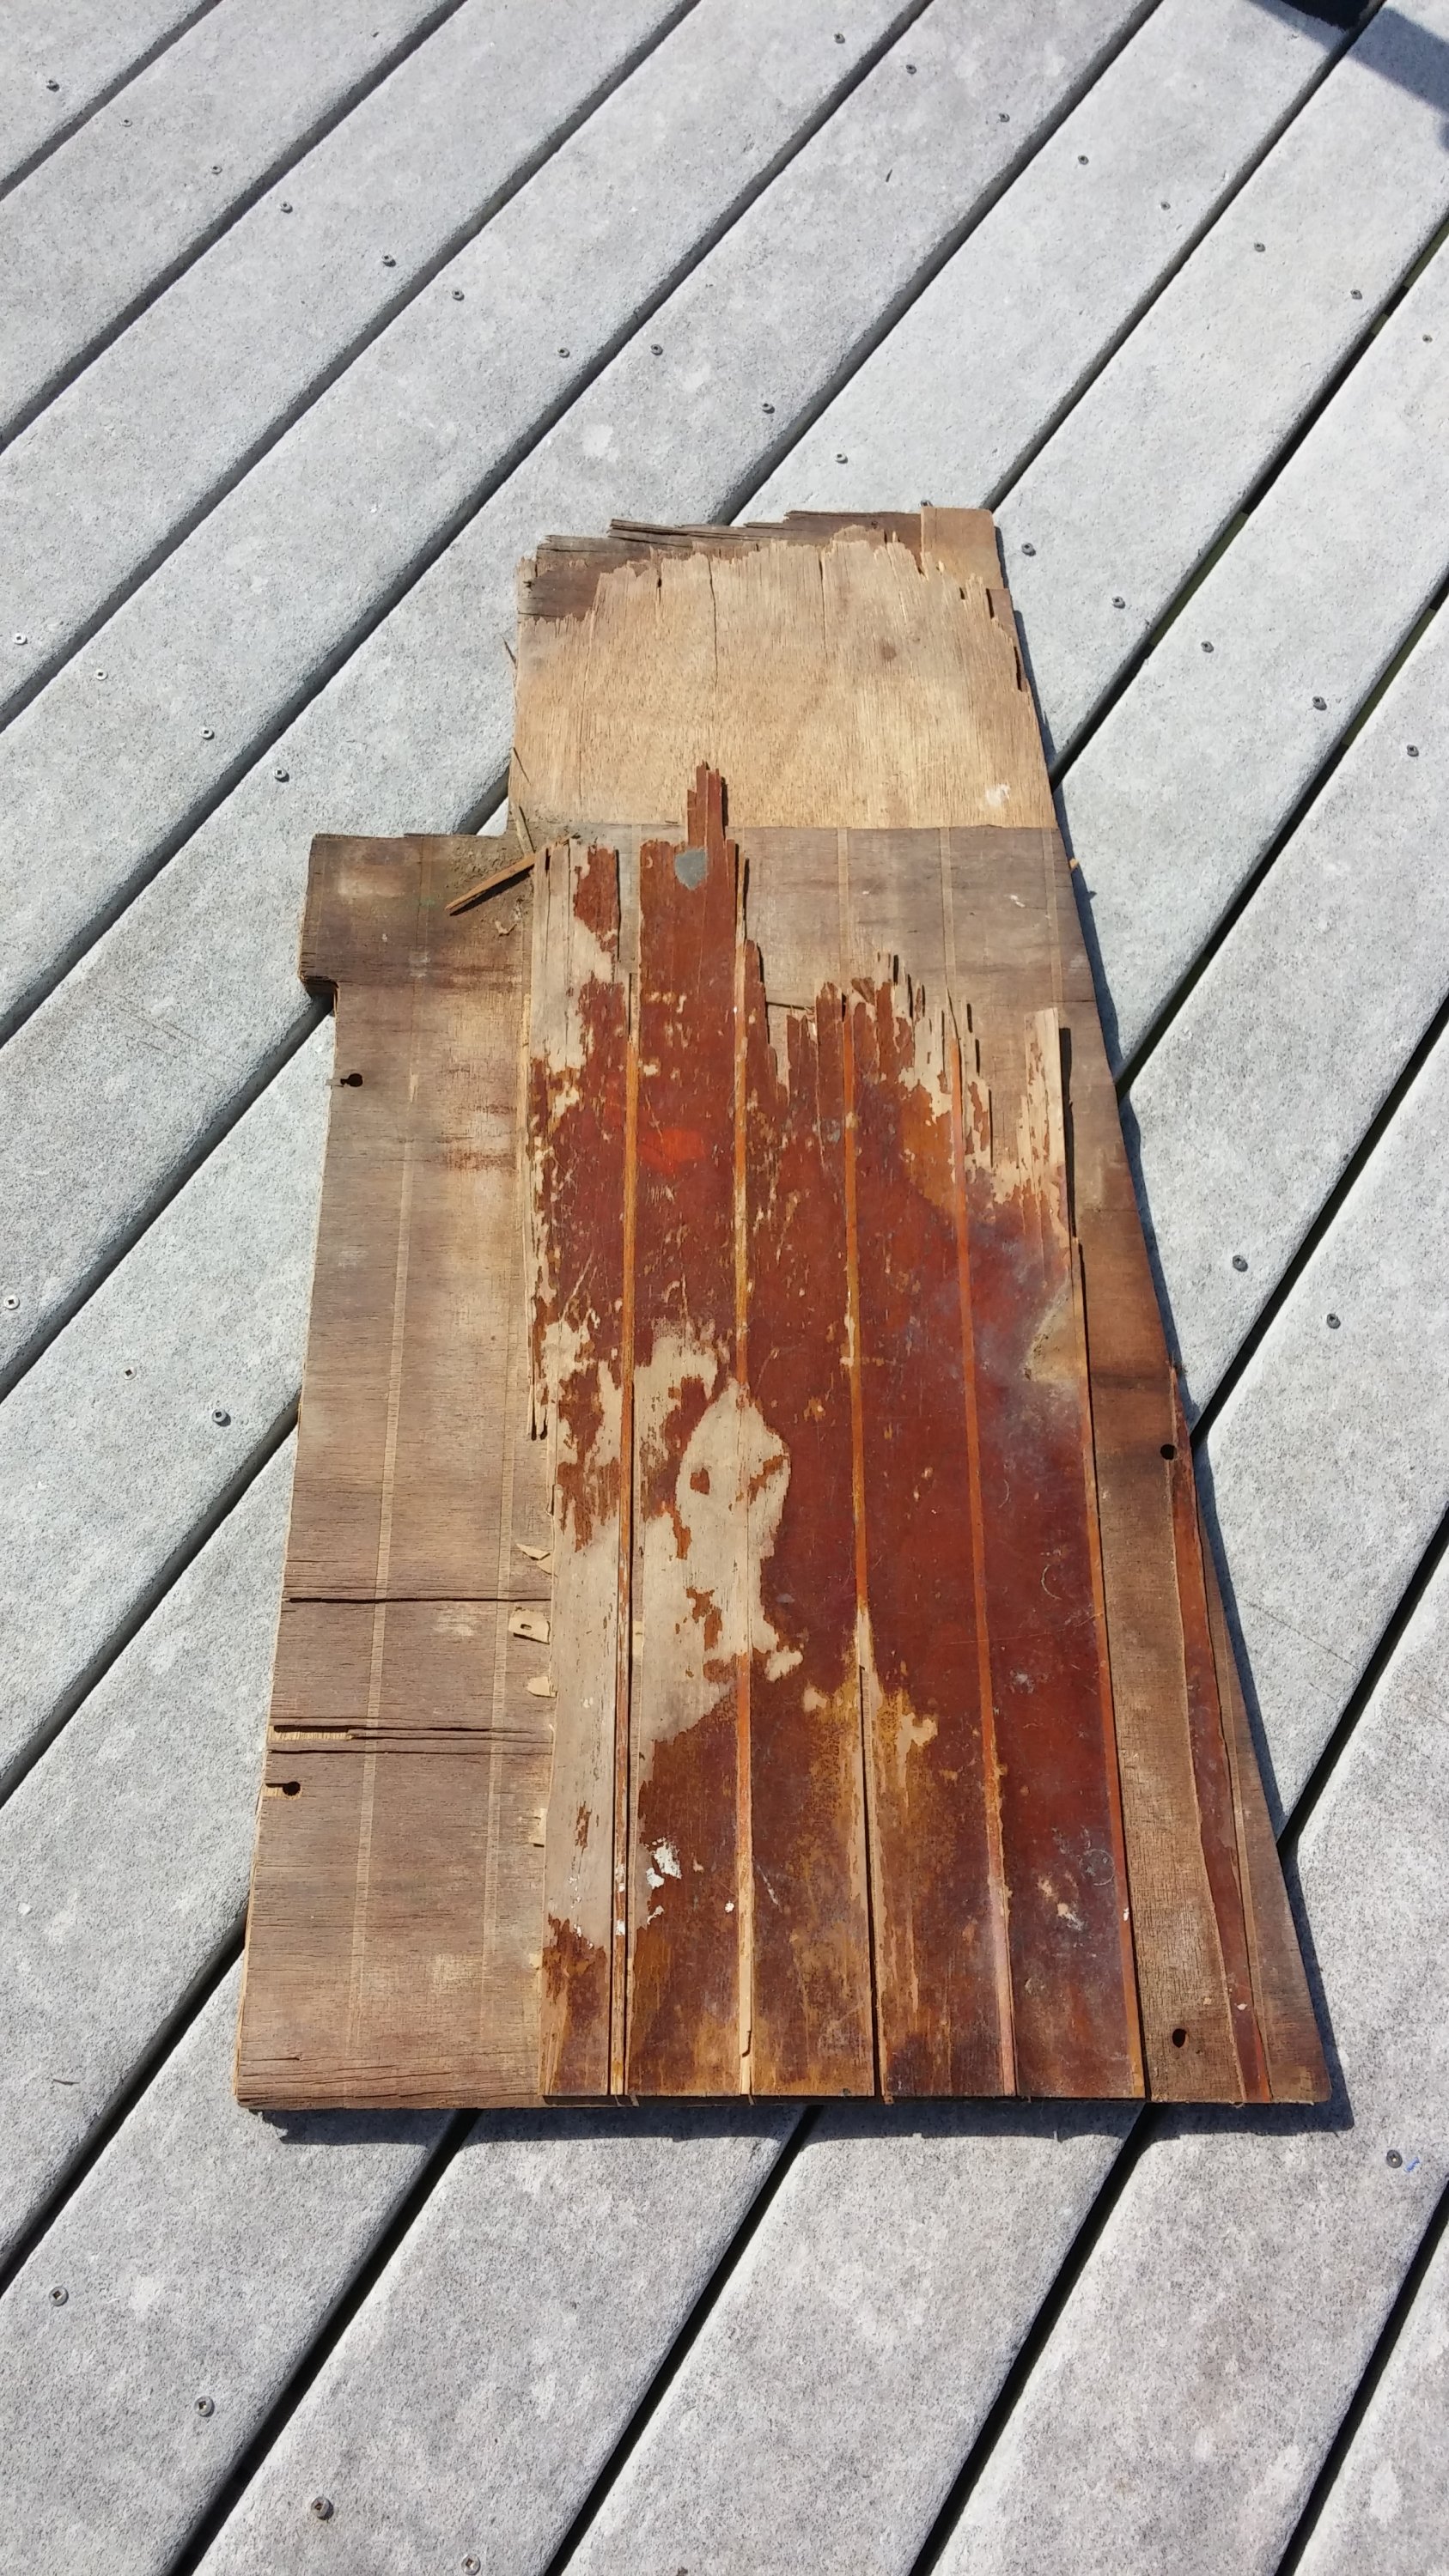
Well the project is finally well underway. The port quarterberth sole that I had to take out:
0815161019.jpg


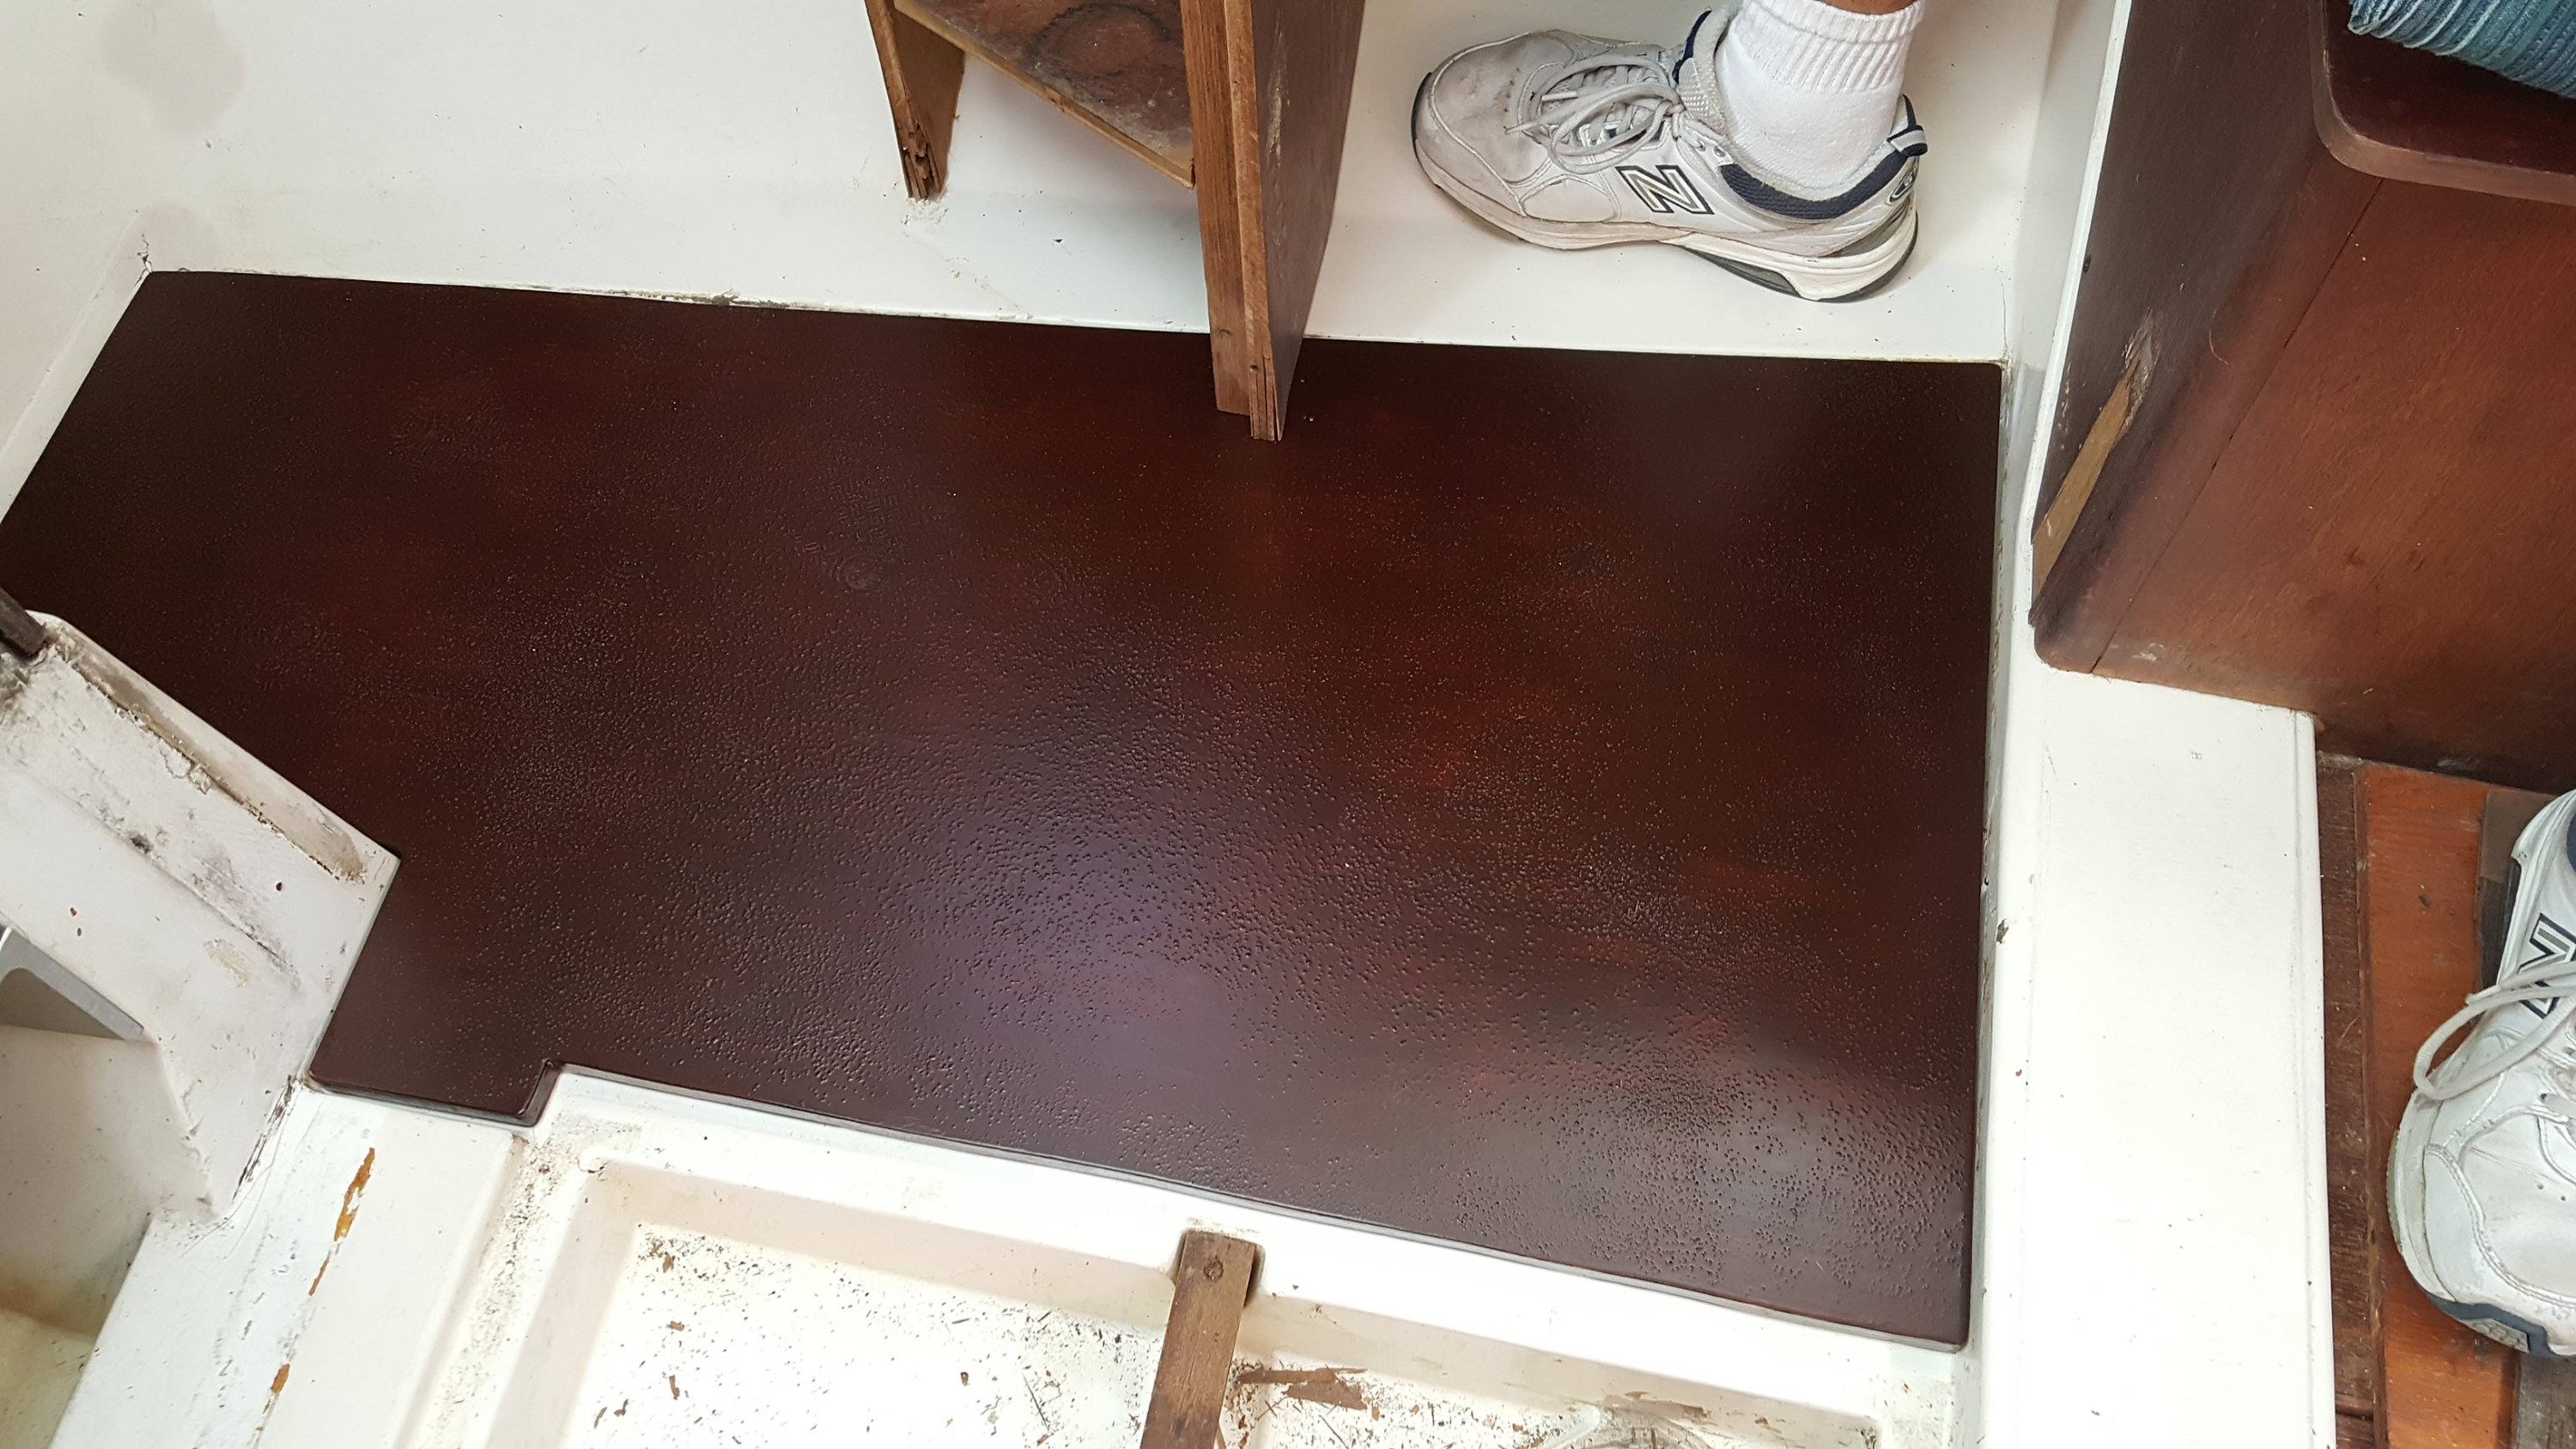
The replacement, installed:
20160813_095449.jpg


The old galley sole:
0815161007.jpg

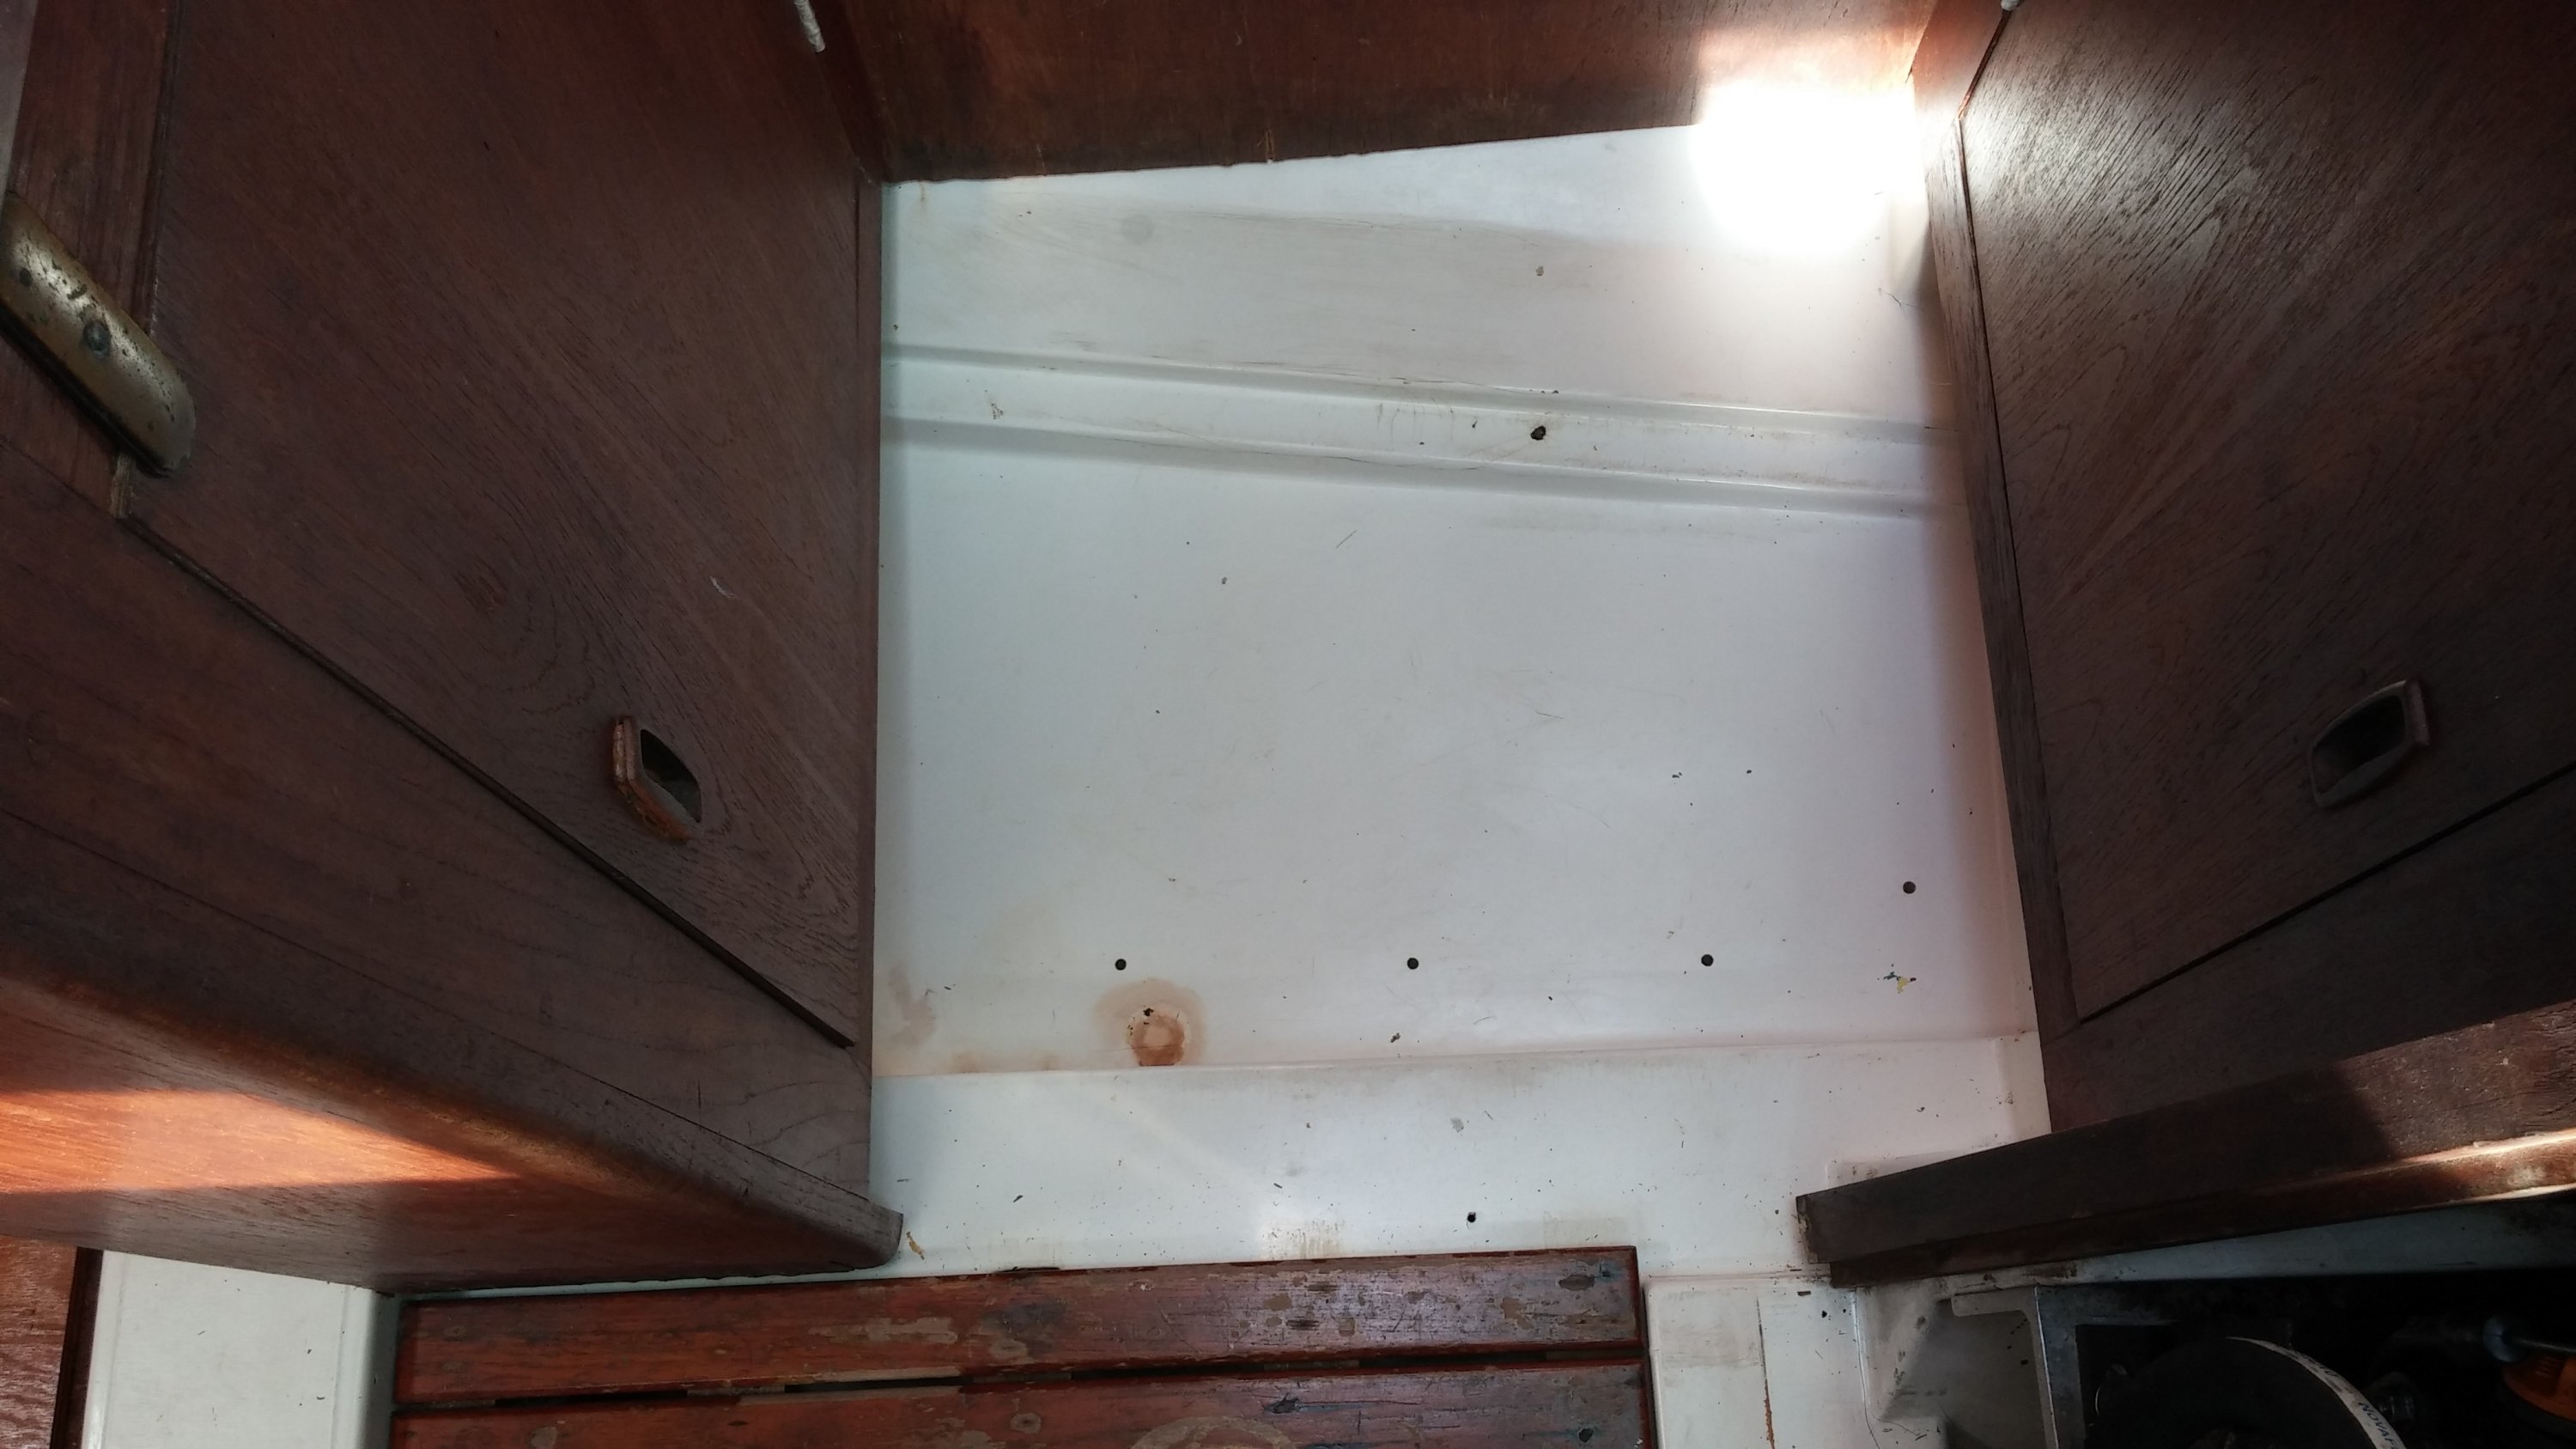
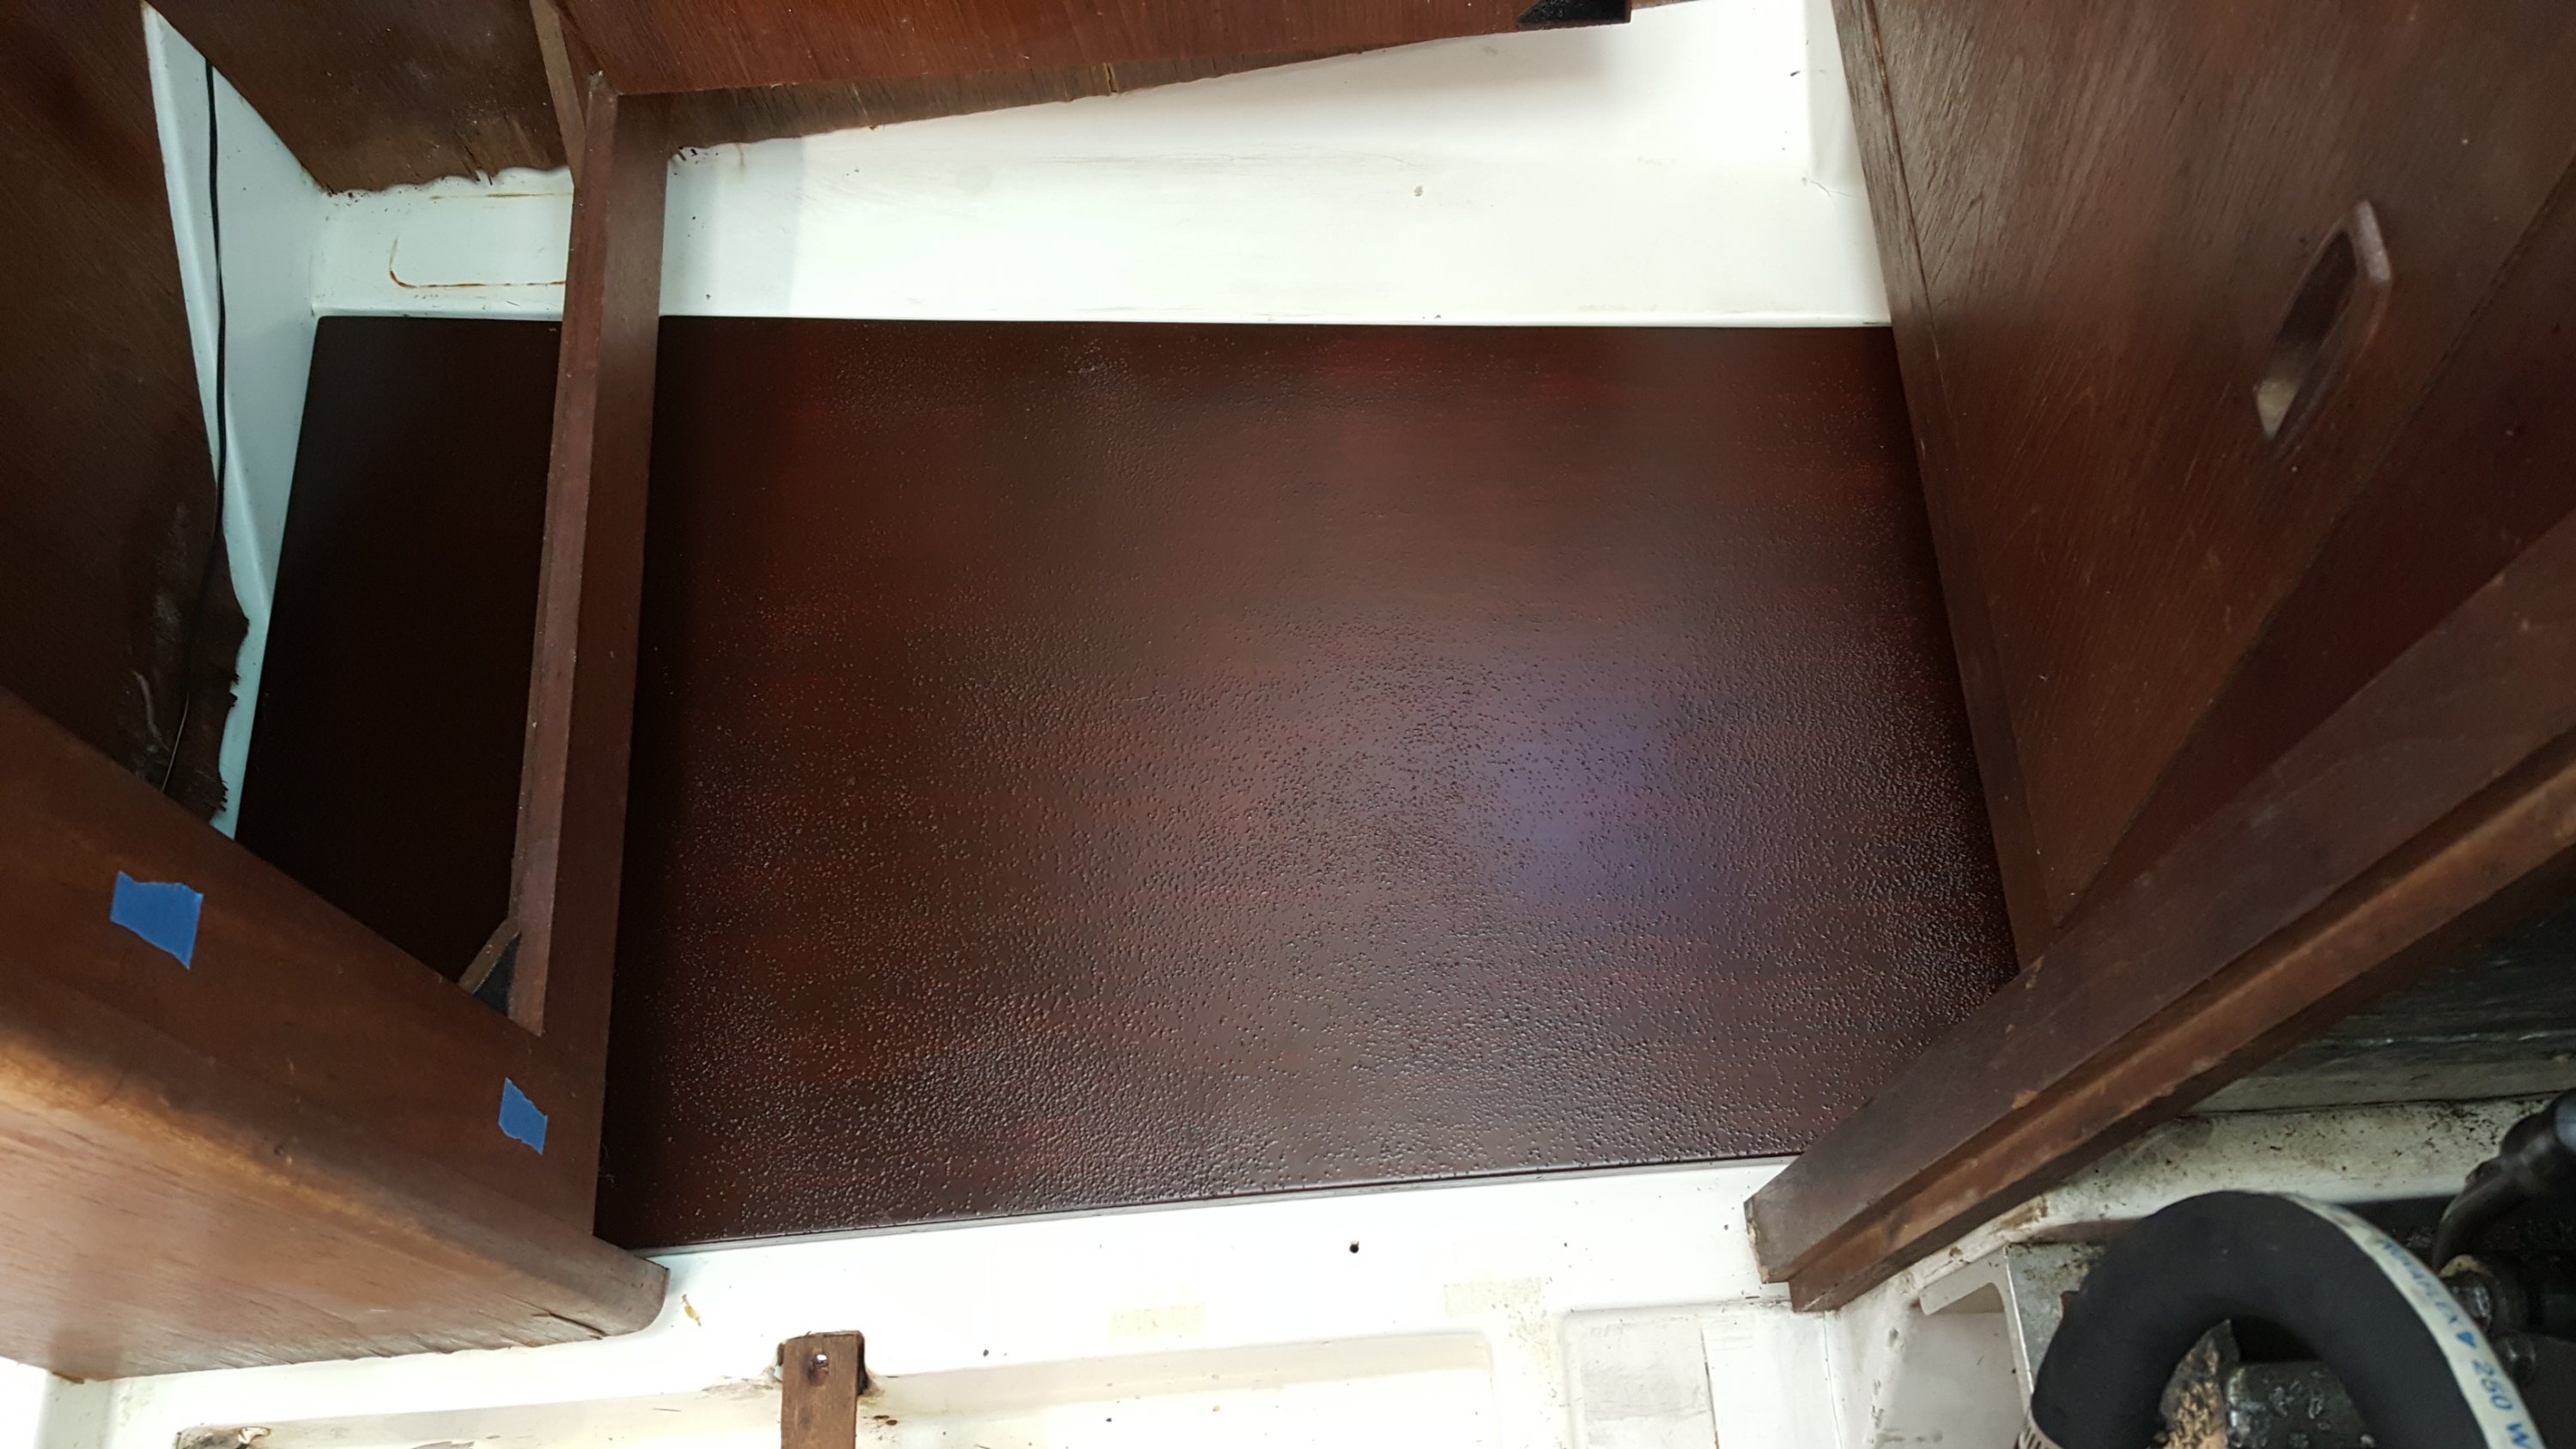
(Exactly! There wasn't one.) Here is the new one, installed:
20160813_101036.jpg


Material was 3/4" exterior grade A/B 5-ply plywood. I cut full size templates out of 1/4" luan plywood, and test fit them. Stain was General Finishes water based stain in Black Cherry. Then 3 coats of West System epoxy (I used the 207 Special Clear Hardener) on top, bottom and edge grain. Finish is Minwax Helmsman Spar Urethane in satin, as follows: One coat, dried and sanded very lightly with 220 grit, as per the instructions. Second coat went on, and while wet I sprinkled table salt fairly evenly (which was difficult) into the wet urethane. After drying, I removed the salt with water, and added one more coat of urethane, for a total of 3 coats.

For those of you contemplating this, it is easier if the cabinetry can come out. I was only moderately successful with that. I tried taking out the nav station, and could not find the last few screws that would have had it come out completely. Ultimately, I removed a panel (which you can see is missing, in the picture), plus enough screws and cleats came out of other places that I could lift it a bit. The combination let the admiral slide the finished panel in easily. Many thanks to HMT2, who has recently done this on his 31, and spent a lot of time with me on the phone, answering questions, texting pictures, and offering confidence-building suggestions, especially regarding the nav station.

So when it came time for the galley sole, I really didn't want to take the forward cabinet out, or even any of its individual panels. Instead, I just made the sole smaller, so it does not run under the midship portion of the forward galley cabinet. It's actually in two pieces, in case anyone is wondering how I got it in without removing the galley cabinet.

We didn't care about teak and holly, so I decided not to spend the money. I'm doing the whole boat, so everything will match. Once I started thinking about the total encapsulation with epoxy, I decided that marine ply was also not imperative. Yeah, there potentially are voids in there somewhere, but I checked all my edges after cutting, and found only one void, which I filled using a syringe and thickened epoxy. The salt for anti-skid was one of the ideas from another thread I started. Thanks for everyone's help on that topic, we tried lots of options, and this is the one we liked best under bare feet.

Its not perfect, but I am pleased. Panels are darker than other wood in the interior, because I ended up applying two coats of stain. I followed the application directions, but was unhappy with the unevenness of color even using the foam brush specified. A second coat helped a lot with that, but obviously overshot the depth of color. We knew we didn't want gloss on the topcoat, for fear of starting a cycle that had us constantly "equalizing" wood finishes instead of sailing, but after seeing the satin I might have opted for semi-gloss. Finally, we live in a condo, so I did all of the epoxy work and finishing in the same room that I had done all my sawing in. Consequently, there are blemishes in the epoxy coats and the topcoats from particulate in the air. But we don't care - look at what we had before.

Now comes the hard part, the main (salon) sole. Settees will have to come out, as the floor runs under them, and I'll have to decide where to cut the whole into smaller pieces, as a one-piece floor will not come through the companionway.
 
Last edited:

pateco

.
Aug 12, 2014
2,207
Hunter 31 (1983) Pompano Beach FL
Ours was rough to start.

am411boat08.jpg


We refinished
2014-12-26 18.41.31.jpg
2014-12-27 14.34.49.jpg


However, we recently had a hot water heater failure that went unnoticed for a week, resulting in complete de-lamination of this section of sole. How hard was the removal? Which screws of the nav station could you not find?
 

SFS

.
Aug 18, 2015
2,069
Currently Boatless Okinawa
How hard was the removal? Which screws of the nav station could you not find?
Chip, thanks for making me laugh. The short answer is "if I could have found them, I would have known where they were, and would have taken them out"! However, I can attempt to give you an idea, and this may be best accomplished in a phone call. I'll send you a PM with my number.

Perhaps a more informative response is that once I got all of the screws out that were obviously applicable, and identified the many that were not (thanks to HMT2 for this concept) I was left with two points of "resistance" to my attempts to lift and to pull straight athwartship. They were:
a) a point somewhere along the aft edge of the port settee back, and
b) a point somewhere on the forward panel of the hanging locker just aft of the nav station. This panel runs port and starboard.

In neither of these cases was I able to find a screw head, a fastener hole (I considered staples and nails), a bung to be pulled, a cleat in an applicable location, etc. It was as if the fastener had been transported to the interior of a piece of wood by a crewmember on the starship Enterprise.

The good new is, the whole nav station doesn't have to come out. I was skeptical when HMT2 told me that, but now I have proven it.
 
Last edited:
  • Like
Likes: pateco

pateco

.
Aug 12, 2014
2,207
Hunter 31 (1983) Pompano Beach FL
Chip, thanks for making me laugh.
I was left with two points of "resistance" to pull. They were:
a) a point somewhere along the aft edge of the port settee back, and
b) a point somewhere on the forward panel of the hanging locker just aft of the nav station. This panel runs port and starboard.
Sorry, I realize that was dumb, but you were still able to get me the info I was asking for?
 

SFS

.
Aug 18, 2015
2,069
Currently Boatless Okinawa
Sent you a PM, give me a call. I'm happy to help, and I think a phone call is much more efficient. Ideally, you would be on the boat.
 
Sep 4, 2007
766
Hunter 33.5 Elbow, Saskatchwen, Can.
Now comes the hard part, the main (salon) sole. Settees will have to come out, as the floor runs under them, and I'll have to decide where to cut the whole into smaller pieces, as a one-piece floor will not come through the companionway.
When I replaced the sole on the 34 I put the cut under the port settee. The 34 has a water tank on that side and the seam I cut is under that. I only needed to cut it back about 8 inches to get it though the entrance.
Hope this will help.
 

Reg M

.
May 21, 2016
131
Hunter 31 Montague
I was planning to replace only the main salon cabin sole next year and I have had a very close look at it. I am quite sure the port settee does not have to come out, if you look along the lower front of the settee you will see the screw plugs in the cabin sole about a half inch inboard of the settee and if you look inside the settee there is no teak and holly. I'm pretty sure that only a half inch or less of the cabin sole extends under the bottom of the settee. The starboard settees are another matter but if you look at how they are fastened down all you have to do is remove the screws which are easy to get at and lift out the settees. The aft stbd settee can be unscrewed from the cabinet behind it. Also, that main cabin sole is not one piece (at least not on mine), there is a joint under the center of the table. I appreciate your post as only today I was looking at my galley and nav soles and wondering if there was a way to get them out. Now with your experience under my belt I think I'll do them too. Good luck with the rest. Reg
 
Last edited:

SFS

.
Aug 18, 2015
2,069
Currently Boatless Okinawa
Reg, I appreciate YOUR post, as it will serve as confirmation to the observations I hope to make today regarding the main sole. I suspect the main sole only "tucks" under that port settee.

Having said that, I apparently have an unusual interior configuration. I do NOT have a U-shaped settee to starboard, with the 3 sides of seating surrounding a pedestal table. Instead, I have a starboard settee that matches the port one (it just runs fore and aft). The dining table folds up against the bulkhead that is the aft wall of the head. Consequently the boat appears to have a lot more interior volume, and it's one of the reasons we bought this copy. I've never been on another H31, so I didn't know this one was odd until HMT2 sent me pictures of his interior.

In any event, I hope to just remove a couple of cleats in the starboard settee, and take the front panel off, leaving the seating surface in place. I have confirmed that the teak and holly sole runs all the way under this one. The tricky part will be deciding where to cut it apart to get it out, while preserving it as much as possible to use as a set of templates, and what cutting tool I will use. Most folks use a circular saw set carefully to the exact depth of the plywood. That terrifies me, but any cut I make will be a blind cut relative to the underside of the wood, so I might as well use the most efficient saw and get it over with quickly.
 

Reg M

.
May 21, 2016
131
Hunter 31 Montague
My previous boat was a CSY 44 which I spent a year in Trinidad rebuilding before we started cruising the Caribbean. I had all the interior cabin soles replaced on that boat and the guy who did it for me (I helped) used a jigsaw and then a hammer and chisle to tidy up the edges. We cut it along the front of the settees and butted the new sole up against the part remaining and covered it all with quarter round. I would suggest one of those multi-use tools that have an off set flat blade which vibrates back and forth. With that tool you can cut it off flush and do a tidy job of it. I would suggest masking the front of the settee. I think if you weigh the damage you will do to the settee in removing part of it compared to, at worst case scenario of installing quarter round, I would prefer the quarter round. However, I don't think you will need a quarter round if you use the suggested tool which I did not have access to. Is there a joint down the middle of your cabin sole? Also, I would like to know, in hindsight, did you really have to remove that panel on the nav station in order to lift it or could you have done it without removing the panel? My interior wood is in excellent condition except for the sole and I don't want to cause more damage than I fix.
 
Last edited:

SFS

.
Aug 18, 2015
2,069
Currently Boatless Okinawa
Those are excellent points, and I have thought about (and talked to vendors about) an oscillating multitool. I'll need to evaluate the integrity of the soles under the settee storage before I can legitimately decide not to replace evertyhing. The soles are soft due to an air conditioner condensate line leak during the PO's administration. If that softness goes all the way under, I'll want the entire sole taken out. The panels in the settee are also not in the best of shape cosmetically, so that is less of a factor in the decision making process.

Relative to the jigsaw: with that blade going up and down beyond the underside of the material you are cutting, weren't you worried about cutting something you didn't want cut? Wires, portions of the molded hull liner beneath the sole, plumbing, etc.? It would seem to me there is no control over the depth of cut with that tool. Also, with the width of the saw's body, I wouldn't be able to get the blade right up against the settee panel. I guess that's why a multitool is the way to go.

You've given me lots to think about, and potentially saved me a LOT of time, so thanks. Any other thoughts will be gladly received.
 

SFS

.
Aug 18, 2015
2,069
Currently Boatless Okinawa
I guess I see how the jigsaw would work. You dont cut with the guides of the saw flat on the sole. That would give you a 90-degree edge. Instead, you angle the saw and blade so it's cutting under the bottom edge of the settee at maybe a 45-degree angle. The bottom of the sole thickness will have been cut at a point farther under the settee panel than the top of that thickness is. Then the chisel is used to clean up enough material to get something relatively vertical to butt the new sole to. Do I have it right?

Your guy must have had a steady hand. I begin to lean toward multitool (no pun intended) in this precise situation.
 

HMT2

.
Mar 20, 2014
899
Hunter 31 828 Shoreacres, TX
Reg,
You are correct the port setee does not need to come out. Both of the starboard ones do, although they are very easy to get out, other than the plugs I did zero damage to them. As I recall you can almost remove them by taking the cleats out. While they are out you can give them several coats of tung oil. That's what I did with mine. The oiled teak was already in good shape but after several,coats of tung oil they look almost new. My boat had a seam that ran under the table as well. It is simply too wide to run a single piece of teak and holly fore to aft. Yes a portion of the nav table unit and the port piece that holds your companionway steps in both have to come out to get that port aft piece out and back in. Here is a photo of what had to come out and the finished product. Also, one with the starboard settees out you can see where the seam is. For whatever reason the photos are reverse of the order in the post.
image.jpeg
image.jpg
image.jpeg
 

Reg M

.
May 21, 2016
131
Hunter 31 Montague
I guess I see how the jigsaw would work. You dont cut with the guides of the saw flat on the sole. That would give you a 90-degree edge. Instead, you angle the saw and blade so it's cutting under the bottom edge of the settee at maybe a 45-degree angle. The bottom of the sole thickness will have been cut at a point farther under the settee panel than the top of that thickness is. Then the chisel is used to clean up enough material to get something relatively vertical to butt the new sole to. Do I have it right?

Your guy must have had a steady hand. I begin to lean toward multitool (no pun intended) in this precise situation.
You are right, the guy was an artist with a jigsaw, he did all the work on the boat at anchor using mostly a jigsaw. On the CSY44 there is about 8 inches under the areas we had to cut and we could easily see underneath. He did cut at about 45 degrees but inboard of the settee by about a half inch so that when he used the chisel the remaining sole under the settee had a 90 degree edge and the new sole butted right up against it (with some west system and microballons to seal the edges. In using that multitool, the blade is about 3 inches wide, I would attack the sole so that you get a 90 degree cut but angle the tool maybe 25 or 30 degrees sideways so that it will not jump around, and you will probable be able to feel when the deeper side of the blade comes to the fibreglass. If you put all the blade teeth on the sole at the same time an attempt to cut with the blade that way it will probable not work as the blade goes from side to side, With it angled, one side of the blade is coming out the top every rotation. Hope this makes sense. Reg
 
Last edited:

Reg M

.
May 21, 2016
131
Hunter 31 Montague
Reg,
You are correct the port setee does not need to come out. Both of the starboard ones do, although they are very easy to get out, other than the plugs I did zero damage to them. As I recall you can almost remove them by taking the cleats out. While they are out you can give them several coats of tung oil. That's what I did with mine. The oiled teak was already in good shape but after several,coats of tung oil they look almost new. My boat had a seam that ran under the table as well. It is simply too wide to run a single piece of teak and holly fore to aft. Yes a portion of the nav table unit and the port piece that holds your companionway steps in both have to come out to get that port aft piece out and back in. Here is a photo of what had to come out and the finished product. Also, one with the starboard settees out you can see where the seam is. For whatever reason the photos are reverse of the order in the post.View attachment 127015 View attachment 127013 View attachment 127012
Nice job!!! So if you just take out the plugs and the screws that hold that panel on the nav station it will come right off and that's all you need to do to get the old sole out? I am wondering if it would help to cut the port edge of the new sole at a 45 on the bottom? Might help to "tip" it into place and would not be visible because the top would go right to the edge. Interesting that the sole under the aft stbd setteeappears to come out with the settee. I have been trying to source new teak & holly plywood and the new stuff seems to be darker than the original in these old Hunters. What have you guys found? Reg
 

SFS

.
Aug 18, 2015
2,069
Currently Boatless Okinawa
Ok, here are the latest developments. I removed the starboard settee (remember, I have only one on that side, not the U-shaped dining area) in about 10 minutes. It was necessary because the sole running underneath it was delaminating. The settee came apart in two pieces - the top (seat pan), and the front vertical panel. I took the top off by climbing inside with a head lamp and screwdriver, and found the applicable cleats. There was only one cleat, and I only had to remove 6 screws. (As HMT2 said above, cleats are the key when taking out furniture.) You can see a few of the screw holes in the lighter colored cleat along the top of the remaining panel below. Here is what it looked like without the top (I'm facing mostly starboard, and the bulkhead at the left is the head):

0819161630b[1].jpg


Then I removed the front panel. Access was a breeze with the top off. There were 4 cleats total: one trim piece of teak quarter round at the far left end (you can't see it); a more standard cleat on the other side of the panel from the trim piece, fastened against the head bulkhead (2 screws); an identical standard cleat screwed to the forward side of the galley cabinet (2 screws); and a long cleat running along the sole (6 screws, 2 of which were so badly corroded I used a speed extractor. Note that all of the fasteners were Frearson drive, not Phillips. Here is a pic with the settee completely removed:

0819161703[1].jpg


The seat pan and the front panel are at the left of the picture, leaning against the head door. I was very pleased at how easy this came out, and even more pleased that I could get both pieces up the companionway and off the boat. They need work, as some of the cleats are in bad shape, and I need to craft a lid for the hole in the seat pan.

I agree with HMT2, the port settee will not have to come out. I should be able to pull the sole out from under it, as there is not a cleat attached to the sole on the interior. The total sole is one piece and will have to be cut to get it out of the boat as a template, but that's ok, it won't fall apart on me like the quarterberth sole.

All of those varnished boards are 3/8" plywood put in place by the PO for additional rigidity when the floors went soft. hey came off the boat today too. More pics tomorrow, as I take out the damaged sole. I've decided to set aside my terror, and make the cuts with a circular saw set (very carefully) to the depth of the plywood.
 
Last edited:

SFS

.
Aug 18, 2015
2,069
Currently Boatless Okinawa
.... So if you just take out the plugs and the screws that hold that panel on the nav station it will come right off and that's all you need to do to get the old sole out? ....
Reg, before you get ALL excited, the answer to the specific question above is a definite maybe. I felt like my sole went in very easily because I was able to lift the nav station as far as I did, but the Admiral and I are currently in serious disagreement about how much play I had. I was too busy lifting to look, and she put in the panel. Regardless, other things will help get the new sole in, even without resorting to your trimming idea above. First, to help keep the panel as flat as possible (i.e., parallel to the water) during installation, remove the teak grid that lies at the bottom of your companionway stairs. Also, the panel doesn't move to port from an amidships position. It slides aft and to port at the same time, starting from a position amidships between the galley cabinet and the aft end of the port settee. Take your time if it seems tight. I got lucky, it took literally 3 seconds to put it in, and an hour to put all the screws and cleats back in the nav station.

Can't comment on the trimming idea you had, maybe HMT2 will weigh in. Final note, I did not fasten this sole in any way. It will not come up, because it's held down by the nav station and by the right-hand vertical strip to the right of the engine compartment. You will need to take out that strip, which means the top and bottom strips have to come out first. I set my stairs aside, and came and went using a small stepladder while working. I didn't trust unbraced stairs.
 
Last edited:

HMT2

.
Mar 20, 2014
899
Hunter 31 828 Shoreacres, TX
Reg,
Your trimming idea is interesting and may be helpful but may not be necessary with the starboard setee's out. On my project I replaced the forward sole panel by the vberth (which is 1/2 inch teak and holly and on mine was glued down) the port panel by the quarter berth, and the panel by the galley all with brand new teak and holly 3/4 inch everywhere but the bow. I stripped and refinished what we have been calling the main sole, except for the sole under the aft starboard setee. The PO had an extra water tank there that had leaked over the years and the sole under the setee was little more than dust where the tank sat. The picture in post 13, where you made the comment about the sole coming out with the setee was taken after I had cut out the bad portion of the sole with a circular saw. That is actually one piece that runs from under the aft setee to the forward setee. You can see the seem in the picture. Sorry for not being clear to start with. Below is a picture of the new piece in place before the finish was done since it was under the setee I didn't worry that the holly stripes didn't line up perfectly. Also attached is a picture of the total completed project.
image.jpeg
image.jpeg
 
Last edited:

SFS

.
Aug 18, 2015
2,069
Currently Boatless Okinawa
Made more progress today. After I pulled up all of the varnished boards I mentioned yesterday, I was surprised to find a removable teak panel just aft of the threshold to the v-berth. The panel was unsupported on two sides, and when I lifted it up I of course found one of the keel bolts. The Admiral asked what was under a round access plate just to starboard of the removable panel. Ta-da! Another keel bolt.

The entire salon sole came out in two pieces, and I didn't have to cut anything. The larger piece is the one that runs under the port settee. We lifted from the inboard side, it came free of the port piece at the seam line, and we pulled in the starboard direction until it came out. There were no fasteners, and it ran under the port settee about an inch. It was narrow enough to fit through the companionway.

The port sole had a total of four fasteners. Two were at the aft starboard corner, one was at the forward starboard corner, and one was in roughly the middle of those two points, along the hull near the bulkhead reinforcement (I don't know what that part of the liner is called). You can see the hole for that screw in the first picture. It was even narrower than the other side, so also came off the boat.

All in all we were really pleased, it only took about 30 minutes, including moving stuff around the boat to create working room, and discussing what to try first.

0820161148b.jpg
0820161148c.jpg


The plan now is to put back in a total of three pieces. The starboard piece will remain unchanged. The port sole will essentially be cut into two pieces along the axis of the keel, and the inboard half will be one long access panel to the entire bilge and the keel bolts. I've cut the template for the starboard sole, and am about to walk down to the boat and test fit it.
 
Last edited:

Reg M

.
May 21, 2016
131
Hunter 31 Montague
Nobody has commented on my question about the color of the new teak & holly plywood. Were you able to get the same lighter shade or did you have to settle for darker stuff. I have not gone to the lumber place yet as it will involve an overnight trip to Halifax so I am waiting until I have to go there on another matter but looking at their website the stuff they have appears to be much darker. Reg