So, my 40.5 is a 1994 and I needed to get access to change what I thought must be ratty turning blocks. I had a fiberglass shop make a cut just in front of the solar panel. They then put a lip on the aft portion of the hood for the forward section to rest upon and finished the edges. (See photos). As an aside, the sheaves were in good shape with some very minor flat-spotting on the main halyard aft turning block. I was amazed.
![IMG_20161210_104708_021[1].jpg](https://forums.sailboatowners.com/attachments/img_20161210_104708_021-1-jpg.131611/)
![IMG_20161228_113441_163[1].jpg](https://forums.sailboatowners.com/attachments/img_20161228_113441_163-1-jpg.131612/)
Cabin Hood Modification For Access
- Thread starter Rick D
- Start date
Rick, thanks for the great pictures and the explanation of the process. can you tell me whether the seahood was solid fiberglass or was it balsa cored. Headed to the boat next week to remove the hood with information received to this point. Thanks Karl
It's cored; I presume balsa.Rick, thanks for the great pictures and the explanation of the process. can you tell me whether the seahood was solid fiberglass or was it balsa cored. Headed to the boat next week to remove the hood with information received to this point. Thanks Karl
I had cracks in the forward section of mine on my 1997 model that allowed water to penetrate the core. It already had the split hood. The repair to the cracks was to remove all of the coring and lay in a foam sandwich with epoxy. The original core was plywood. Based upon this I would expect the one-piece hoods to also be plywood cored.
Thanks again to Rick D. and to Rich Stidger as always this forum is a wealth of information on how to do it right the first time. Rich S., my plan is to use Corecel foam as well with epoxy, another job done and over with in the story that never ends.

Back in June 2016 I posted on this sea hood/line organizer repair.
http://forums.sailboatowners.com/index.php?threads/h40-5-line-organizer-repair.179429/
I have more pictures of the repair sequence and techniques that I used. I will post after I organize them.
http://forums.sailboatowners.com/index.php?threads/h40-5-line-organizer-repair.179429/
I have more pictures of the repair sequence and techniques that I used. I will post after I organize them.
Here is a photo story on how I repaired my organizer cover. This post and a second post are involved:
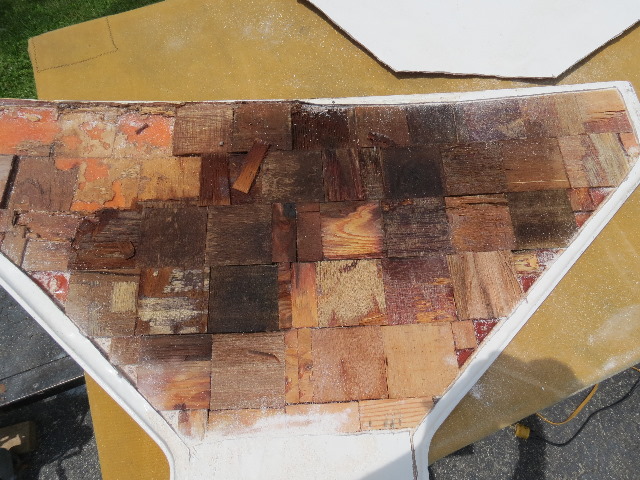
Looking at the bottom of the cover, after I cut away the fiberglass covering, you can see the square blocks of wet plywood.
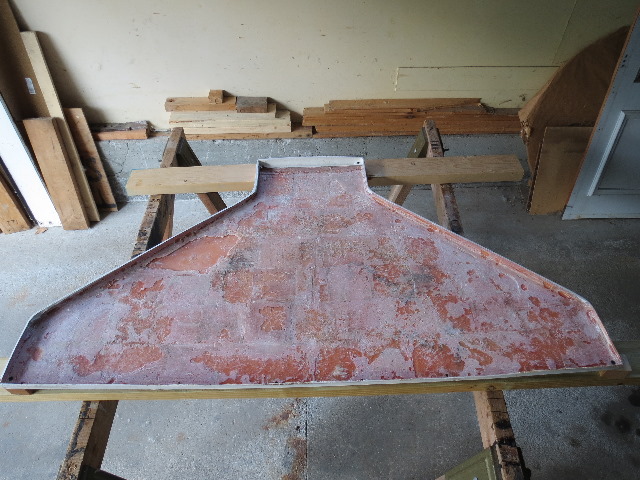
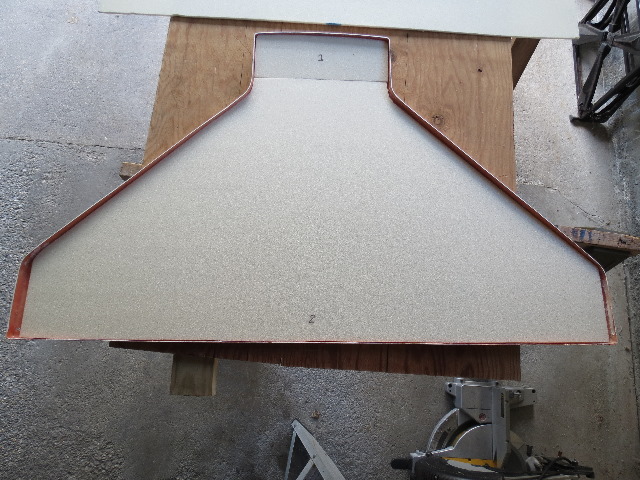
Here is the cover with all wood blocks removed. I used a Dremel to cut around the edges and a vibrating tool to cut under and loosen the blocks.
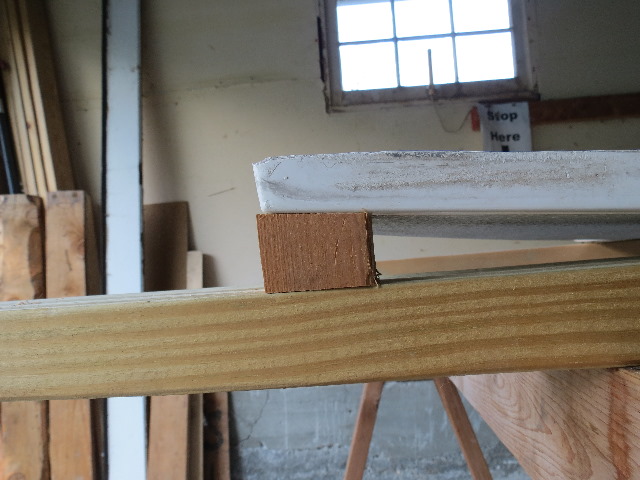
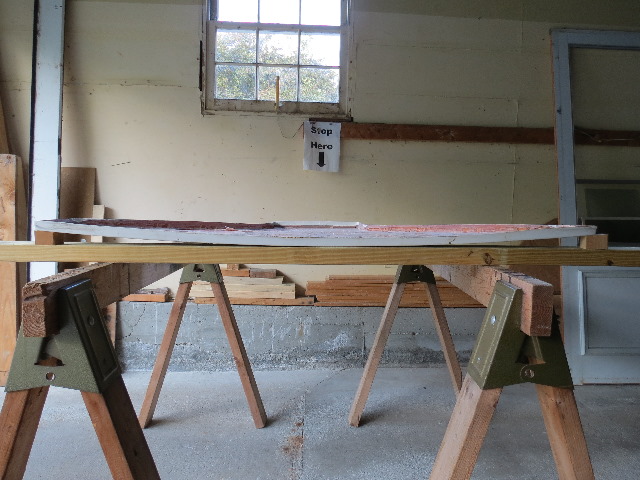
The cover is curved, so in order to hold that shape I used two blocks of wood under each of the aft corners. When the center is flush to the surface the curve is correct. In a later picture you will see that I used paint cans as weights to hold the epoxied foam tight to the inside surface of the cover. Without these corner blocks the cover would have been distorted from its original curve due to the weights.
There was another layer of fiberglass cloth on the very inside of the cover that I removed. I then used acetone and lots of rags to remove any mold wax that could have been left from the manufacturing process. The fiberglass was not adhered well and that is why I thought there could still be mold wax.

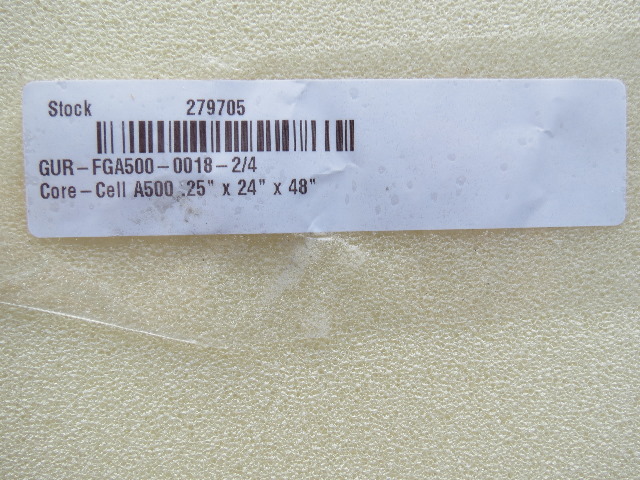
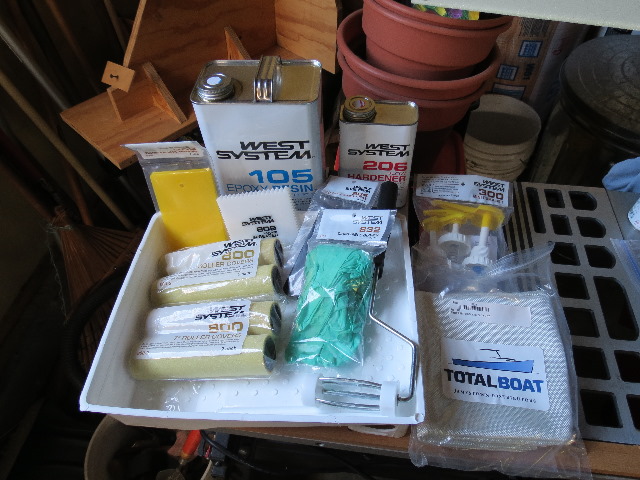
I bought this foam from Jamestown Distributors along with all of the West System supplies. They offered a repair kit with a gallon of epoxy, tools, and cloth. I found that to be the best deal. I bought two sheets of the foam to make the filler. I used two 1/4" thicknesses instead of one 1/2" piece because I thought it would be easier to bend to the curved shape of the cover.
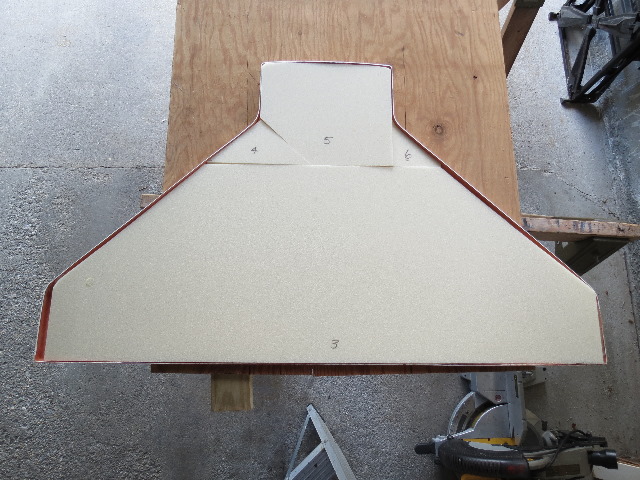
I had to piece the foam together since the sheets were not large enough to cover in one.
The top piece (#1) had a curve that I allowed by cuts most of the way through.
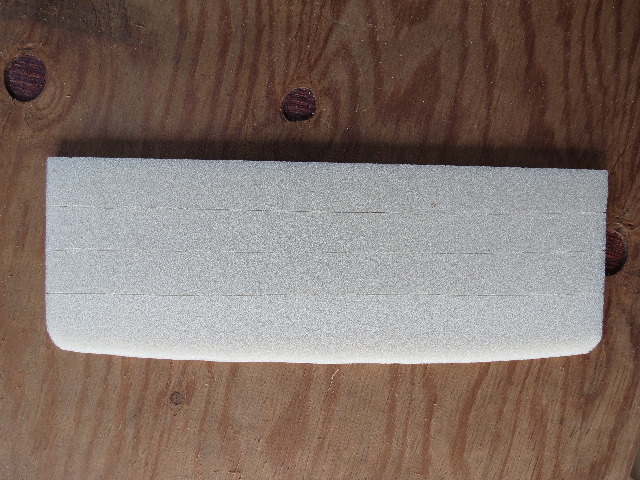
The second layer of foam had more pieces to fit. No problem.
Here is the West Systems kit that I bought.
More images and details in the next post. I am at the 10 picture limit!
Looking at the bottom of the cover, after I cut away the fiberglass covering, you can see the square blocks of wet plywood.
Here is the cover with all wood blocks removed. I used a Dremel to cut around the edges and a vibrating tool to cut under and loosen the blocks.
The cover is curved, so in order to hold that shape I used two blocks of wood under each of the aft corners. When the center is flush to the surface the curve is correct. In a later picture you will see that I used paint cans as weights to hold the epoxied foam tight to the inside surface of the cover. Without these corner blocks the cover would have been distorted from its original curve due to the weights.
There was another layer of fiberglass cloth on the very inside of the cover that I removed. I then used acetone and lots of rags to remove any mold wax that could have been left from the manufacturing process. The fiberglass was not adhered well and that is why I thought there could still be mold wax.
I bought this foam from Jamestown Distributors along with all of the West System supplies. They offered a repair kit with a gallon of epoxy, tools, and cloth. I found that to be the best deal. I bought two sheets of the foam to make the filler. I used two 1/4" thicknesses instead of one 1/2" piece because I thought it would be easier to bend to the curved shape of the cover.
I had to piece the foam together since the sheets were not large enough to cover in one.
The top piece (#1) had a curve that I allowed by cuts most of the way through.
The second layer of foam had more pieces to fit. No problem.
Here is the West Systems kit that I bought.
More images and details in the next post. I am at the 10 picture limit!
Continuing:
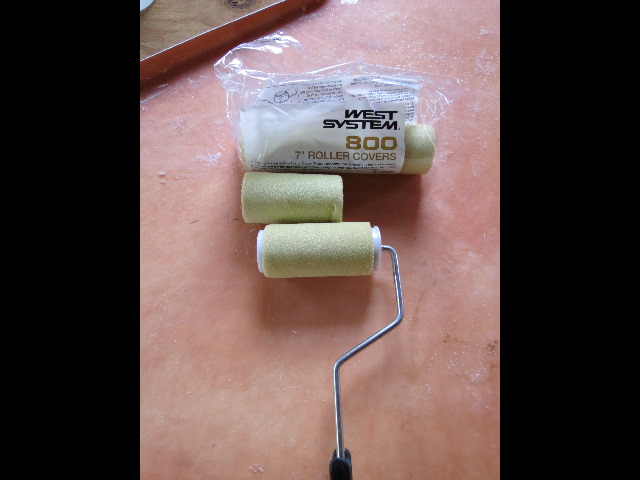
I cut the 7" rollers in half to use with a short handle for applying the epoxy. This worked well. I should add at this point that I exchanged the fast hardener for the slow hardener. The temperature was in 55-65 degrees range and the fast hardener was just way to fast.
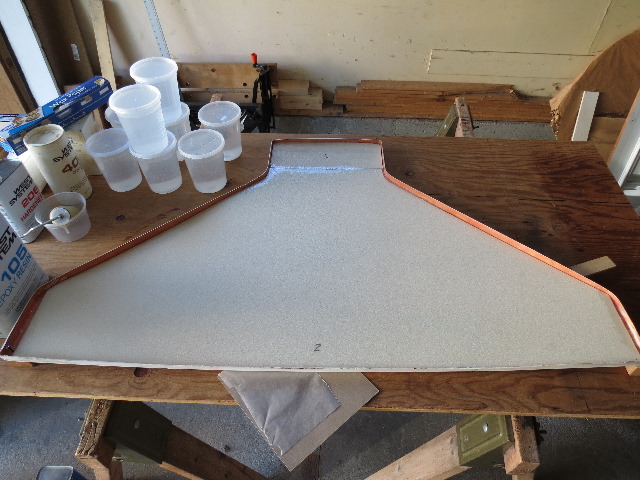
Here is the first layer of foam installed. I wet-ed the inside of the cover and also the bottom of the foam. I used the epoxy with colloidal silica filler to make a thickened mix. This ensured that any small gaps were filled. I had the silica filler left over from a previous repair years ago- it wasn't in the repair kit. I found that it took a surprising number of paint cans (all partial) to hold the foam in place and tight to the curve of the cover. I also used Chinese take-out containers filled with water to supplement the weight.

First layer done and ready for the second. Again I used a thickened epoxy mix and coated both mating surfaces of the foam.
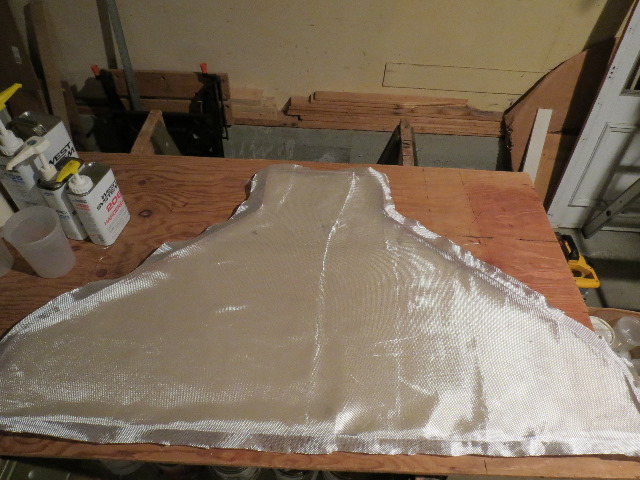
This last picture shows a top sealing layer of fiberglass cloth cut and ready to apply over the foam. An important detail is that around each of the four corner screws that hold the cover to the deck, you need to cut away the foam from the screw hole and after plugging the hole tightly, fill the void with solid epoxy. This will insure that any water that gets past the screws will not get into the foam core. I would use epoxy thickened to peanut butter consistency to accomplish this. This epoxy mix needs to be very thick so that it doesn't run out of the holes in the cover. It will also make a hard corner that will not crush when you tighten the screws.
That is the end. My cover fit very well and it is very strong to walk upon. No worries there!
I cut the 7" rollers in half to use with a short handle for applying the epoxy. This worked well. I should add at this point that I exchanged the fast hardener for the slow hardener. The temperature was in 55-65 degrees range and the fast hardener was just way to fast.
Here is the first layer of foam installed. I wet-ed the inside of the cover and also the bottom of the foam. I used the epoxy with colloidal silica filler to make a thickened mix. This ensured that any small gaps were filled. I had the silica filler left over from a previous repair years ago- it wasn't in the repair kit. I found that it took a surprising number of paint cans (all partial) to hold the foam in place and tight to the curve of the cover. I also used Chinese take-out containers filled with water to supplement the weight.
First layer done and ready for the second. Again I used a thickened epoxy mix and coated both mating surfaces of the foam.
This last picture shows a top sealing layer of fiberglass cloth cut and ready to apply over the foam. An important detail is that around each of the four corner screws that hold the cover to the deck, you need to cut away the foam from the screw hole and after plugging the hole tightly, fill the void with solid epoxy. This will insure that any water that gets past the screws will not get into the foam core. I would use epoxy thickened to peanut butter consistency to accomplish this. This epoxy mix needs to be very thick so that it doesn't run out of the holes in the cover. It will also make a hard corner that will not crush when you tighten the screws.
That is the end. My cover fit very well and it is very strong to walk upon. No worries there!
Last edited:
It looks like your fiberglass shop did a great job. Your cover looks exactly like mine that was done at the Hunter factory.So, my 40.5 is a 1994 and I needed to get access to change what I thought must be ratty turning blocks. I had a fiberglass shop make a cut just in front of the solar panel. They then put a lip on the aft portion of the hood for the forward section to rest upon and finished the edges. (See photos). As an aside, the sheaves were in good shape with some very minor flat-spotting on the main halyard aft turning block. I was amazed.